Light a cinnamon candle, put on your favorite holiday music, and let’s get crafting.
There’s something magical about making your own Christmas decorations. Maybe it’s the smell of fresh pine mixed with hot glue. Or the satisfaction of hanging something you made with your own two hands.
These 88 crafts will help you create a home that feels warm and welcoming this holiday season. No fancy skills needed. Just a little time, some basic supplies, and a cup of hot cocoa.

Simple Velvet Trees

Wrap a foam cone with velvet ribbon. Start at the bottom. Work your way up. Use pins to hold it in place. Add a small bow on top. Done.
These trees look expensive. They’re not. And they catch the light beautifully on a mantel or side table.
Flocked Ornaments That Look Like Fresh Snow

Here’s a secret: baking soda makes ornaments look like they’re covered in soft snow.
Paint your ornaments any color you like. While the paint is still wet, sprinkle baking soda all over. Let them dry completely. Brush away the excess gently.
The result? Ornaments with a velvety texture that feel special to touch.
Vintage Candy Ornaments
Remember those ribbon candies your grandma had? These ornaments look just like them.
Cut a 16-inch piece of ribbon. Mark every inch down the center. Thread a needle and sew through each mark. Pull the ribbon tight so it bunches up. Tie it off at the top.
Hang these on your tree for a sweet, old-fashioned touch.
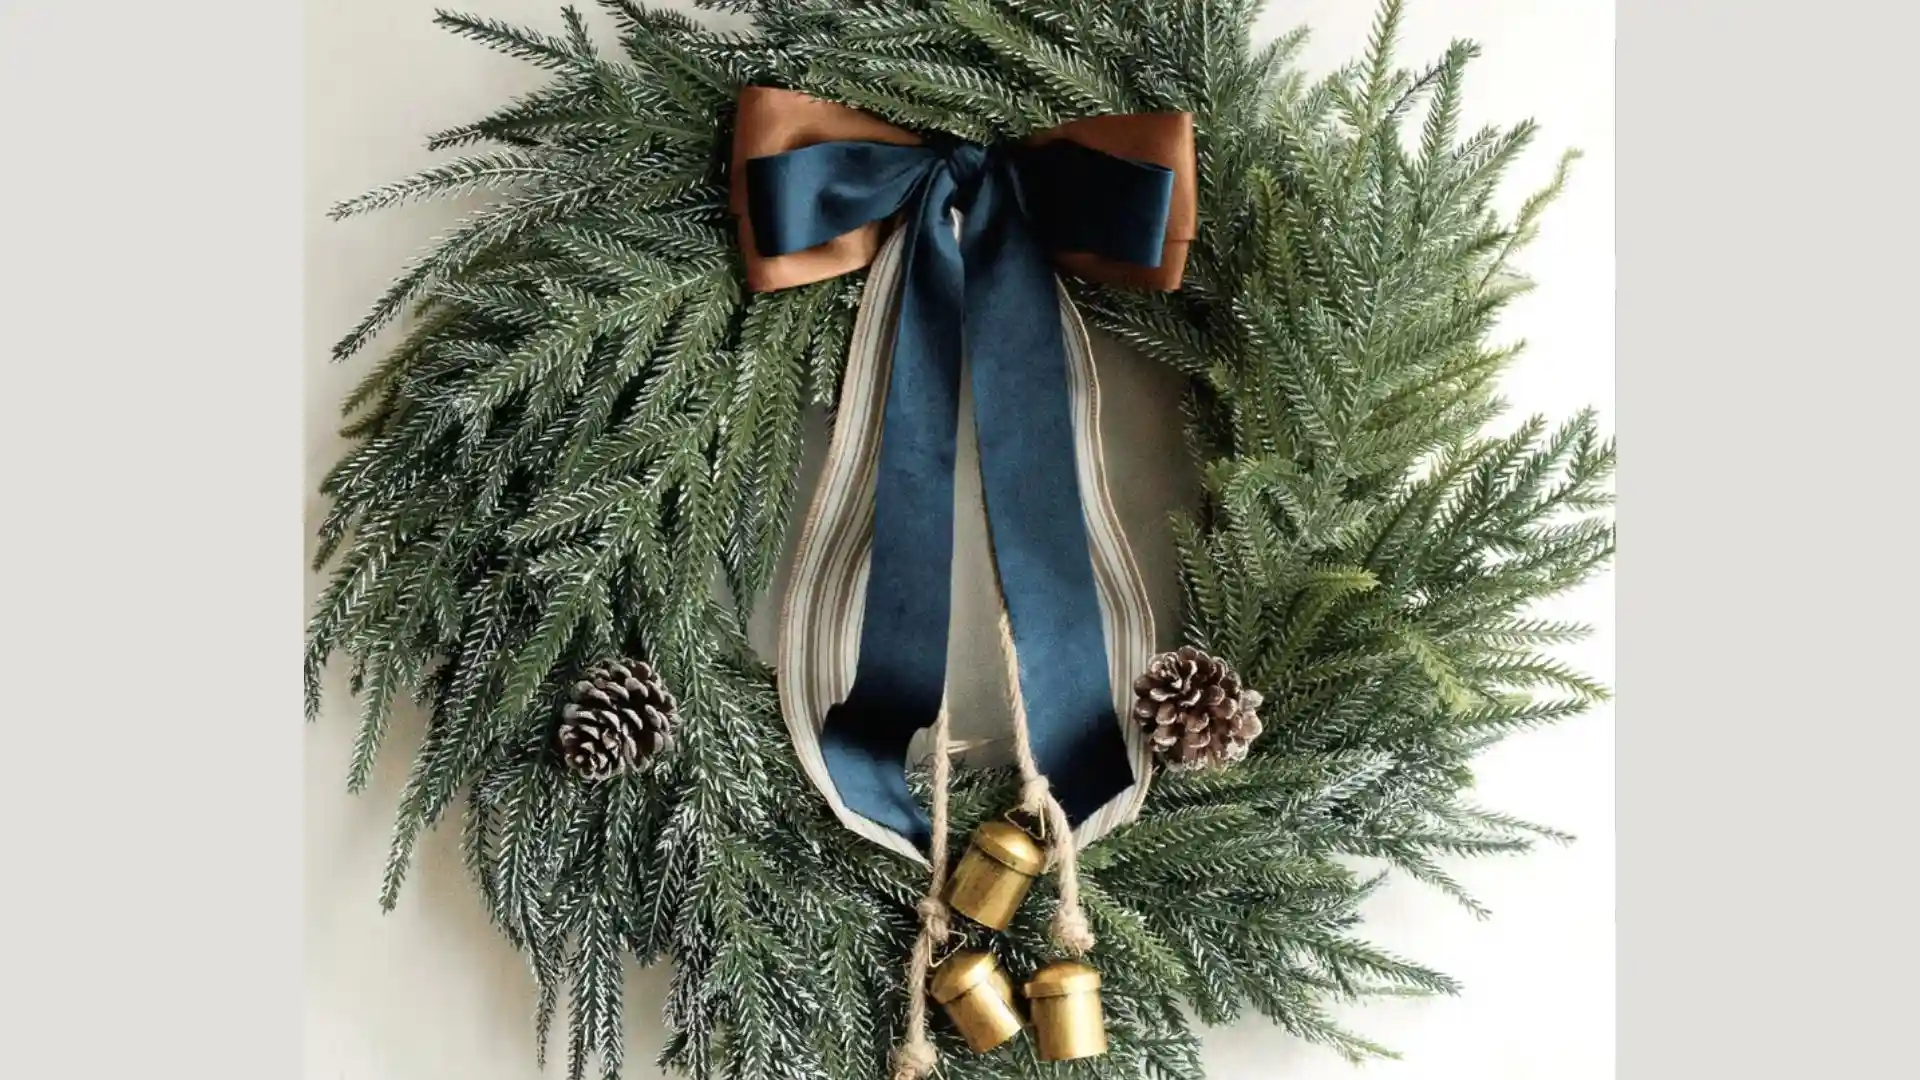
Braided Wreath in Rich Velvet
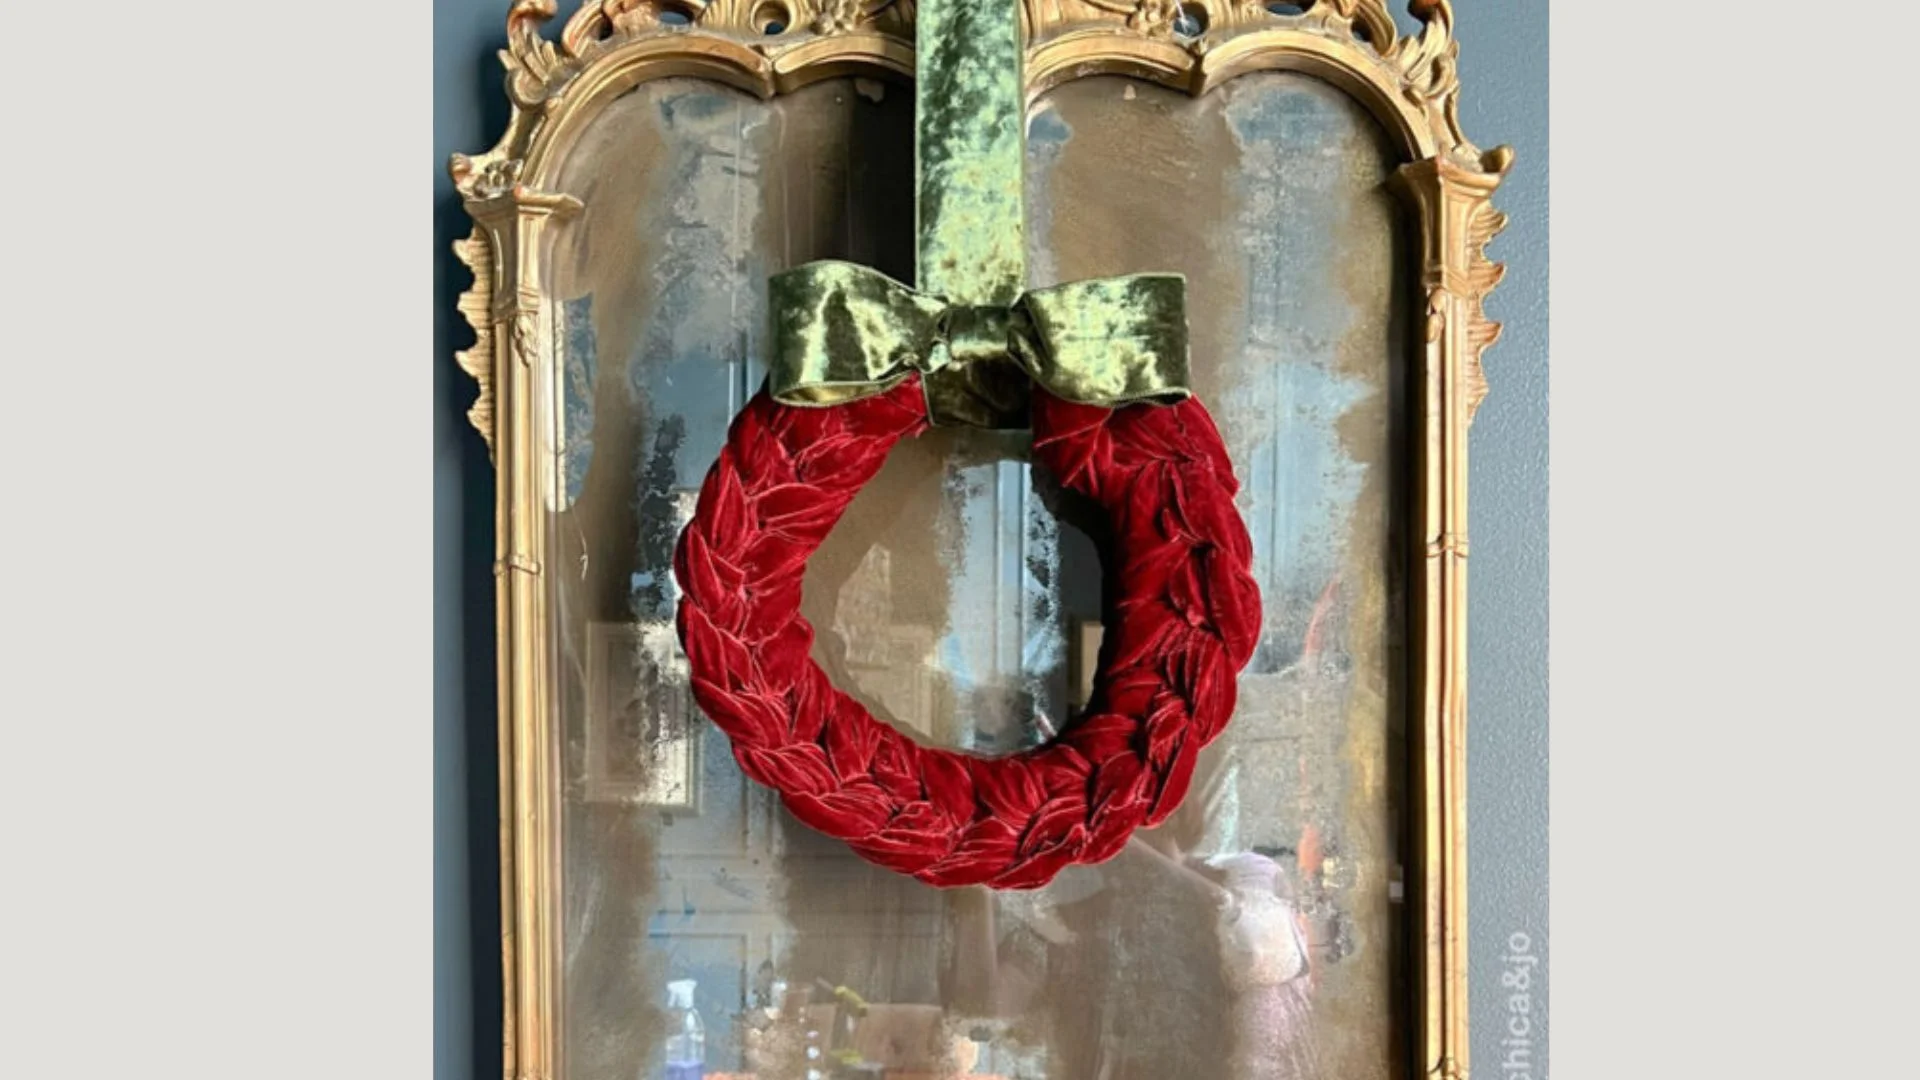
Cut three long strips of velvet fabric. Make one light and two dark. Pin them together at one end. Braid loosely. Wrap the braid around a wreath form. Pin as you go.
Add a big bow. Hang it on your door.
The texture of velvet catches the light differently than evergreen. It’s unexpected. People will ask where you bought it.
Honeycomb Ornaments with Sparkle

Buy honeycomb ornaments from the craft store. Paint craft glue around the edges. Sprinkle glitter on top. Work in small sections.
Let each section dry before moving on. The glitter stays put this way. No glitter trail through your house all December.
Pipe Cleaner Christmas Trees
These look complicated. They’re not.
Cut pipe cleaners into four equal pieces. Fold each piece in half. Hot glue them to a foam cone in rows. Start at the bottom. Overlap each row slightly.
When the cone is covered, fold all the pipe cleaners upward. Now they look like branches.
Gift Wrapping as an Art Form

Stop wrapping gifts the same boring way. Try this woven knot technique instead.
Cross two ribbons. Fold them over each other in a pattern. Keep folding until you create a square design. It sounds tricky but your hands will learn the rhythm.
Your gifts will look like they came from an expensive boutique.
Mystery Baubles for Stockings
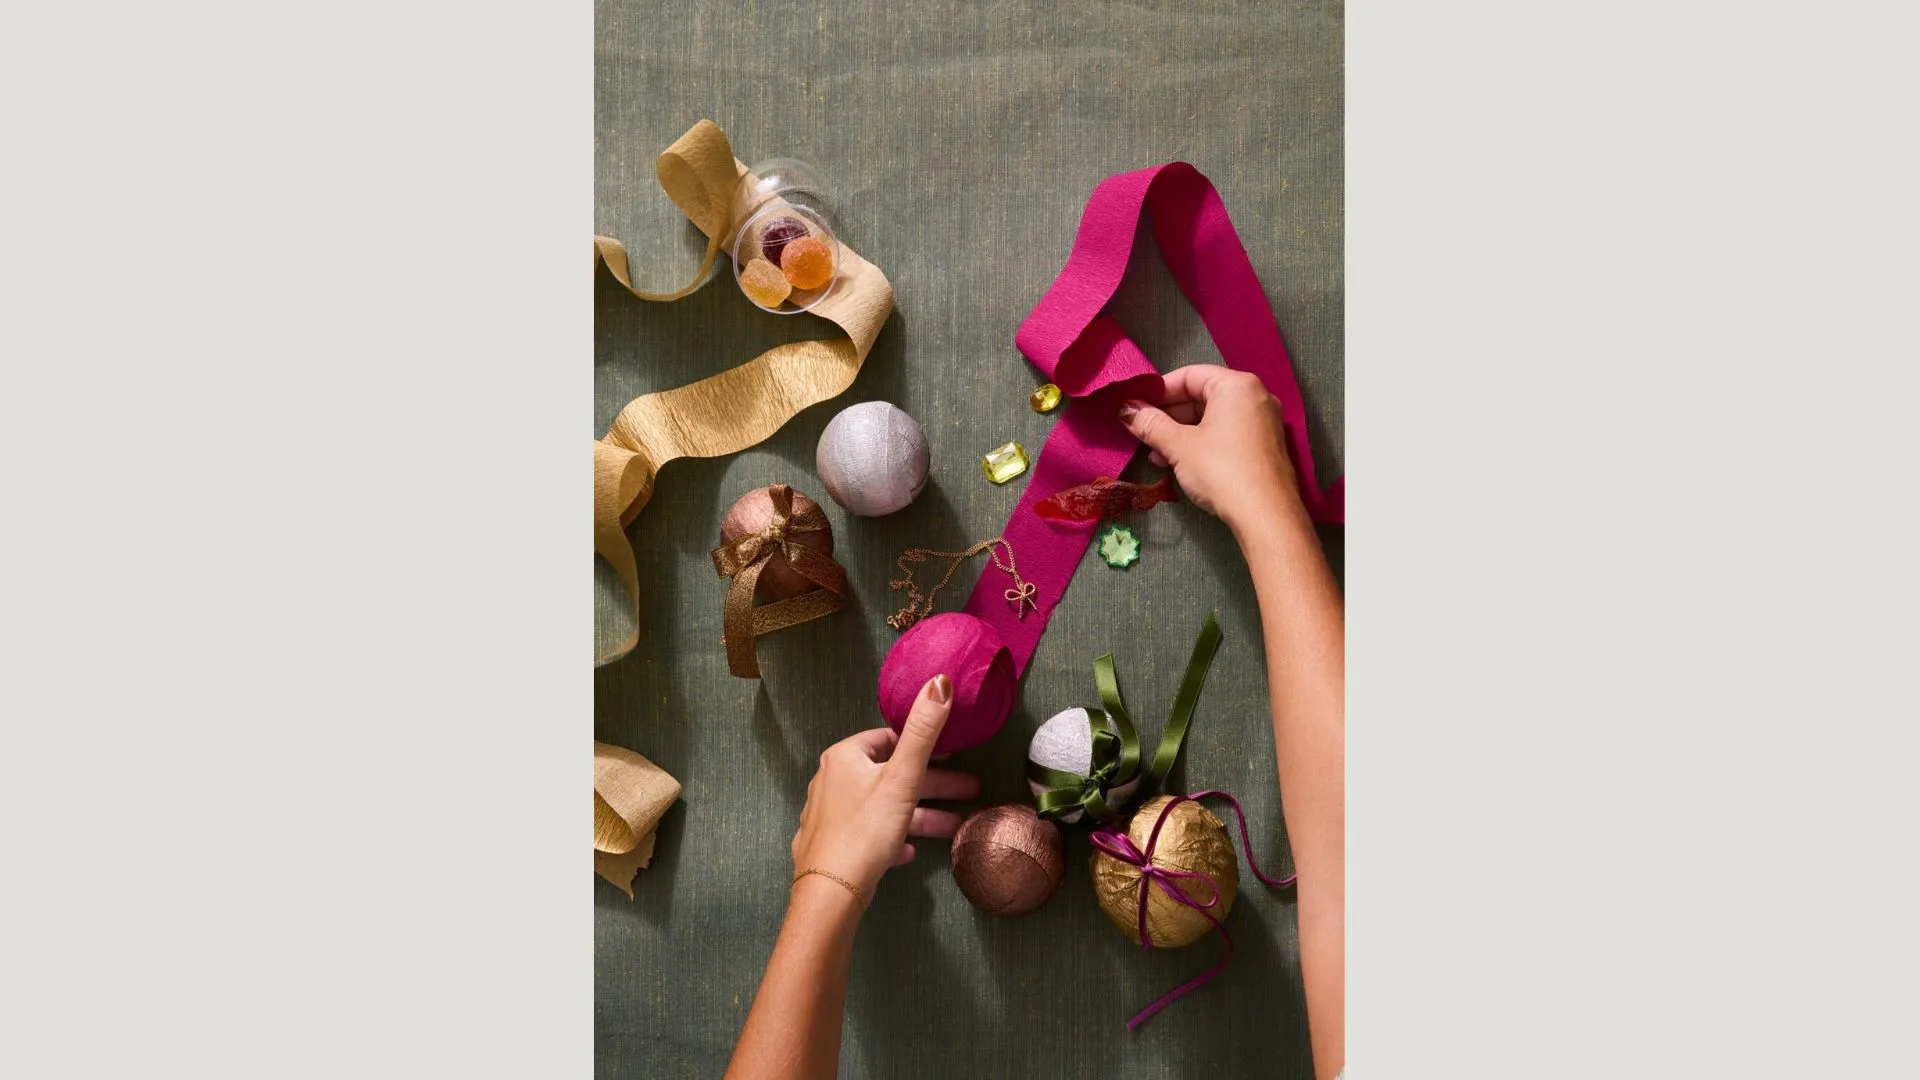
Fill clear ornaments with tiny toys and candy. Wrap them in crepe paper. Tuck in more little gifts and confetti as you wrap.
Kids unwrap and unwrap until they find all the treasures inside. It’s like a surprise party in ball form.
Bedazzled Packages
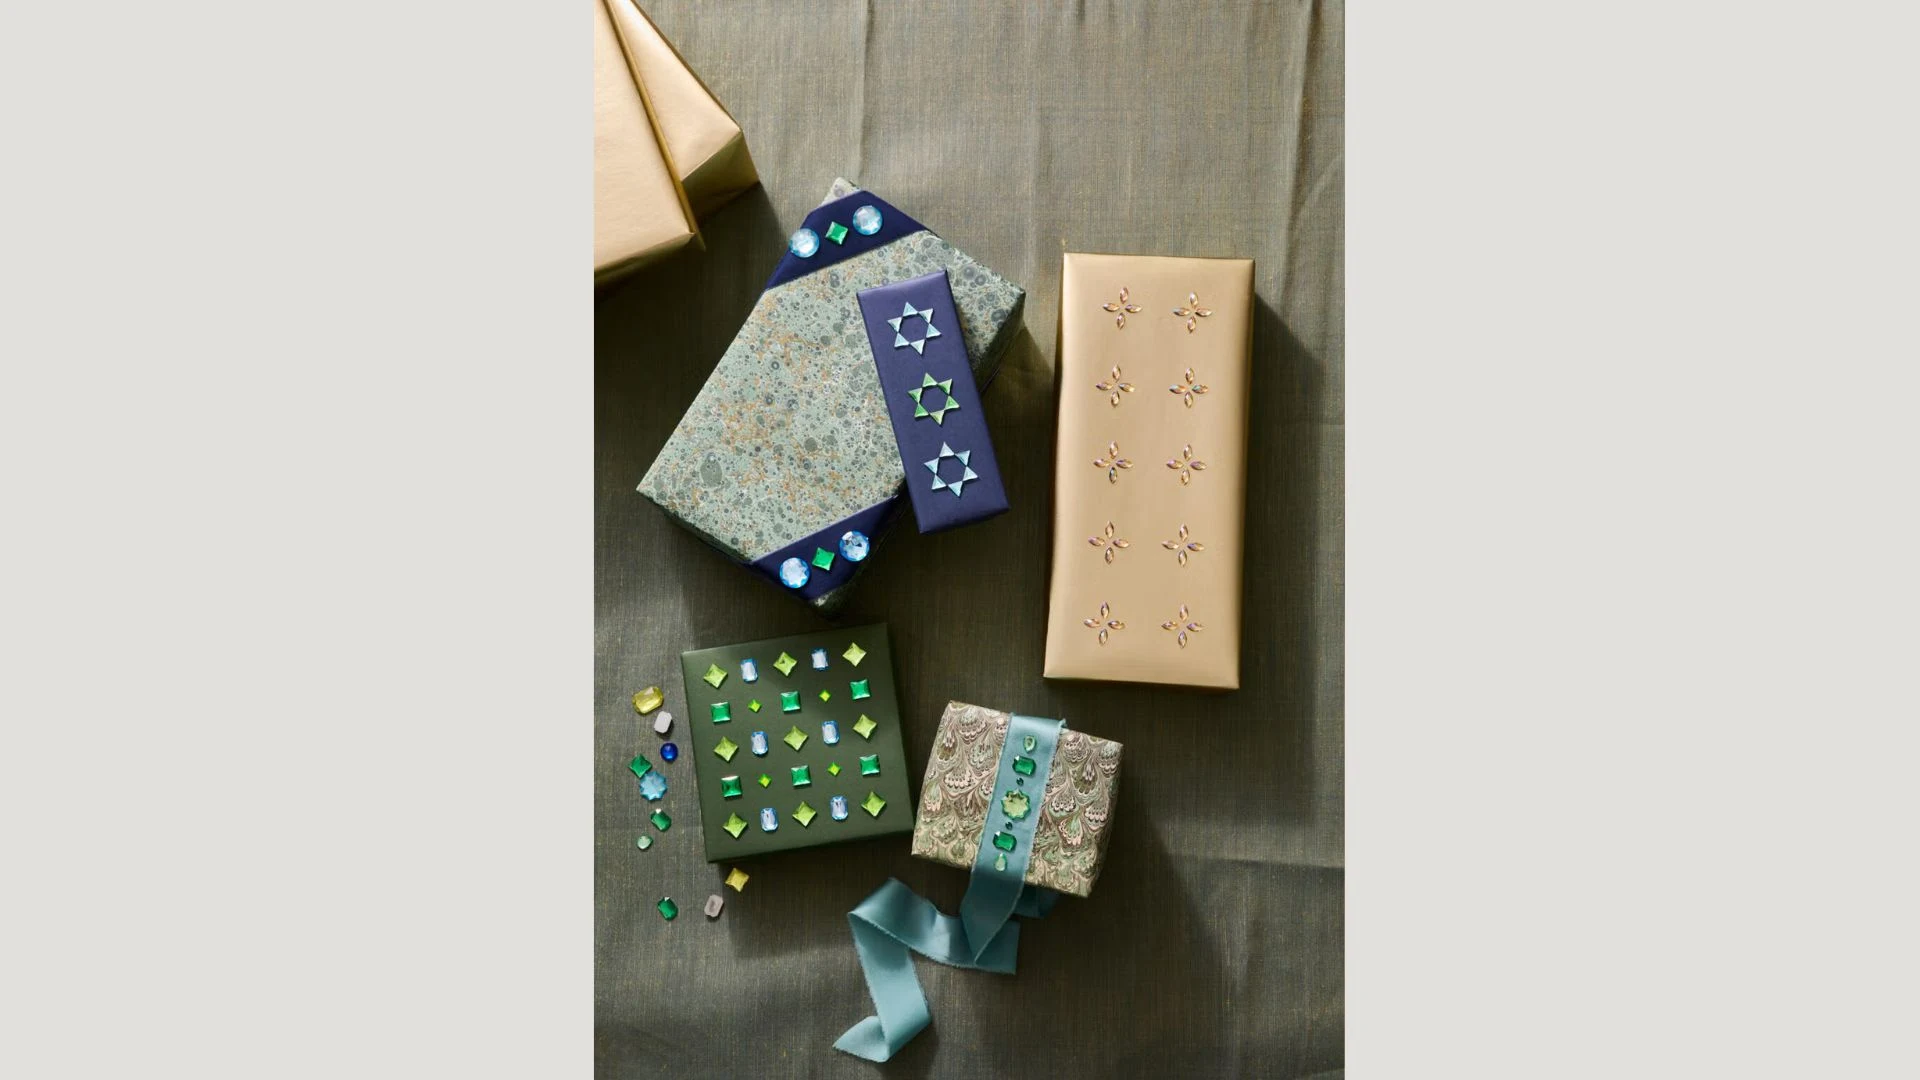
Stick gemstones to wrapped gifts with glue dots. Make patterns or scatter them randomly. Both look good.
The stones catch the light under the tree. They make even small gifts feel fancy.
Ribbon Wreath That Glows
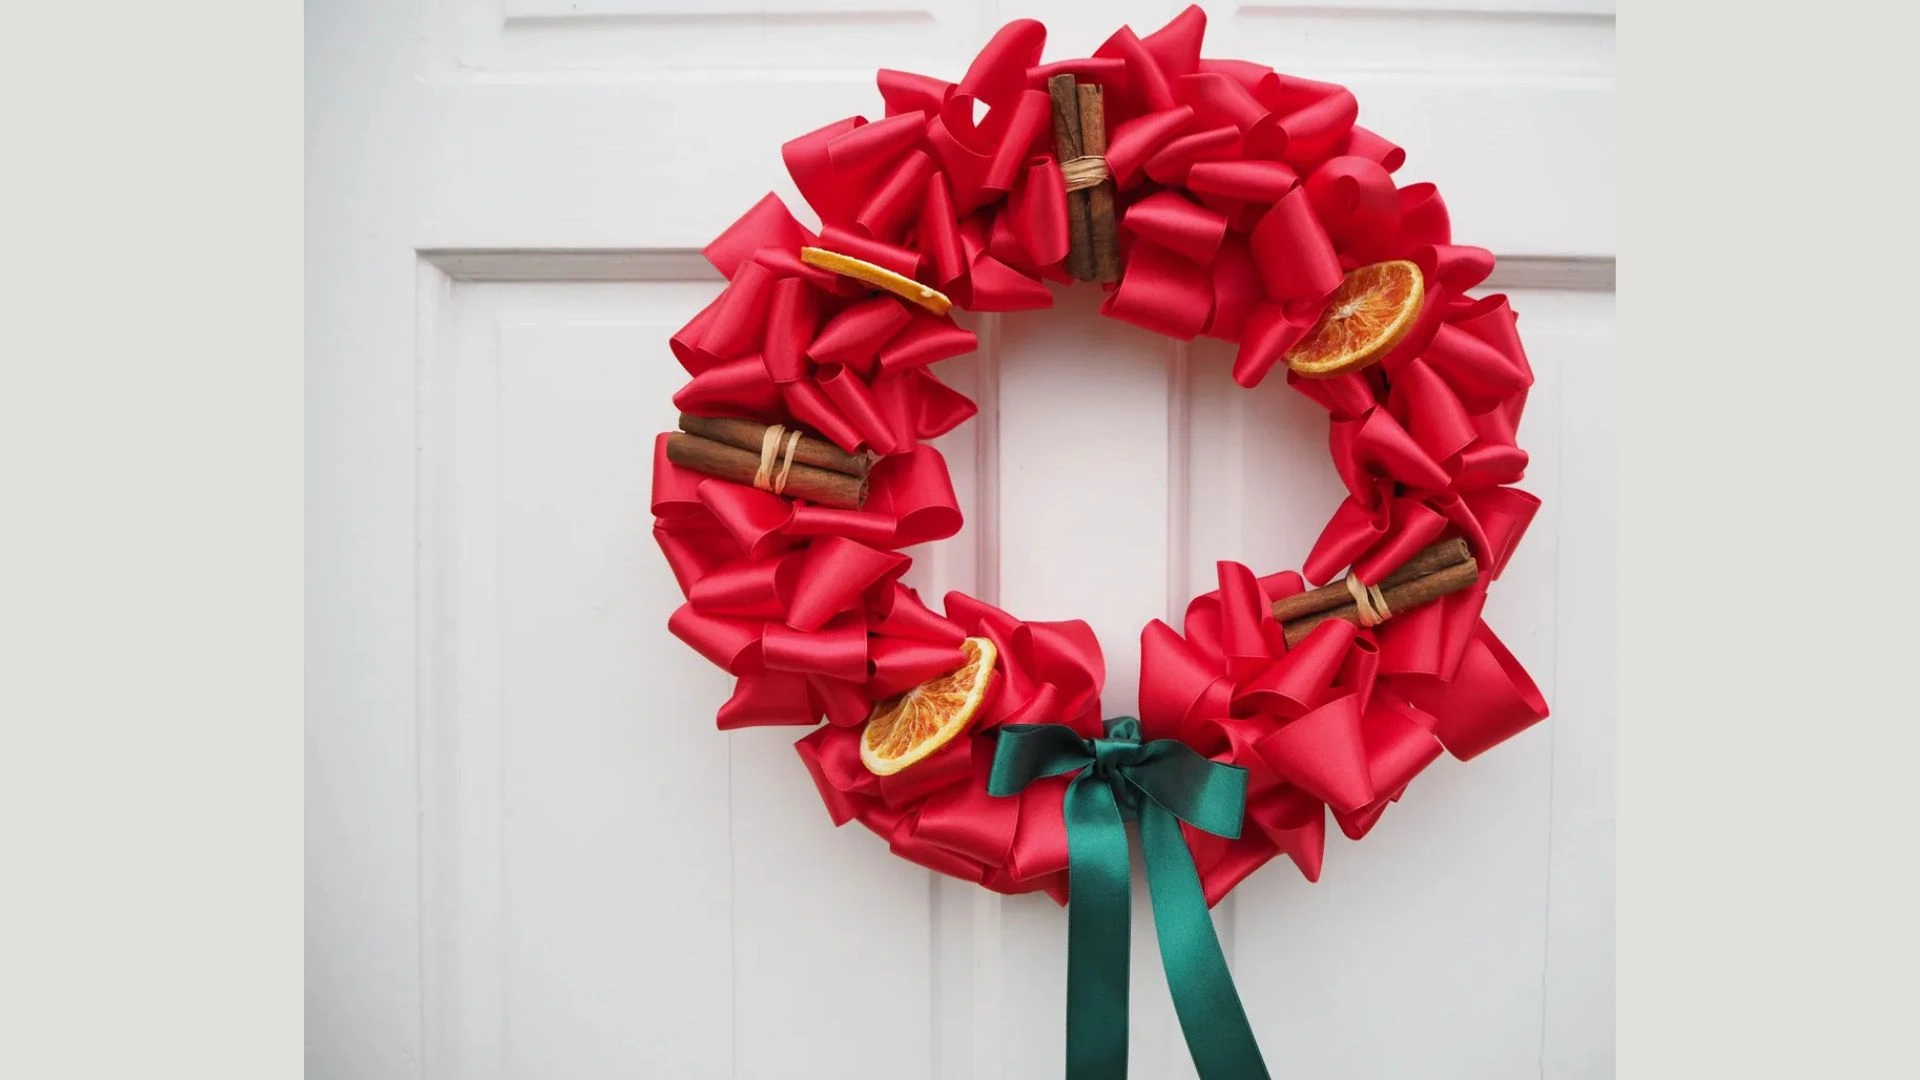
Tie gold satin ribbon strips around a wood wreath form. Cut each piece 8 inches long. Tie them tight. Keep going until the whole wreath is covered.
Hang it where light hits it. The satin shimmers.
Cupcake Liner Ornaments

Flatten ten cupcake liners. Fold each in half with the colored side in. Use glue dots to secure the fold.
Stack the liners on top of each other with glue dots. Connect the first and last liner. You’ve made a sphere.
These are light as air. They look delicate hanging from branches.
Paper Chain Garland Like You’re Six Again
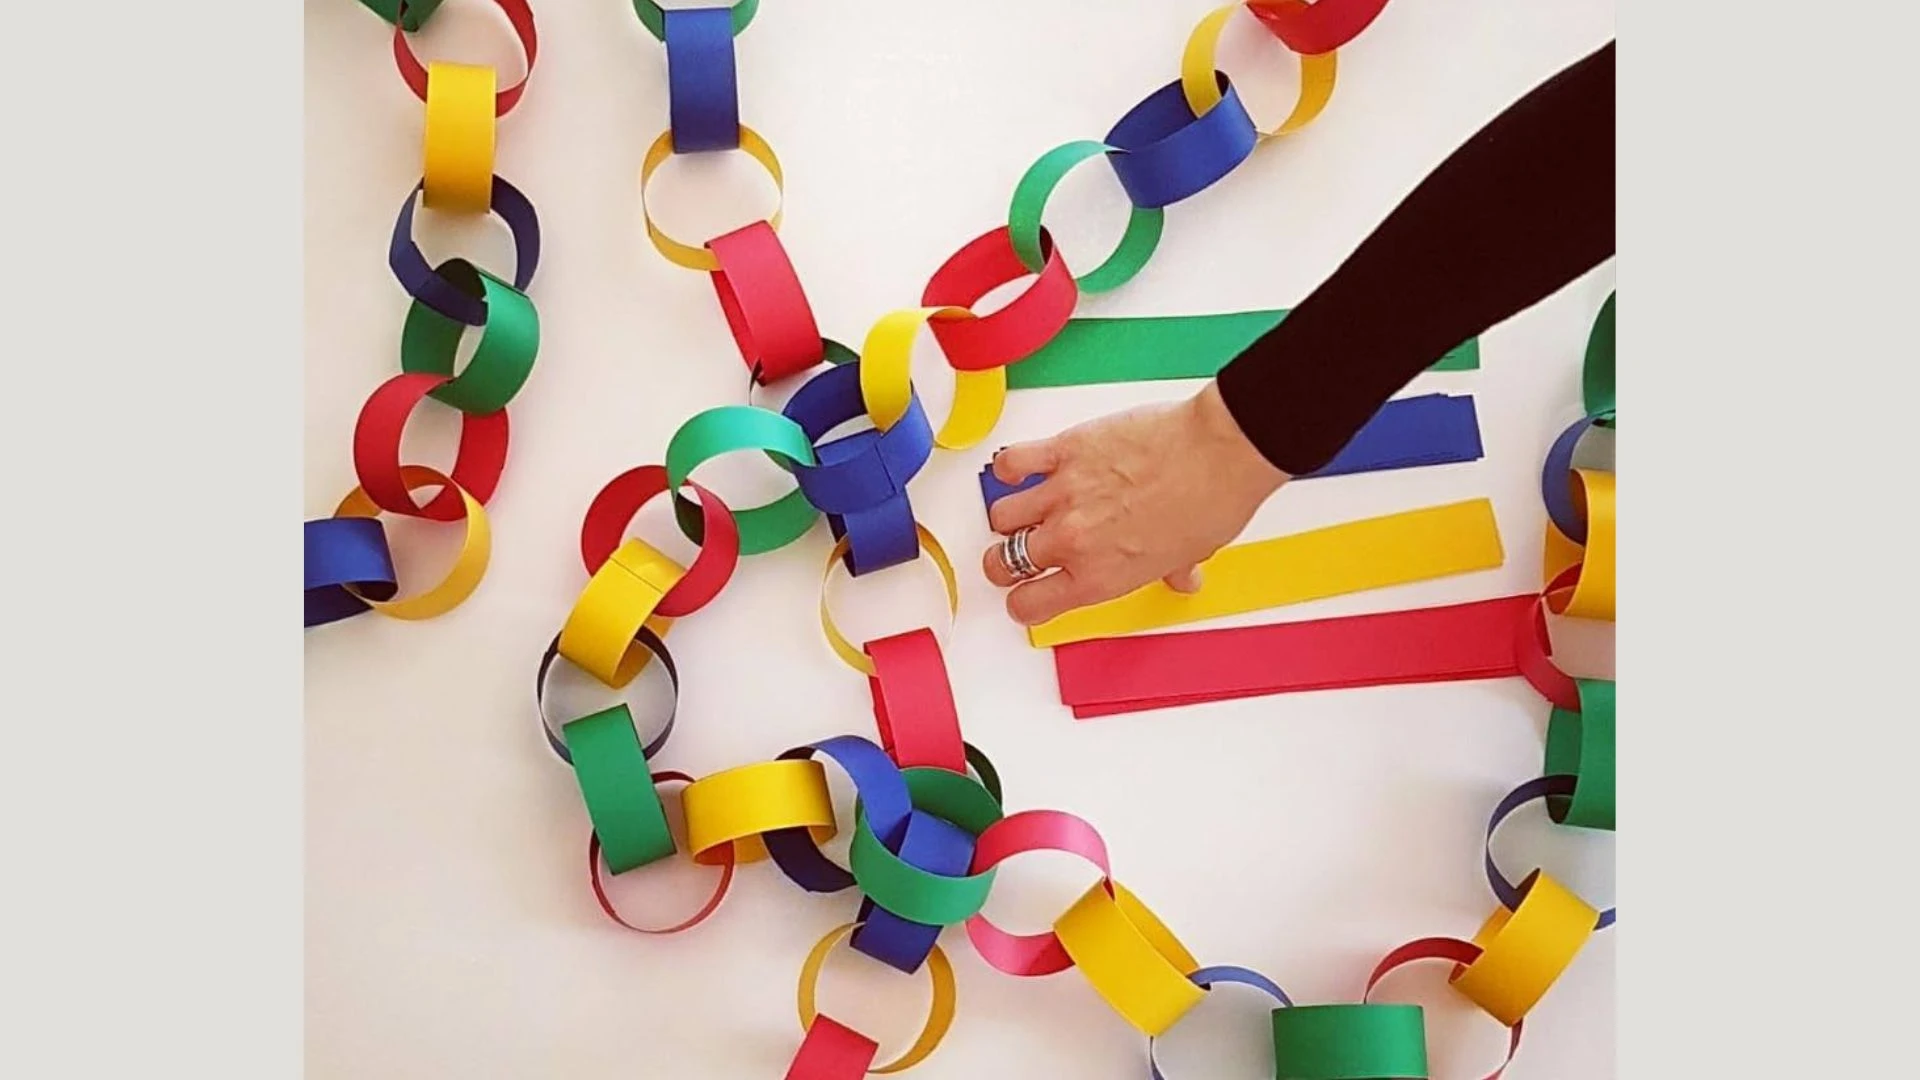
Remember making these in school? They’re still charming.
Cut paper strips from wrapping paper or tissue paper. Mix sizes for interest. Loop and staple each piece to the next.
Drape them across your mantel or doorway. Sometimes the simplest decorations bring the most joy.
Orange Clove Pomanders That Smell Like Christmas

Poke holes in oranges with a skewer. Stick whole cloves in each hole. Make patterns or cover the whole orange.
Set them in a bowl. They’ll make your home smell warm and spicy for about a week.
This craft is calming. The repetitive poking. The smell of citrus and spice. It’s meditation disguised as decorating.
Modern Tinsel Wreath
Layer tinsel onto a wreath carefully. Don’t let it clump. Use a light touch.
The result is sparkly without being over the top. It catches every bit of light in the room.
Starburst Tree Topper from the ’60s

Push toothpicks into a foam ball. Dip them in glue first. Cover the whole ball.
Spray with adhesive. Roll in glitter. Let it dry. Attach wire to the bottom.
Your tree now has a vintage midcentury vibe.
Cupcake Liner Poinsettias
Flatten red cupcake liners. Fold into quarters. Cut a petal shape. Unfold to see four petals.
Layer several together. Secure with tape or glue dots. Add them to gift wrap or napkins.
They look like you spent much more time than you did.
Embossed Velvet Magic

Heat your iron to the wool setting. Turn off the steam. Dampen velvet fabric slightly.
Place a rubber stamp face-up on your ironing board. Put the velvet face-down on top. Press with the iron for 30 seconds.
Peel away to reveal a beautiful embossed pattern. Works on ribbons and stockings too.
Pipe Cleaner Everything
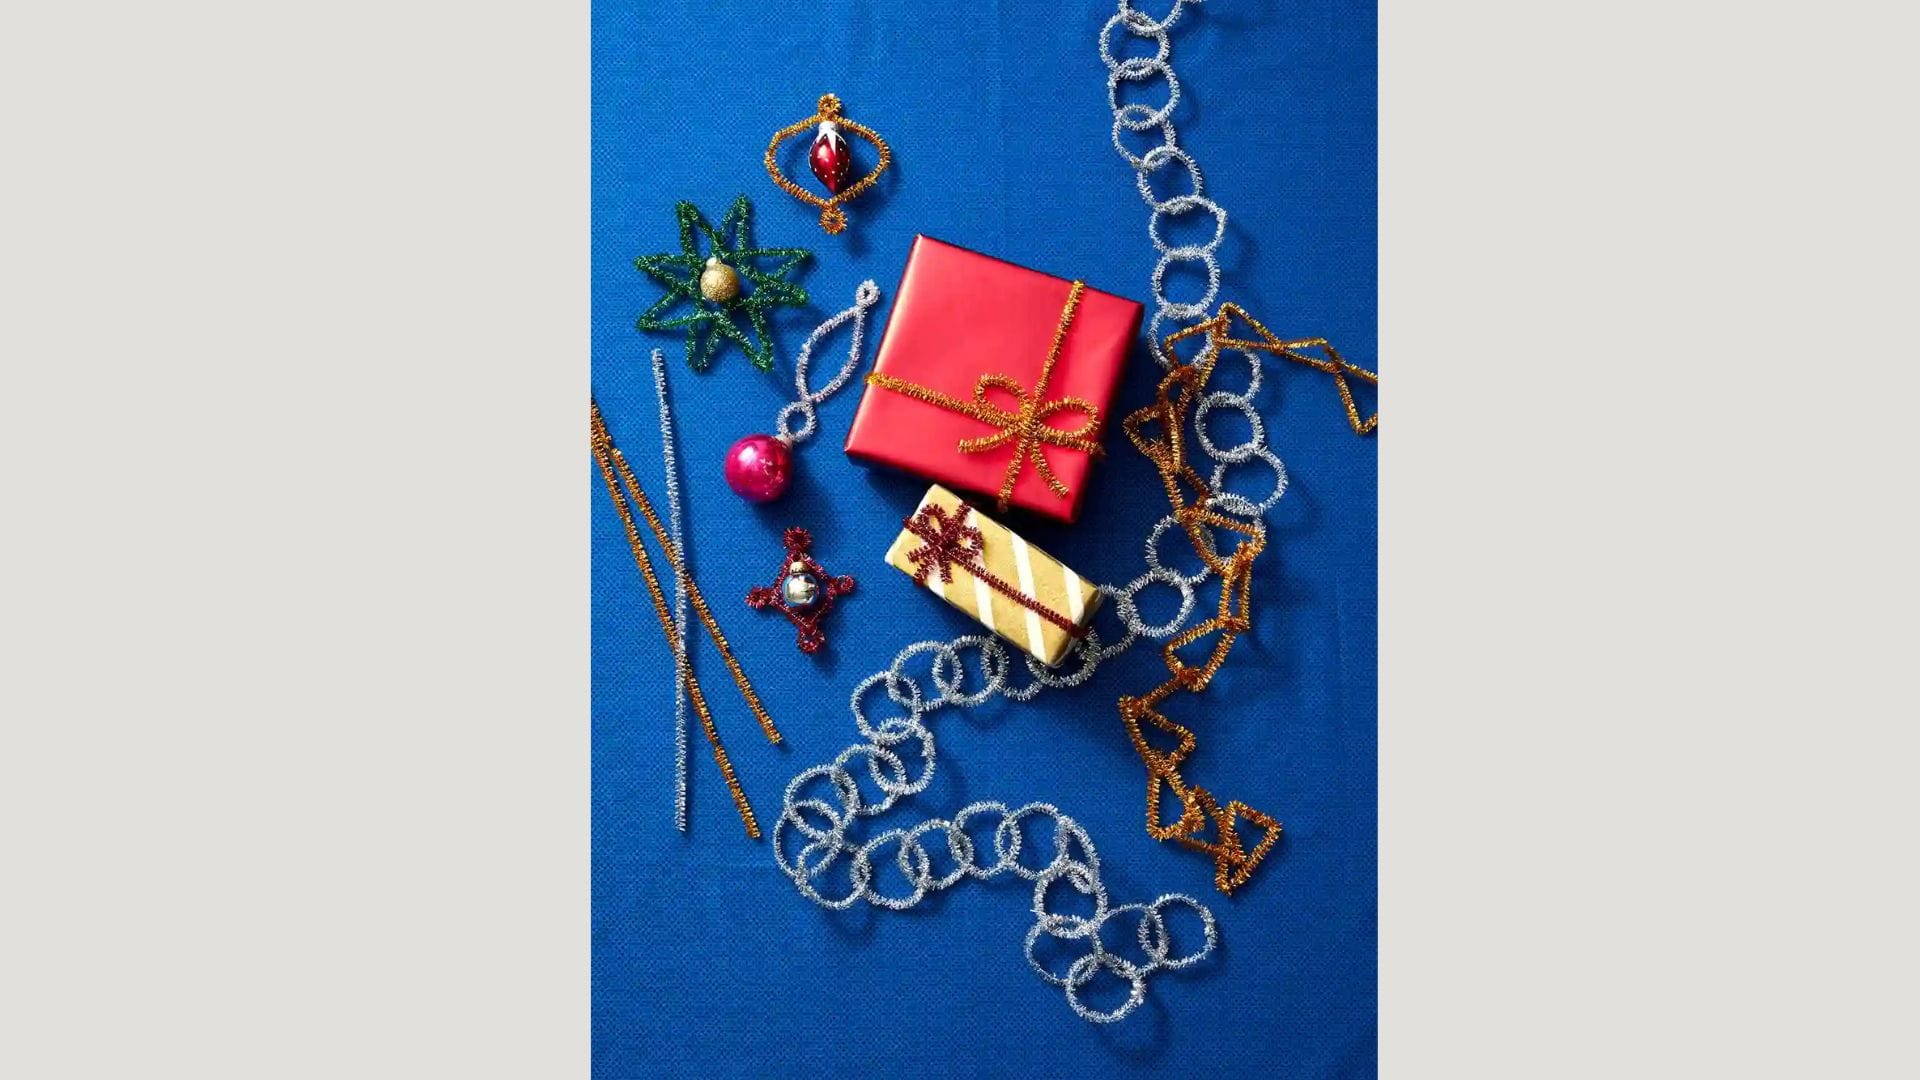
Thread tinsel pipe cleaners through ornaments. Wrap them around gifts. Loop them together to make garland.
These bendy sparkly wires are more useful than you’d think.
Wooden Bead Starburst Ornaments
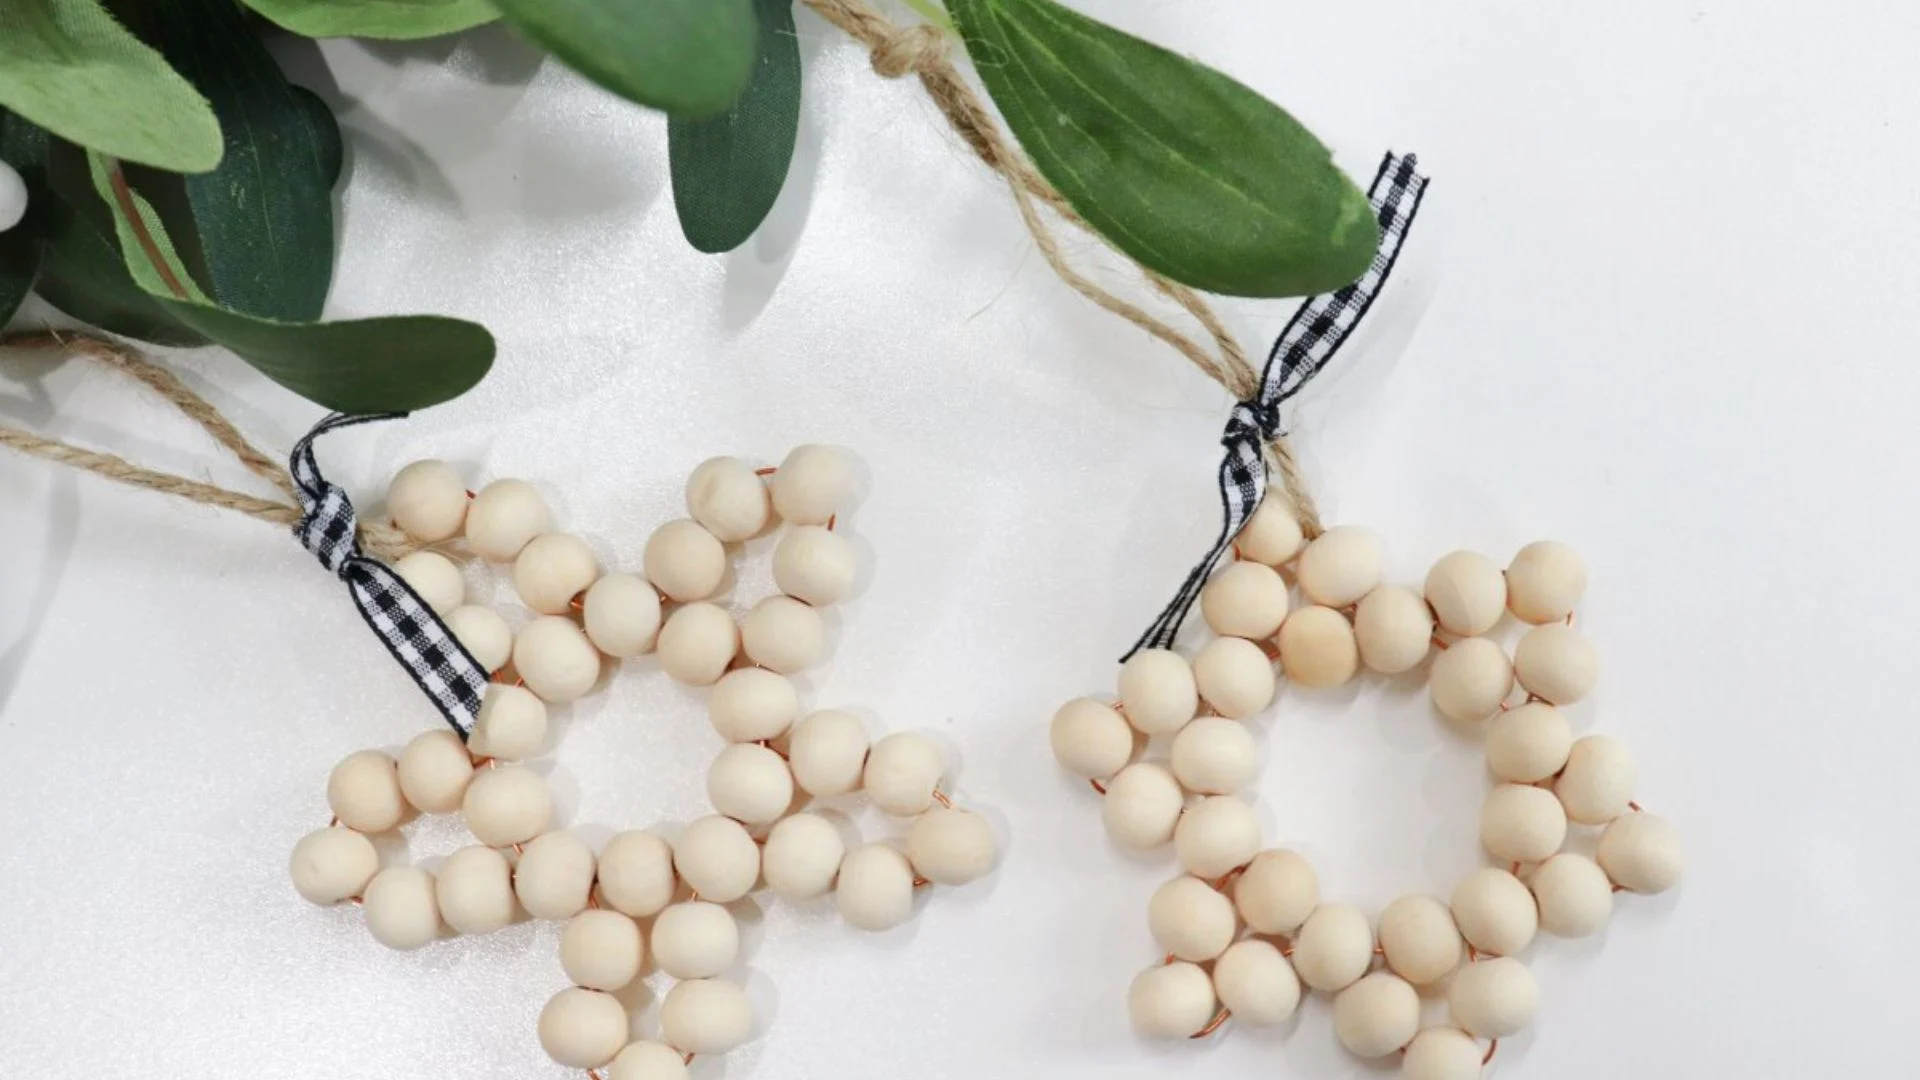
String beads onto thin wooden dowels. Glue the ends to hold them. Cut four shorter pieces and do the same.
Attach the four pieces to the center of your first dowel. You’ve made a starburst. Add ribbon to hang it.
These look modern and handmade at the same time.
Fire Starters That Smell Amazing
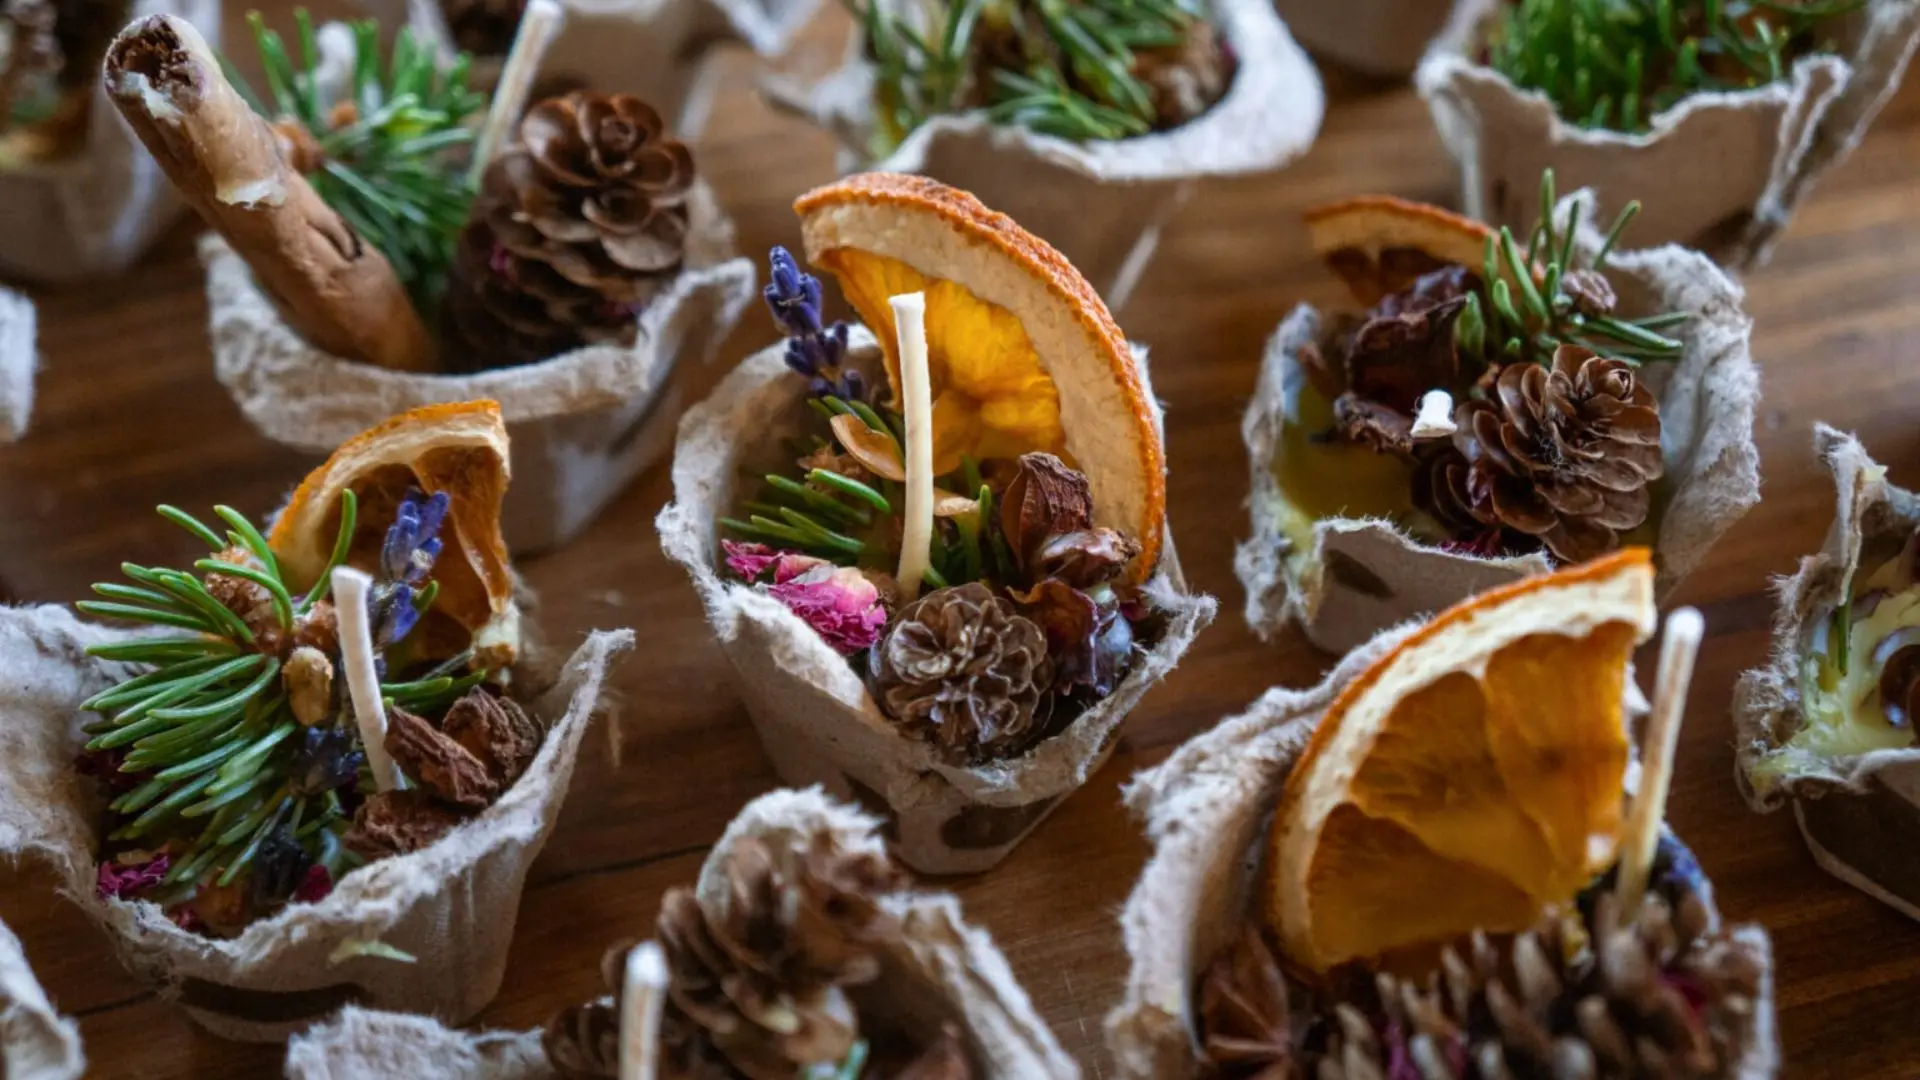
Put cupcake liners in a muffin tin. Melt wax in the microwave. Place wicks in each cup.
Fill halfway with pinecones, cinnamon sticks, dried citrus, and coffee beans. Pour wax over everything. Let it set.
Tuck one under the logs in your fireplace. It’ll smell incredible as it burns.
Toy Drum Ornaments from Toilet Paper Rolls
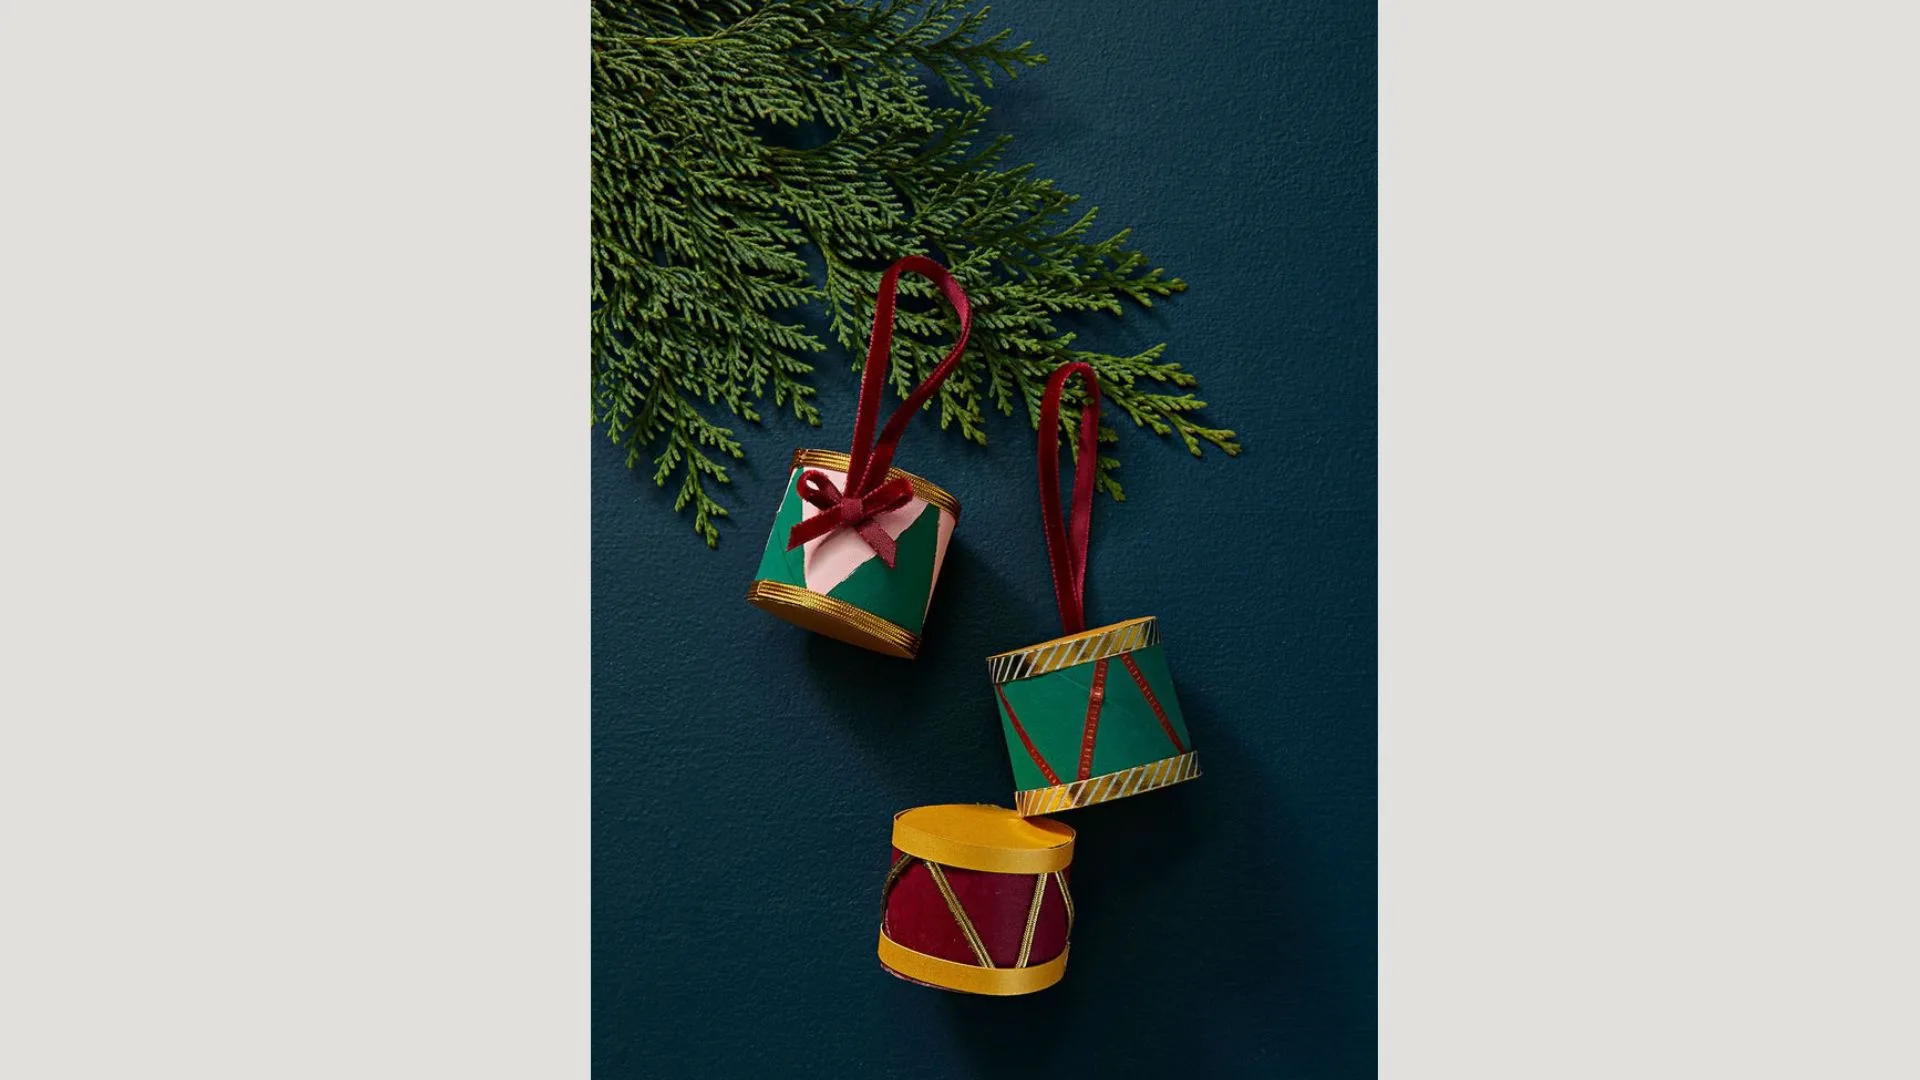
Cut a toilet paper roll short. Paint it. Cut circles of craft paper to fit the ends. Glue them on.
Wrap with ribbon or washi tape. Add a ribbon loop to hang.
No one will guess these started as bathroom trash.
Bottle Candle Holders with Fresh Greens

Put evergreen sprigs in wine bottles. Fill with water. Add cranberries if you want color.
Stick taper candles in the bottle openings. If they don’t fit, carve away some wax.
Replace the water every few days to keep the greens fresh.
Garlands from Your Pantry
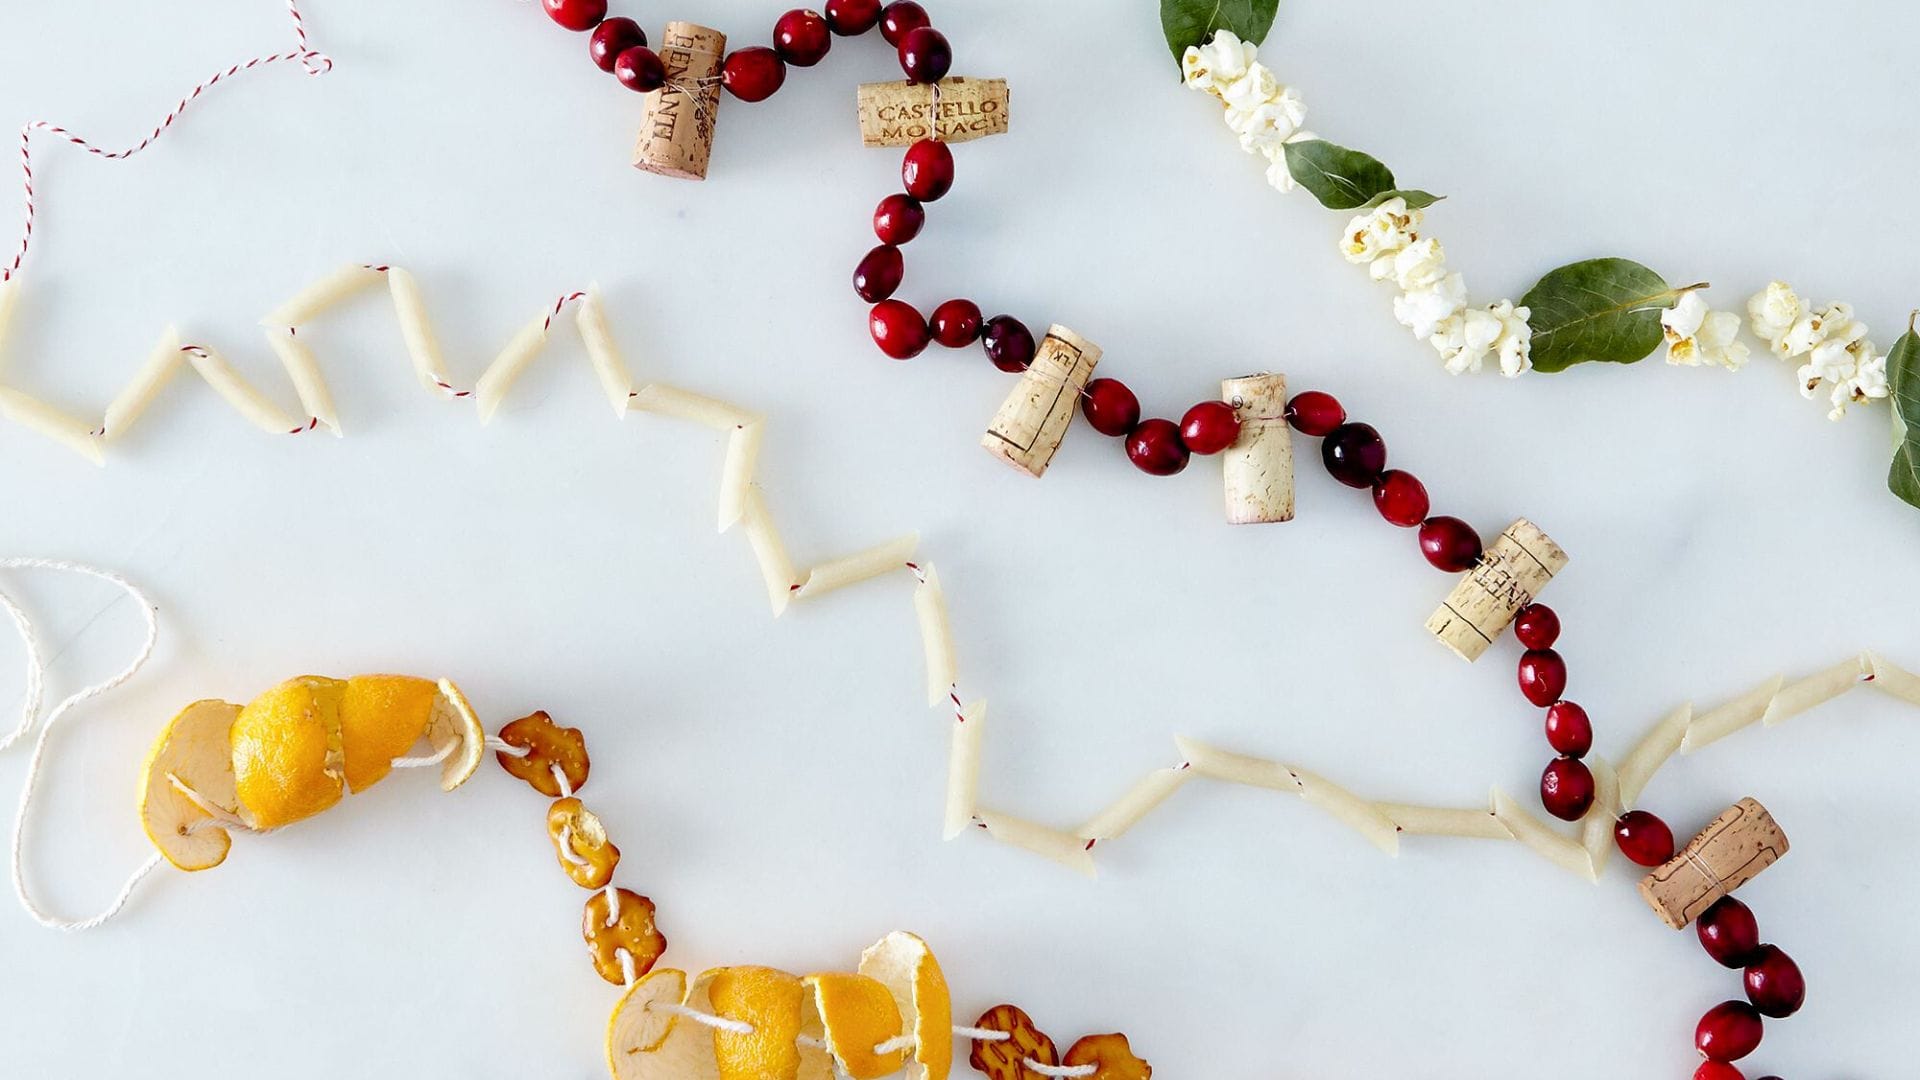
Thread popcorn, dried fruit, and bay leaves onto string. Or loop ribbon through pretzels and pasta.
Paint the pasta gold first for extra shine. When Christmas is over, compost everything.
Swan Ornaments with Personality
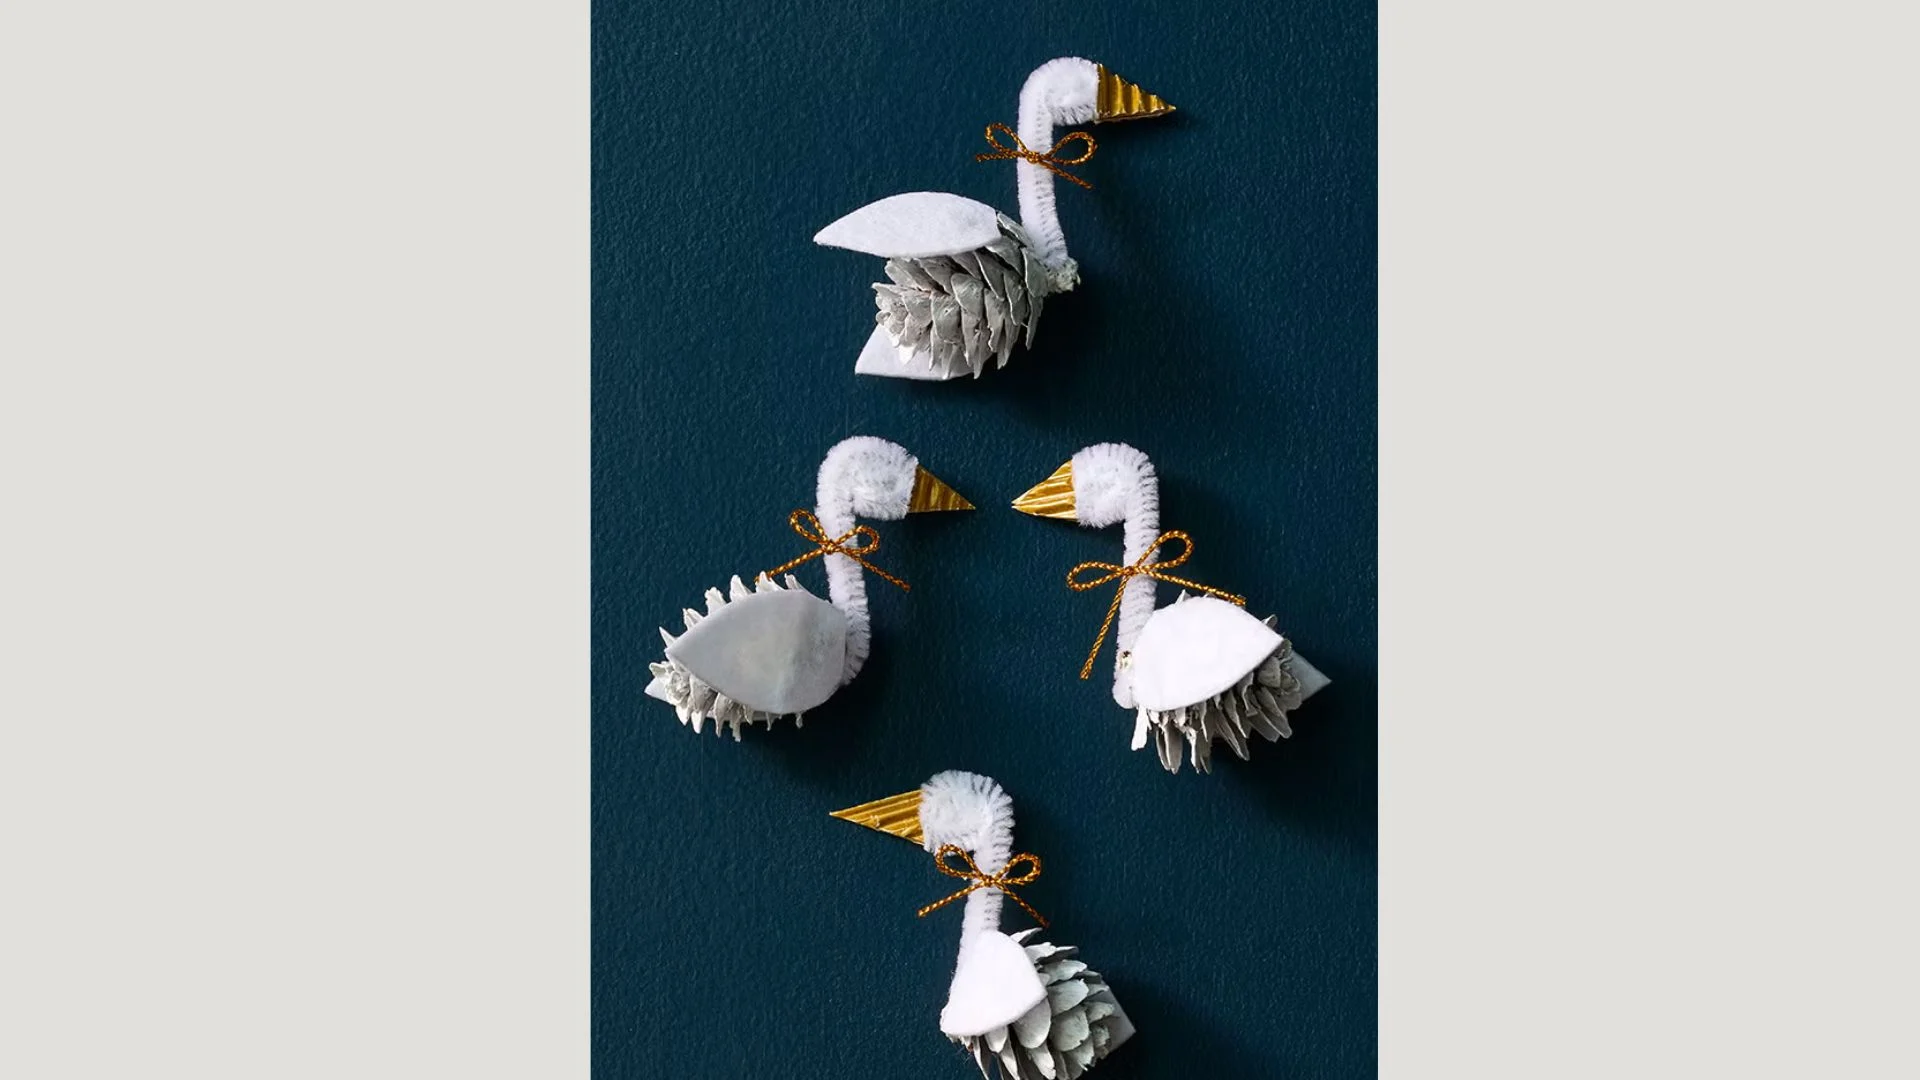
Paint a mini pinecone white. Let it dry. Shape a white pipe cleaner into a swan’s neck and head.
Glue it to the pinecone. Add a gold paper beak. Cut wing shapes from felt. Glue them on.
Add string to hang your graceful swan.
Decorated Wreath You Can Change with the Seasons
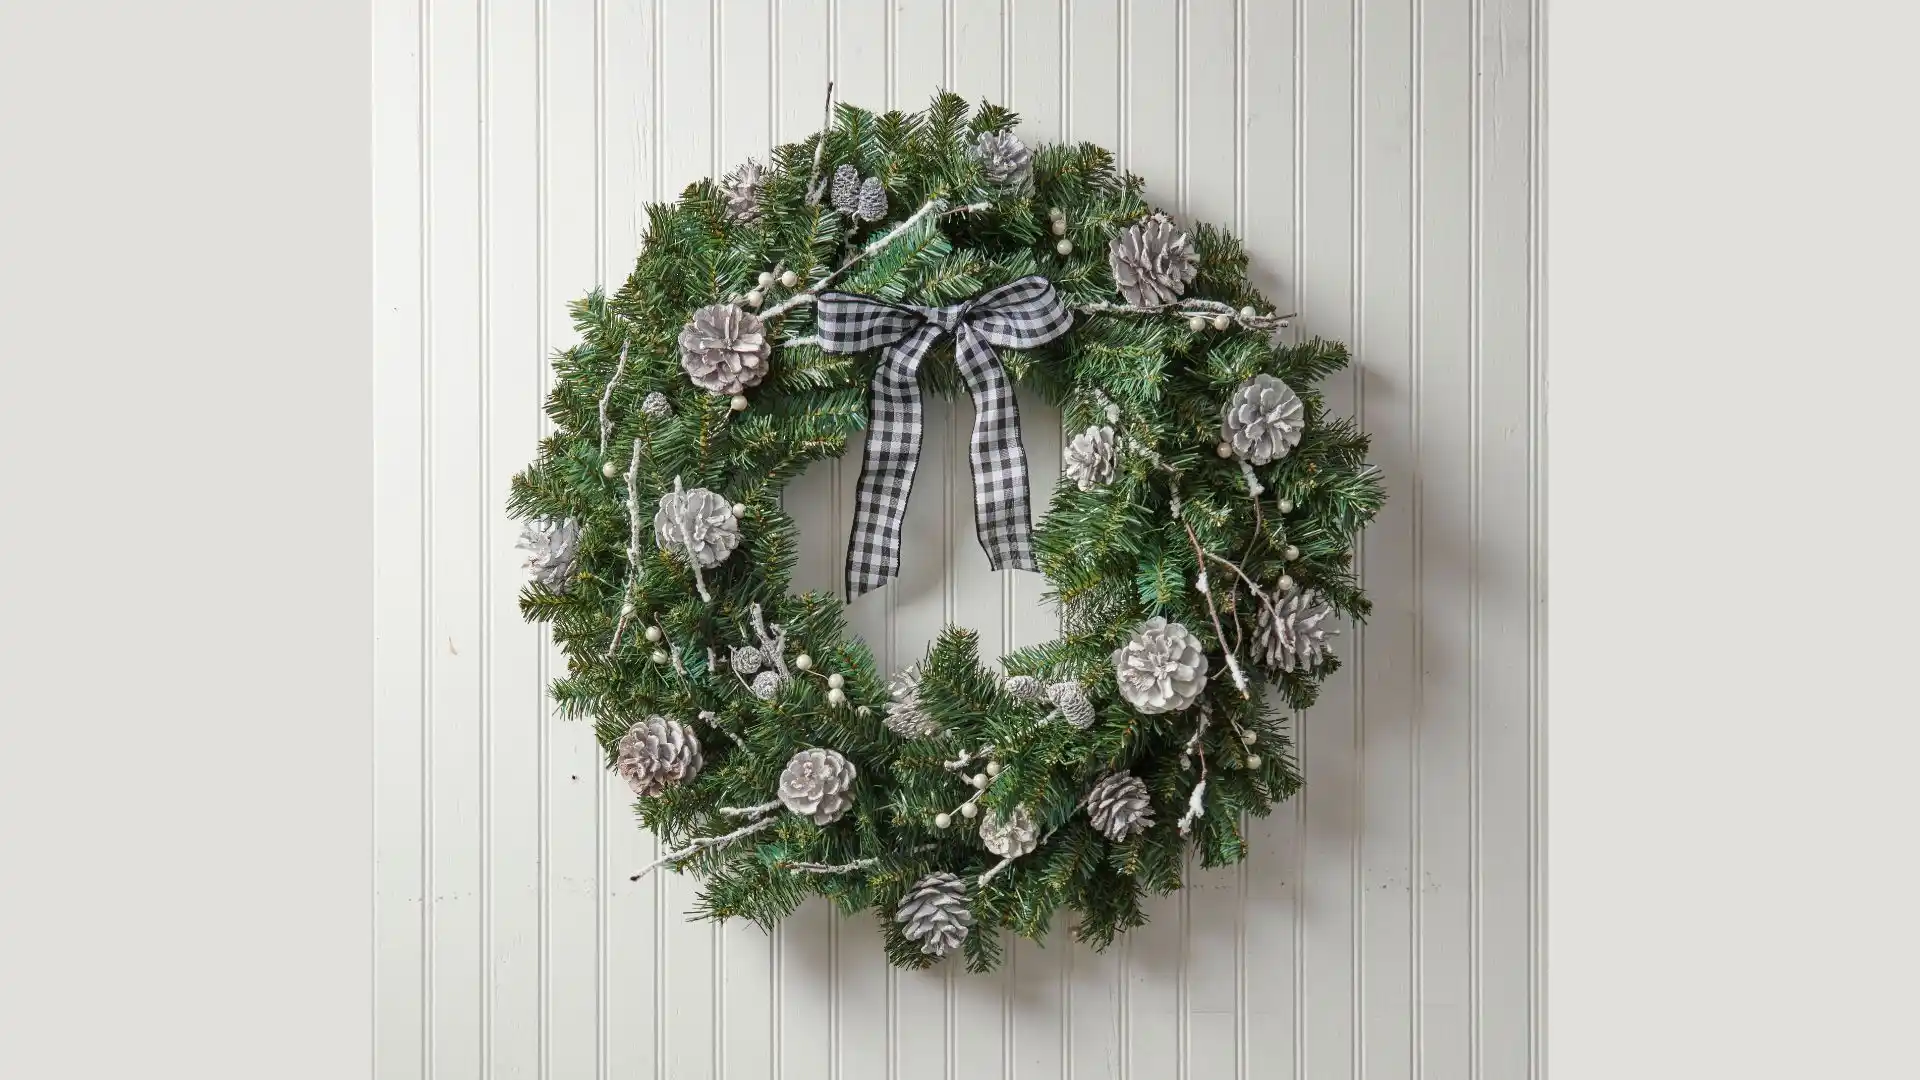
Attach bundles of dried flowers and greenery to a plain pine wreath. Use wire to secure them.
Add a bow. When spring comes, swap winter greenery for spring flowers. The base stays the same.
Snowy Mason Jars in Five Minutes
Brush Mod Podge on a mason jar. Roll it in kosher salt while the glue is wet. Let it dry.
Wrap twine around the rim. Add a pinecone and berries. Put a candle inside.
These glow beautifully on winter evenings.
Clay Christmas Village
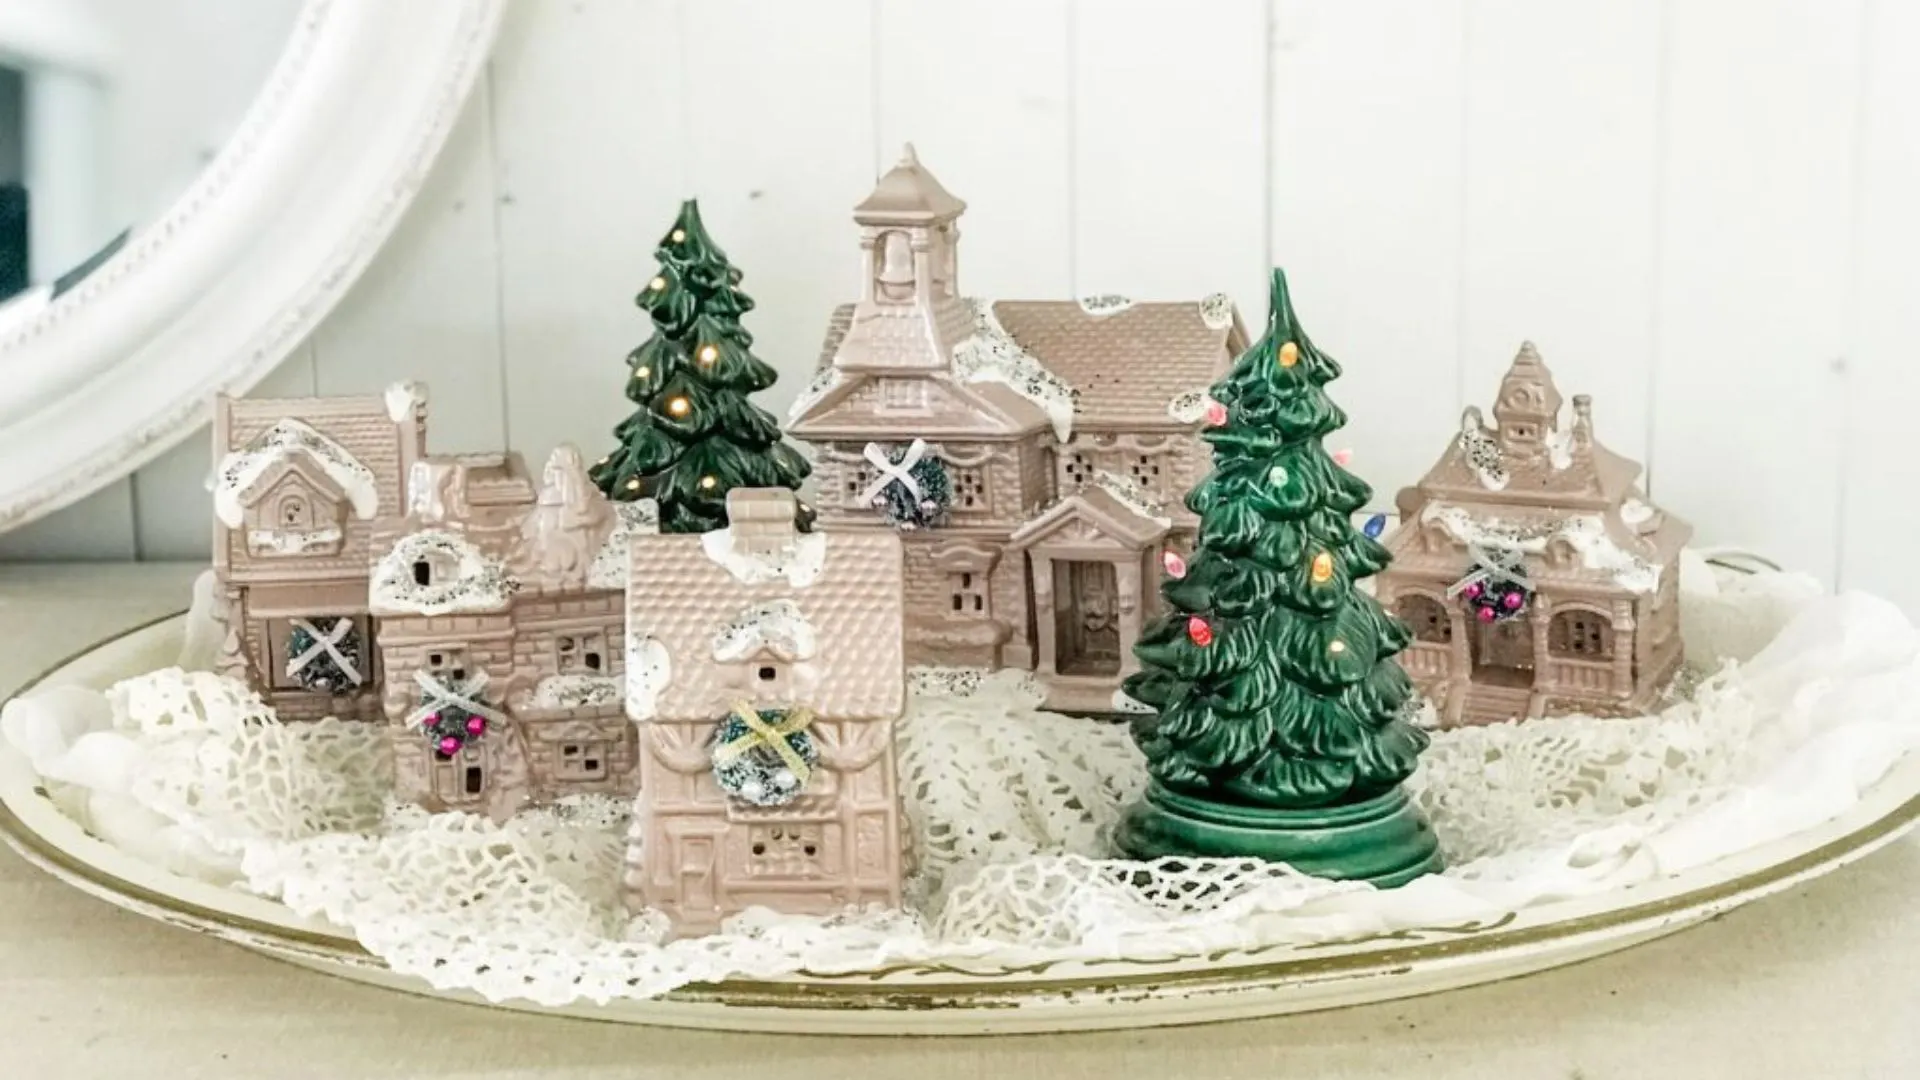
Roll out air-dry clay. Cut house shapes with a craft knife. Let them dry overnight.
Arrange them on your mantel. Add fake snow around them. They look modern and minimal.
Pet Ornaments That Make You Smile

Print photos of your pets or family members. Hot glue pipe cleaners around plain ornaments to make legs and tails.
Glue the photos on top. Add any small decorations you want.
These become family treasures. You’ll hang them every year.
Twine-Wrapped Pears from Light Bulbs
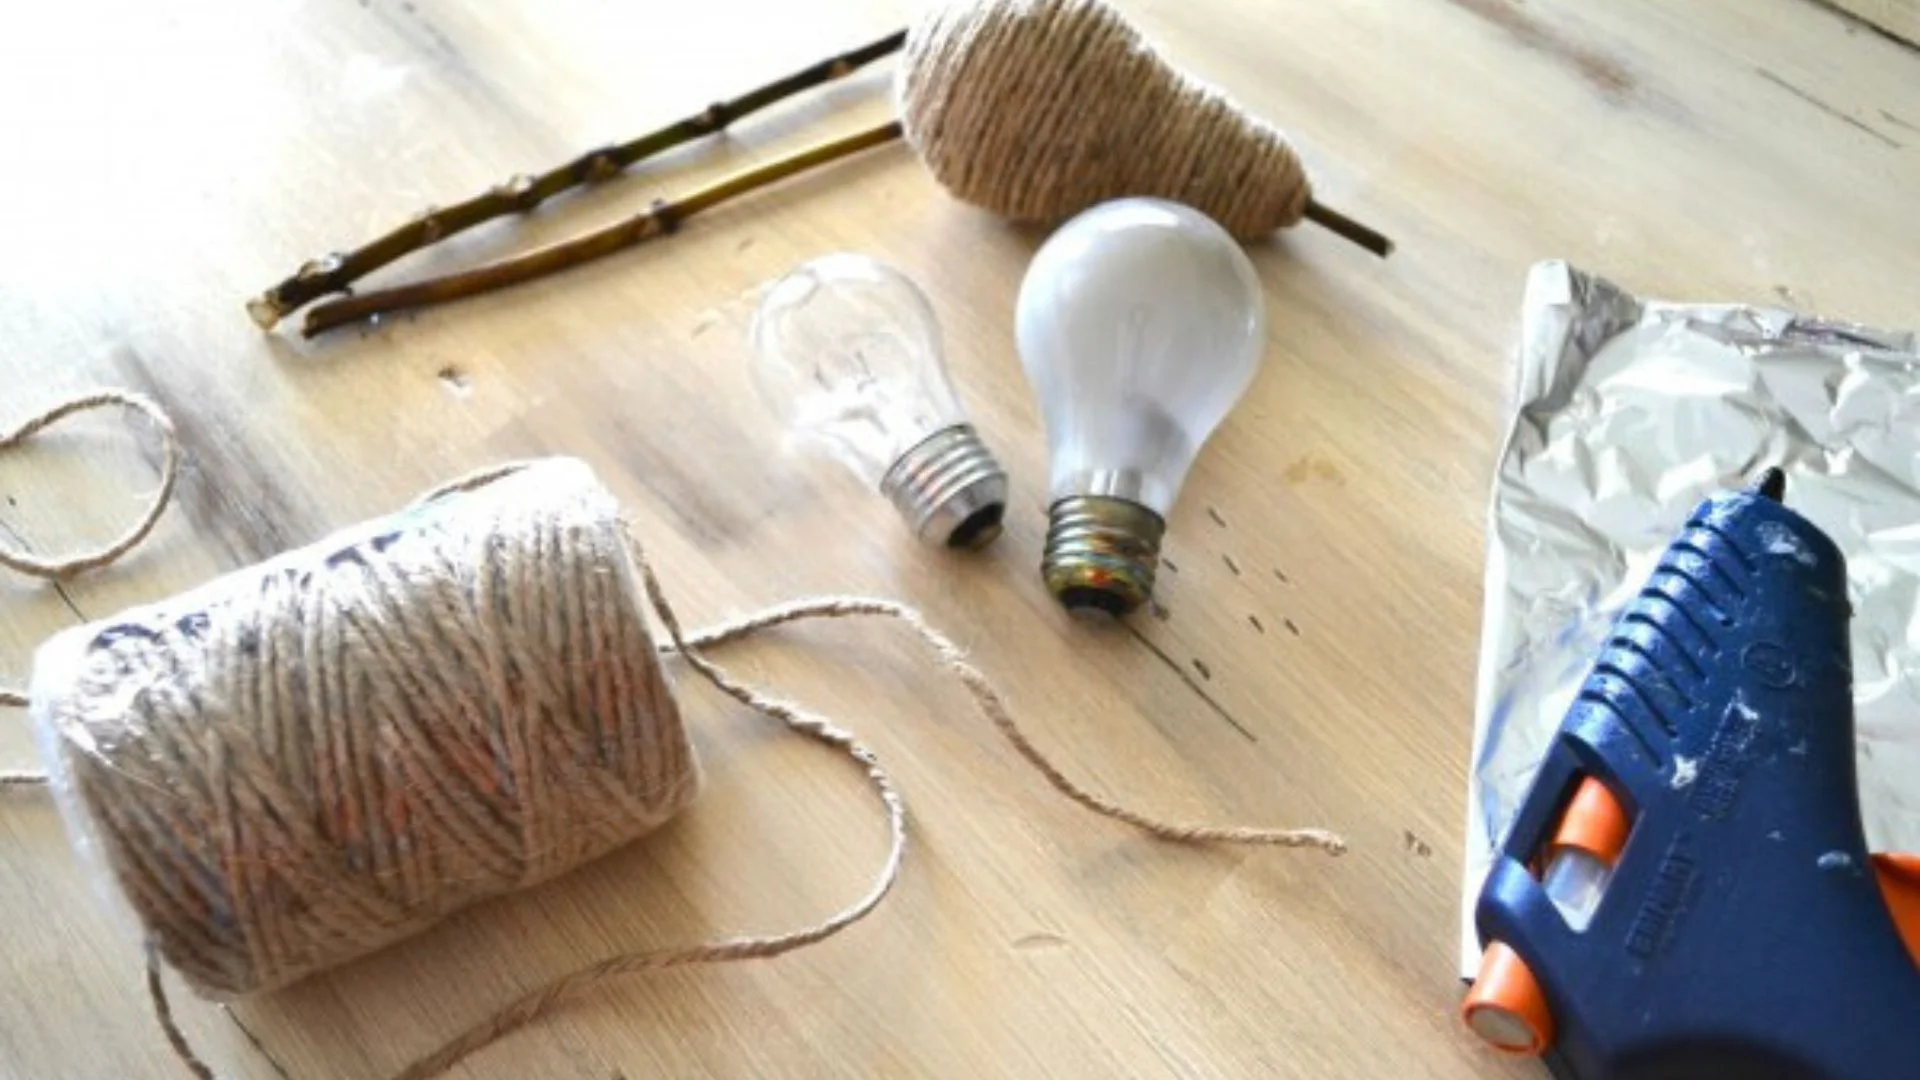
Don’t throw out old light bulbs. Wrap them in twine. Start at the fat end. Glue as you go.
Add a twig for a stem. Cut a leaf shape from paper. Glue it on.
Display them in a bowl. They look surprisingly real from across the room.
Wallpaper Ornaments When You Have Scraps Left
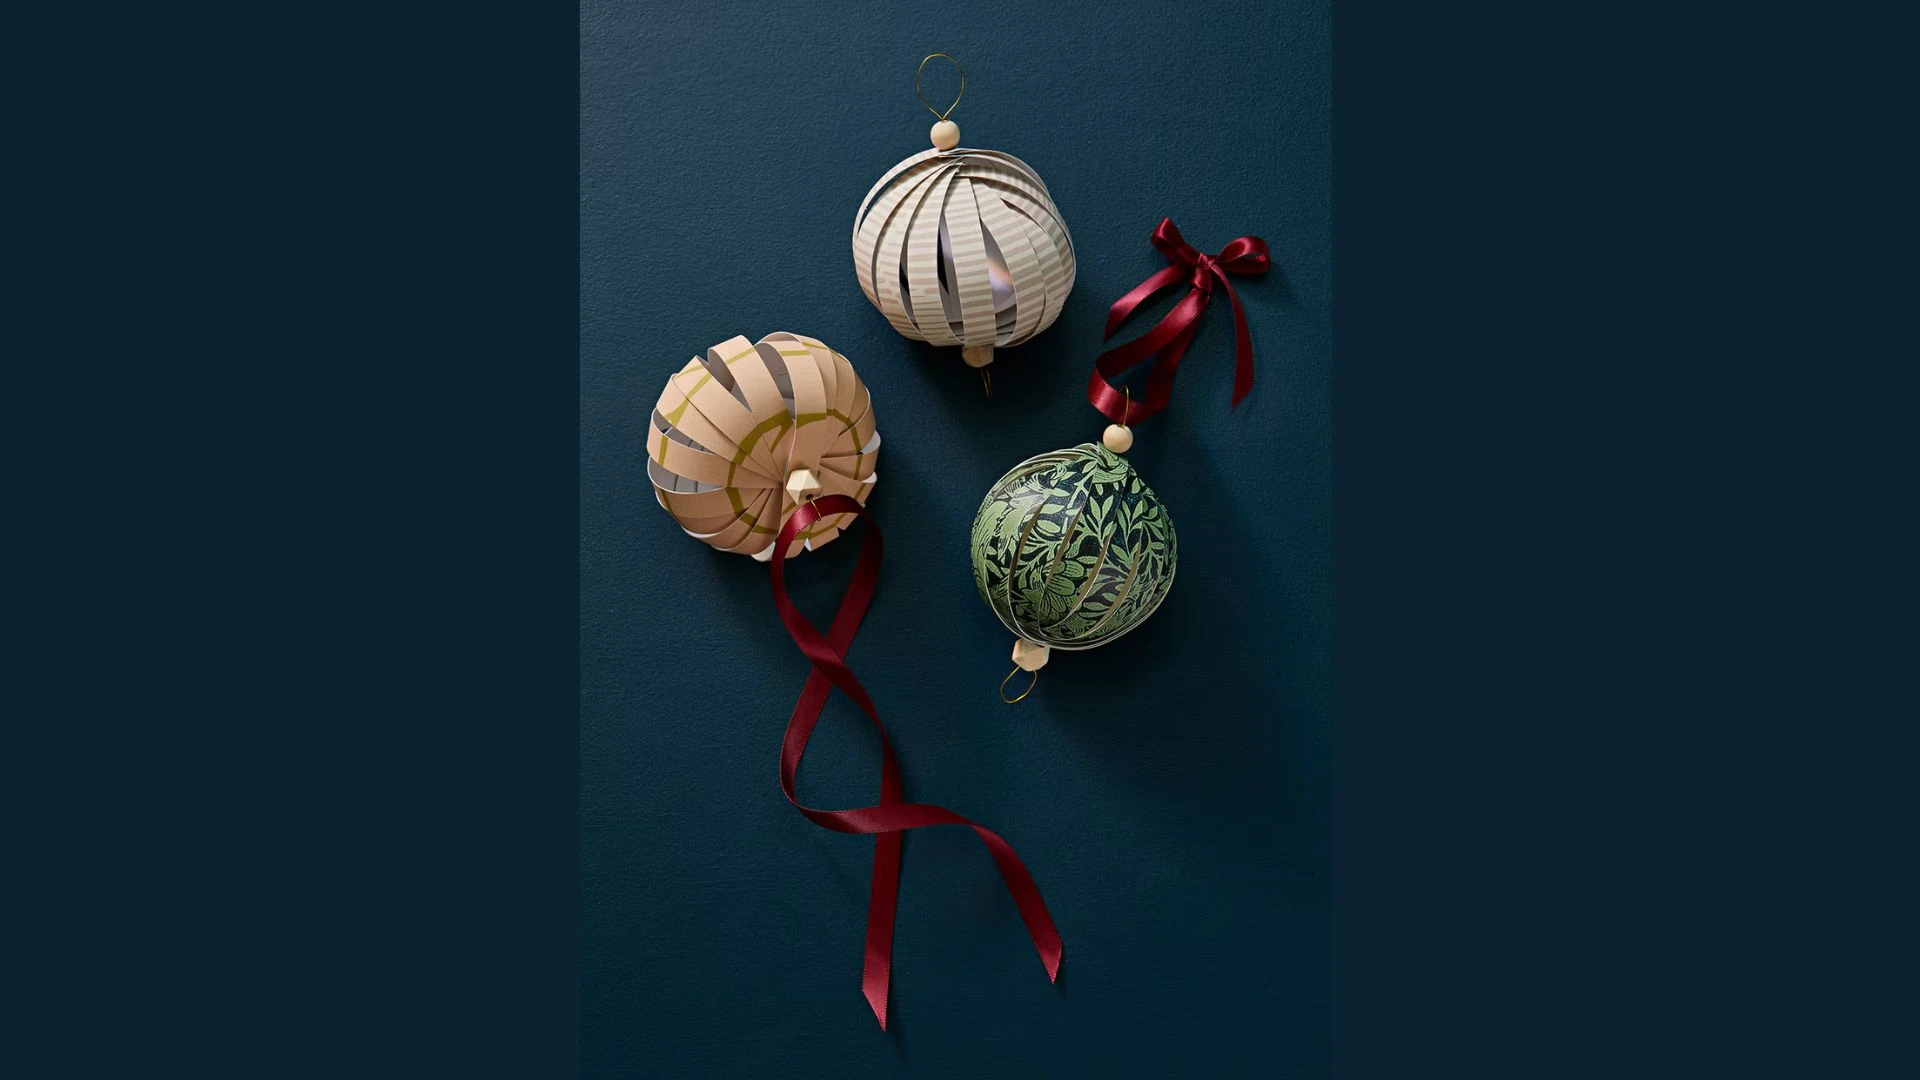
Cut leftover wallpaper into thin strips. Poke holes in the top, middle, and bottom of each strip.
Thread them onto wire with beads at each end. Fan them out to make a sphere shape.
Tie ribbon on top to hang them.
Fringe Ornament with Flapper Style

Start at the bottom of an ornament. Glue tinsel fringe ribbon around it in rings. Overlap slightly so there are no gaps.
Work your way to the top. Replace the metal hook with gold cord.
These catch every bit of light on your tree.
Giant Candy Cane Pillow
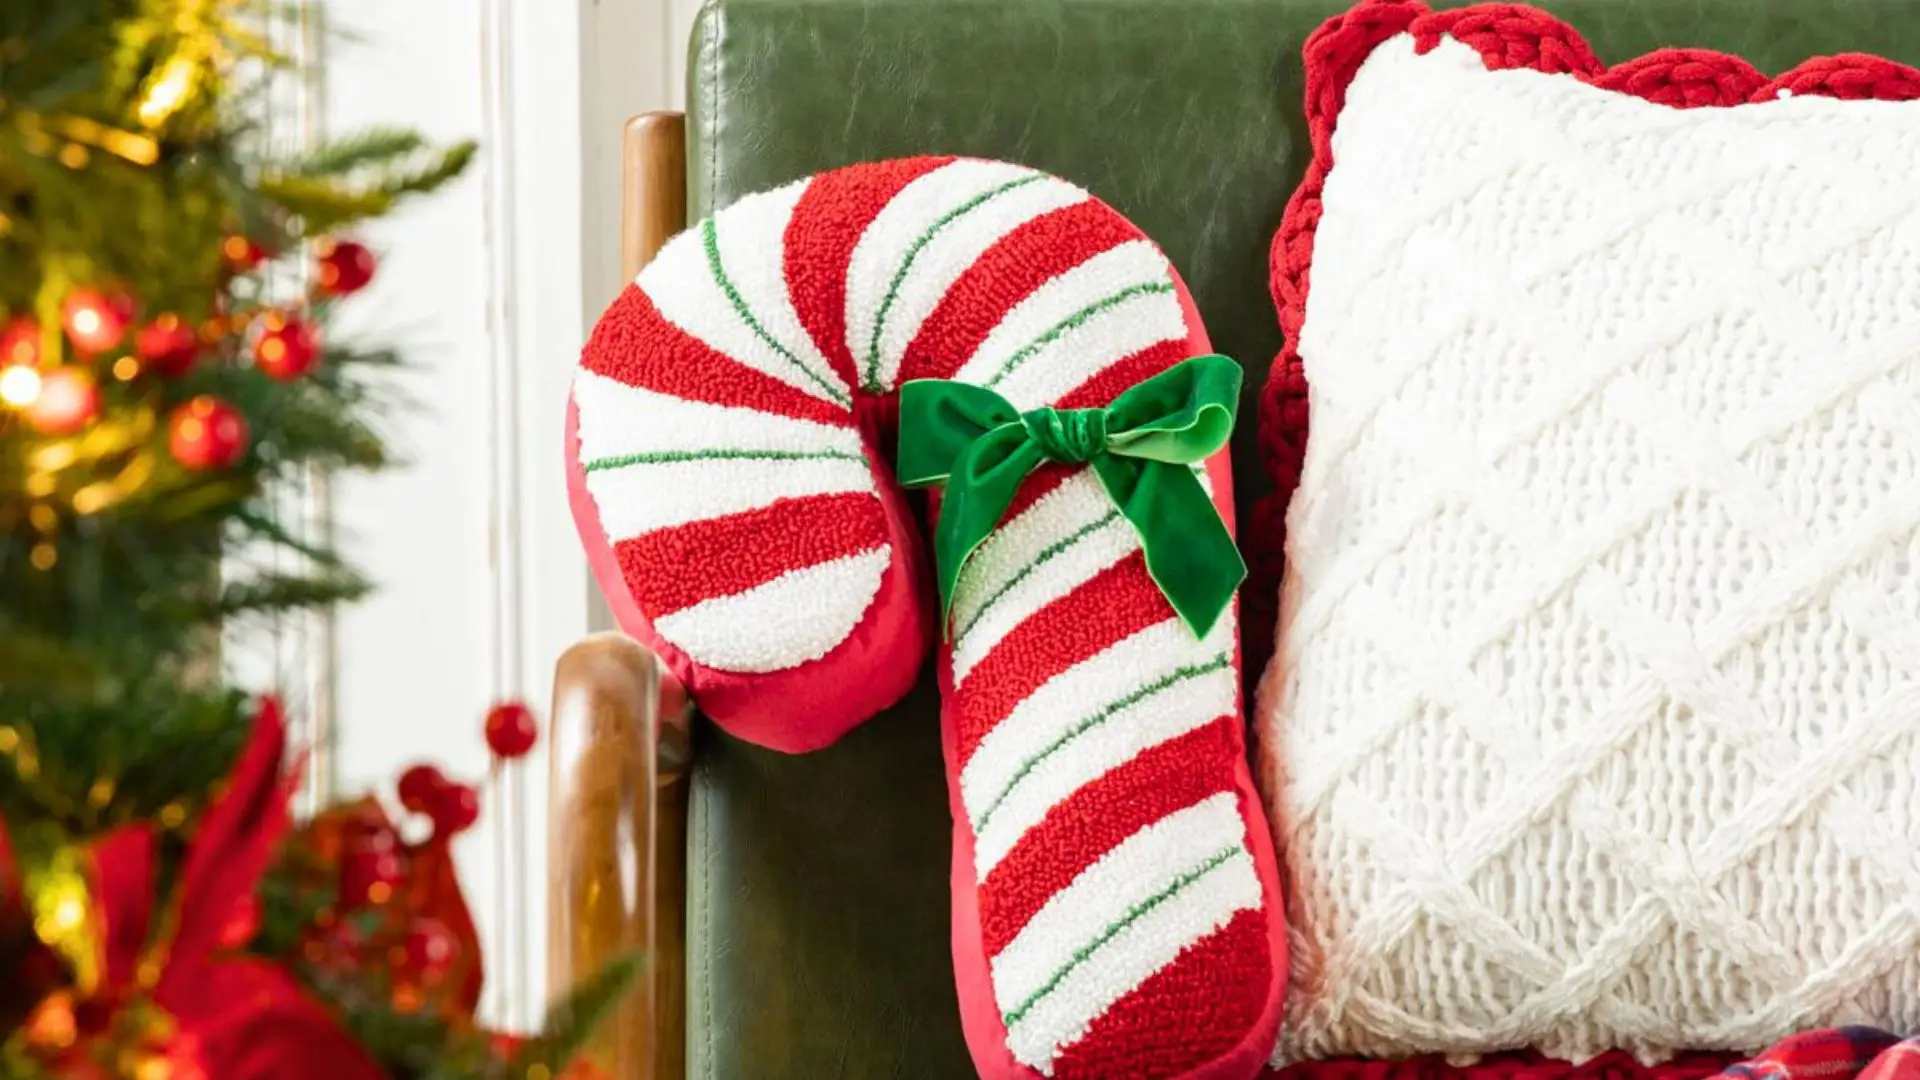
Cut red and white felt into strips. Sew them together in a candy cane shape. Fill with stuffing.
This takes about an hour if you can use a sewing machine. Kids love it.
Paper Christmas Trees in Every Color
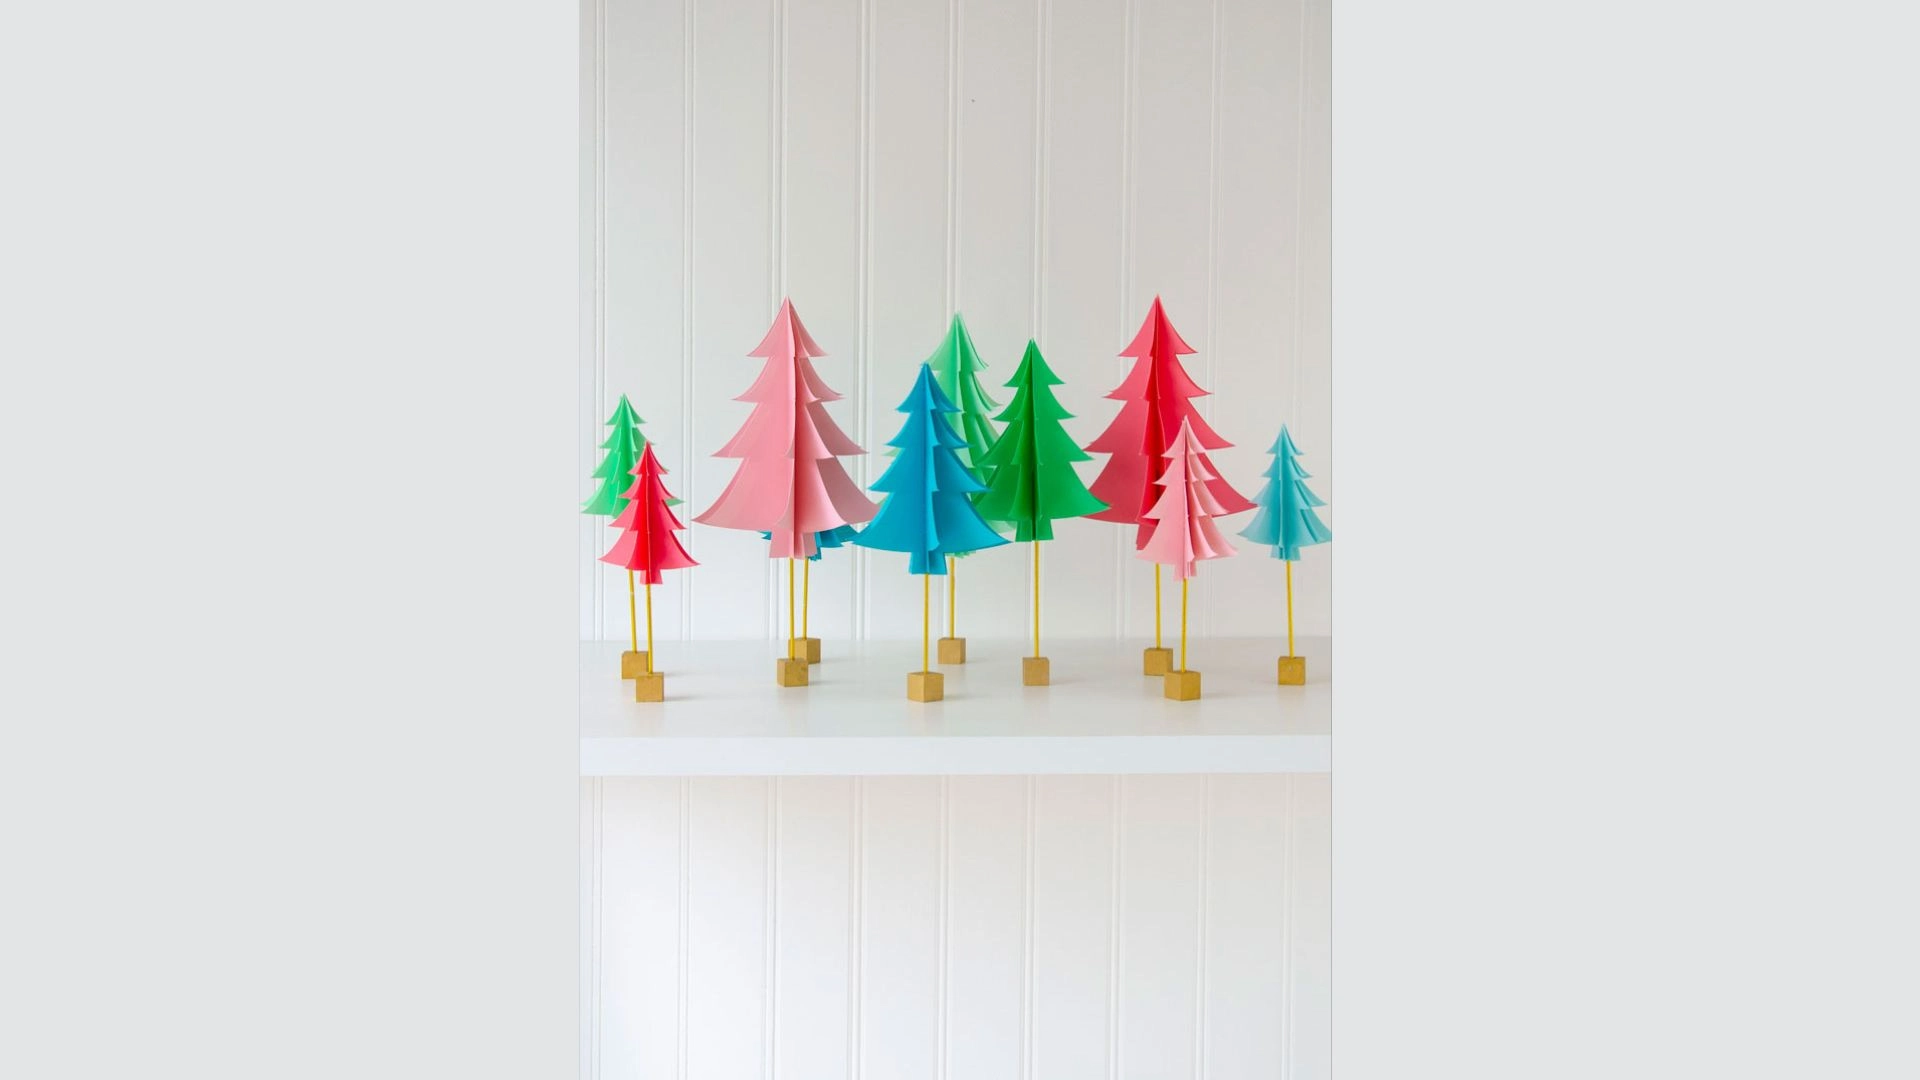
Make rainbow trees from cardstock. They sit on small wood bases.
Paint the bases gold. Arrange your paper tree forest on a shelf or table.
Paper Bag Snowflakes for Windows

Follow a simple pattern to cut paper bags into snowflakes. Hang them in windows.
An all-white display looks good through winter. You can leave them up after Christmas.
Bell Garland with Vintage Charm
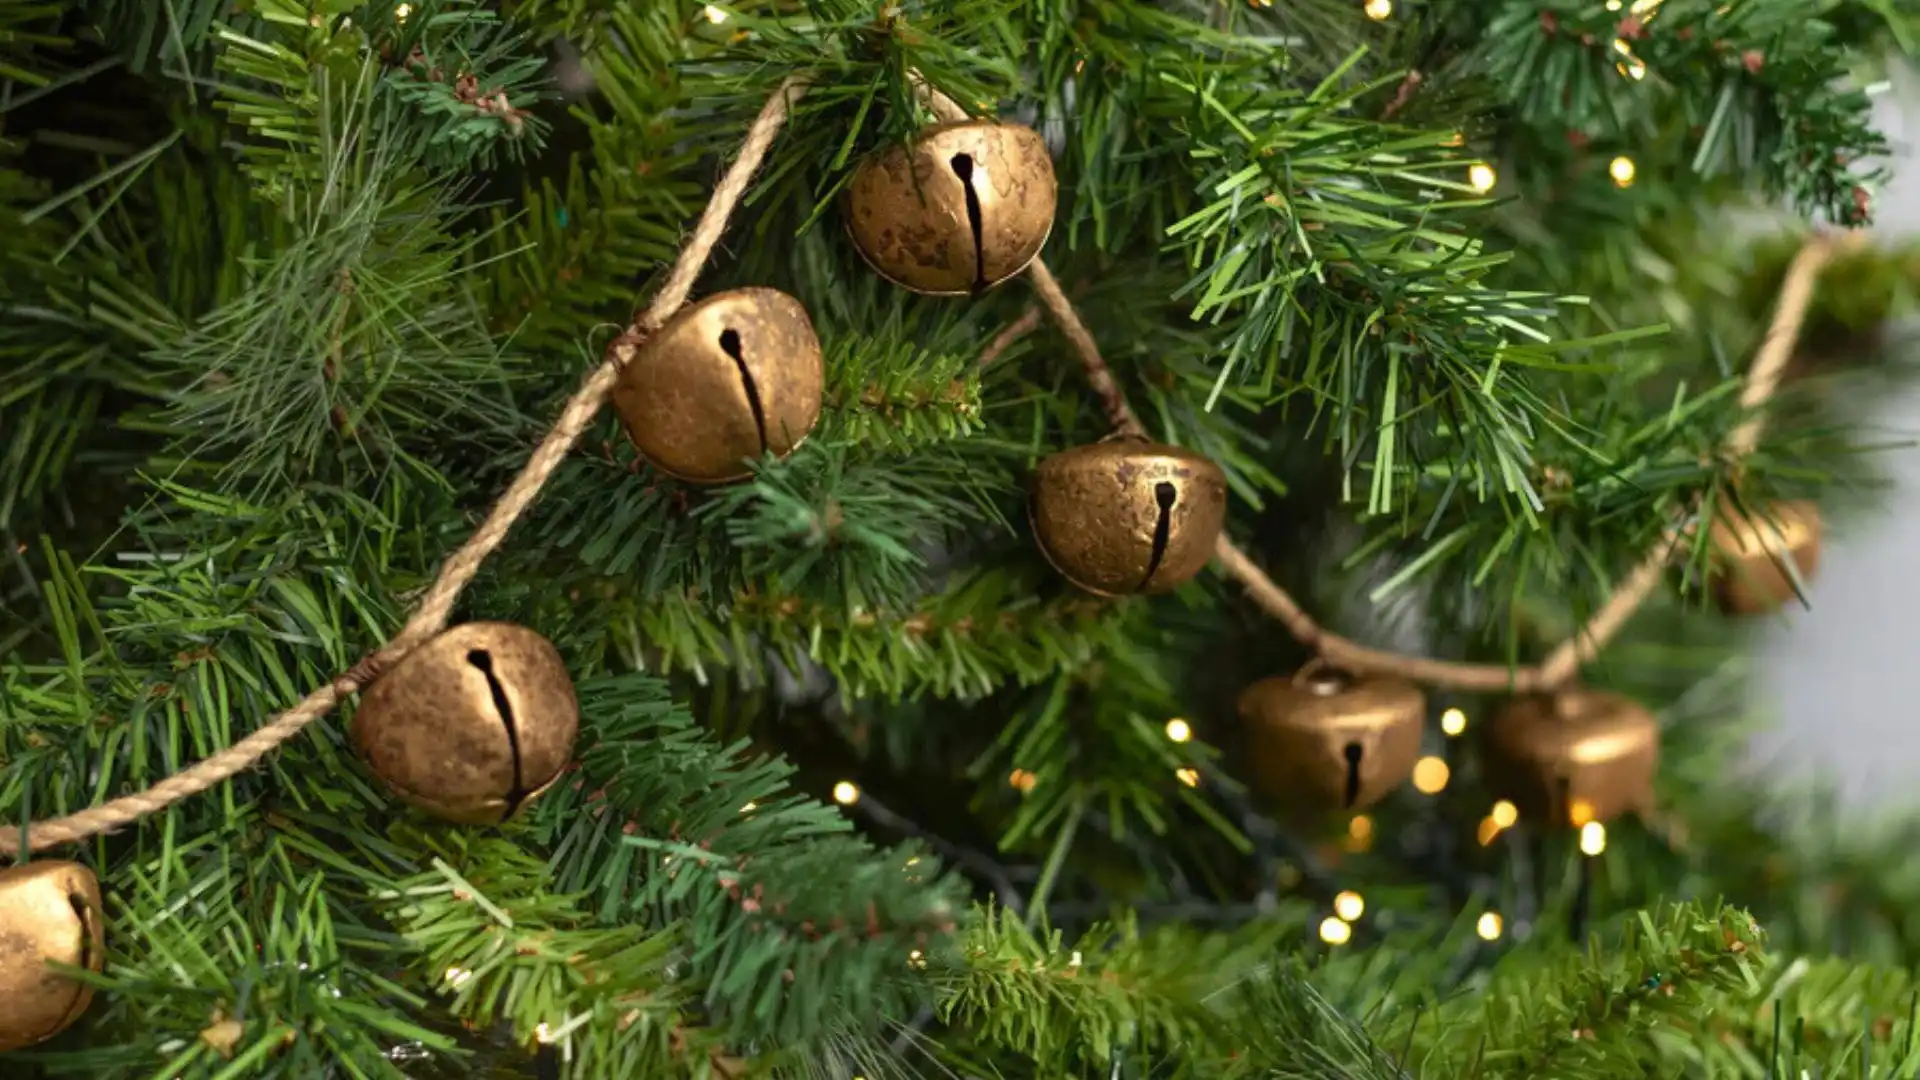
String old brass bells on satin cord. Draw patterns on them with white paint pens. Add snowflakes and swirls.
Hang the garland on your tree or along a railing.
Craft Stick Wreath in Shades of Green
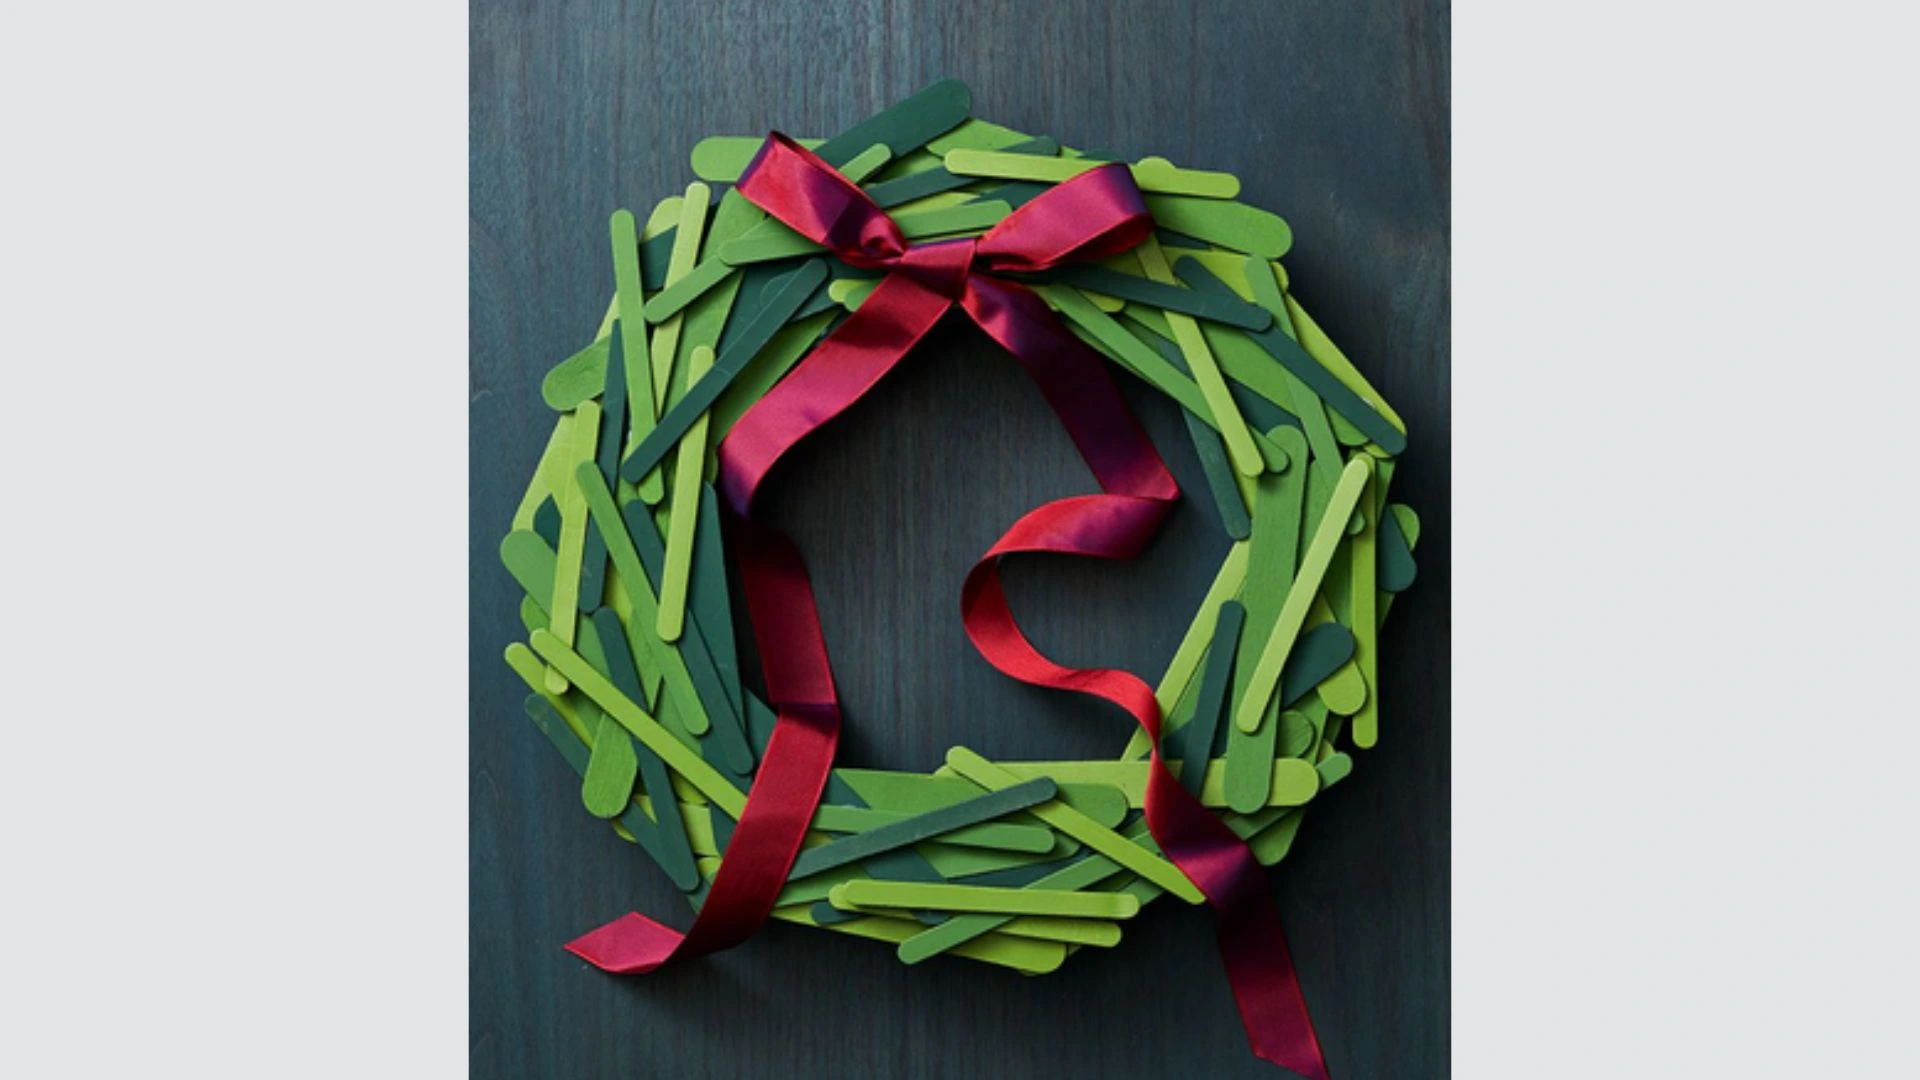
Paint popsicle sticks in three different shades of green. Or buy them already colored.
Glue them to a foam wreath form. Overlap them. Mix the shades. Keep going until the wreath is covered.
Felt Mistletoe to Hang Every Year

Cut felt pieces following a pattern. Use different shades of green for depth. Add pom-pom berries.
Hang it in the doorway. Kiss someone under it.
Holiday Straws Topped with Holly
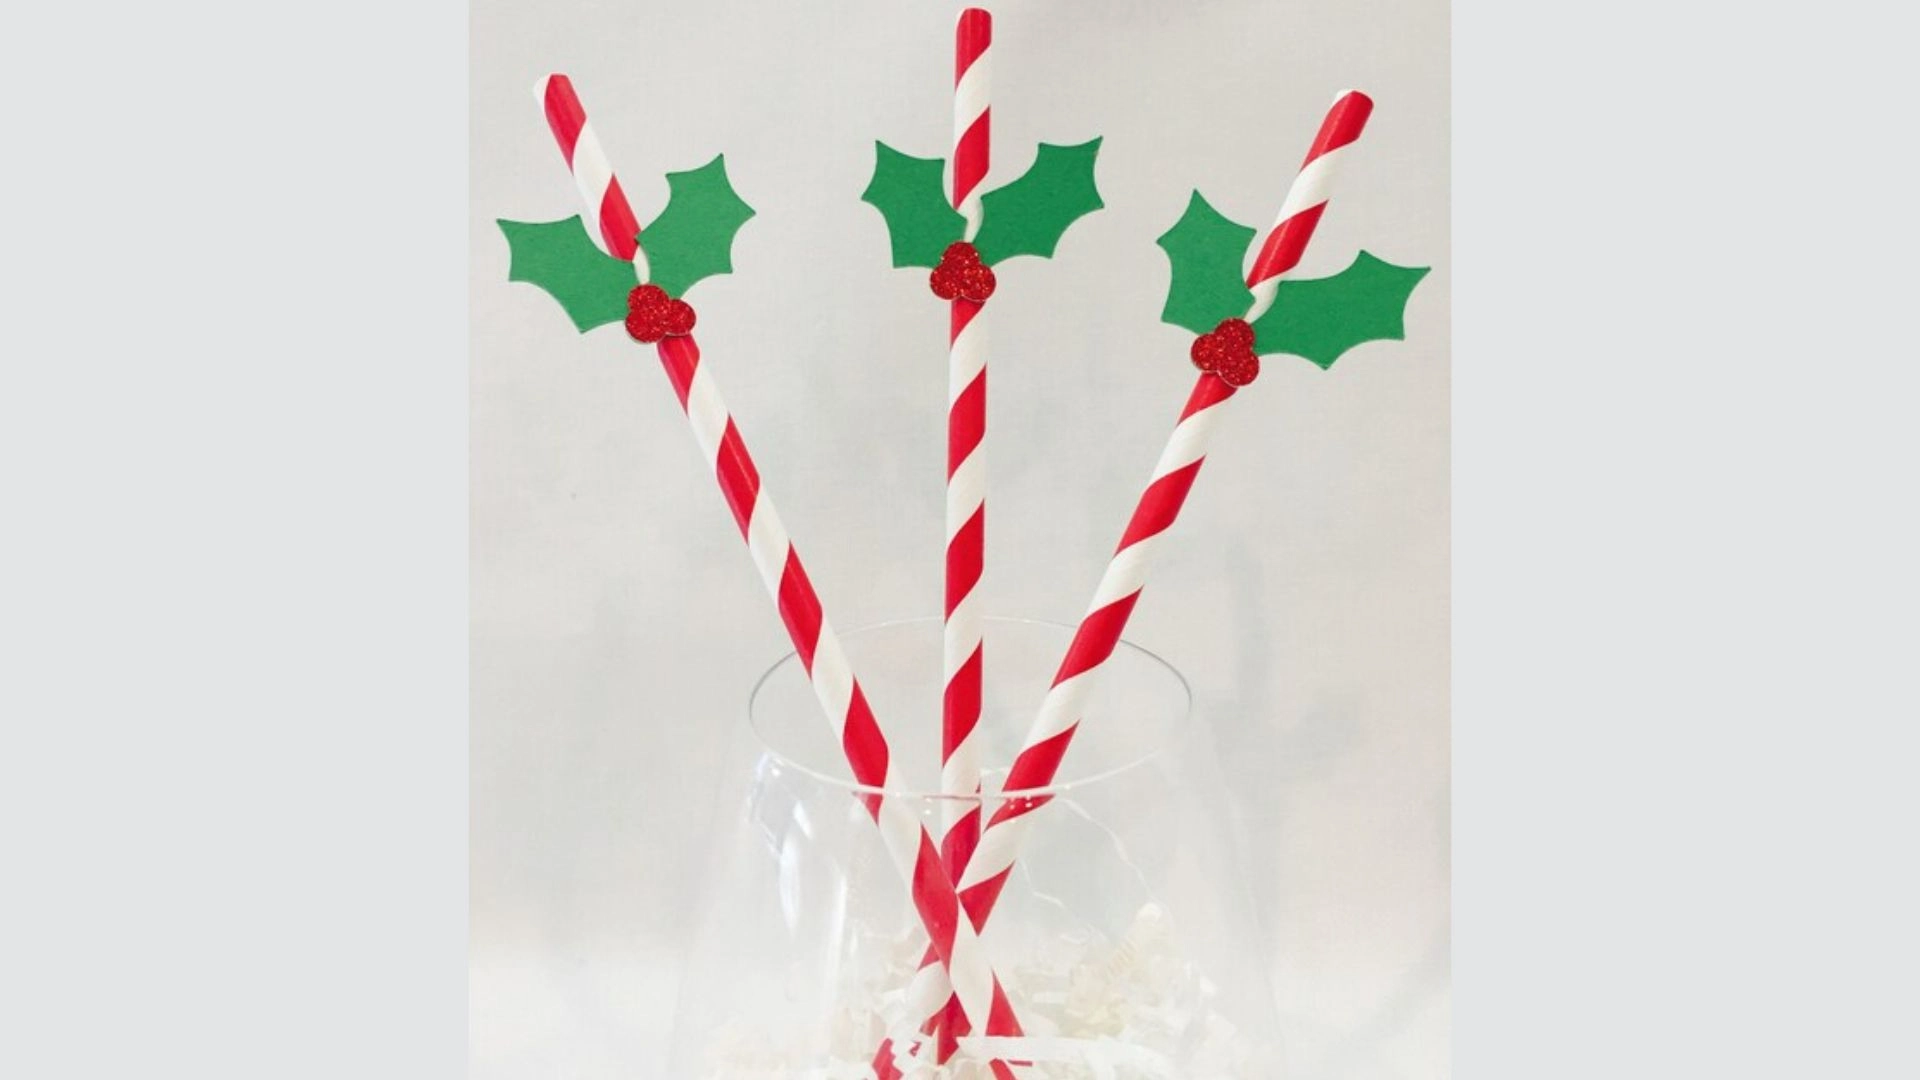
Hot glue tiny paper holly leaves and berries to the tops of red and white striped straws.
Use them in hot cocoa or holiday cocktails.
Pinecone Christmas Tree Centerpiece

Hot glue pinecones to a paper mache cone. Start at the bottom. Work your way up.
This makes a beautiful table centerpiece that won’t drip wax or need water.
Washi Tape Holiday Cards
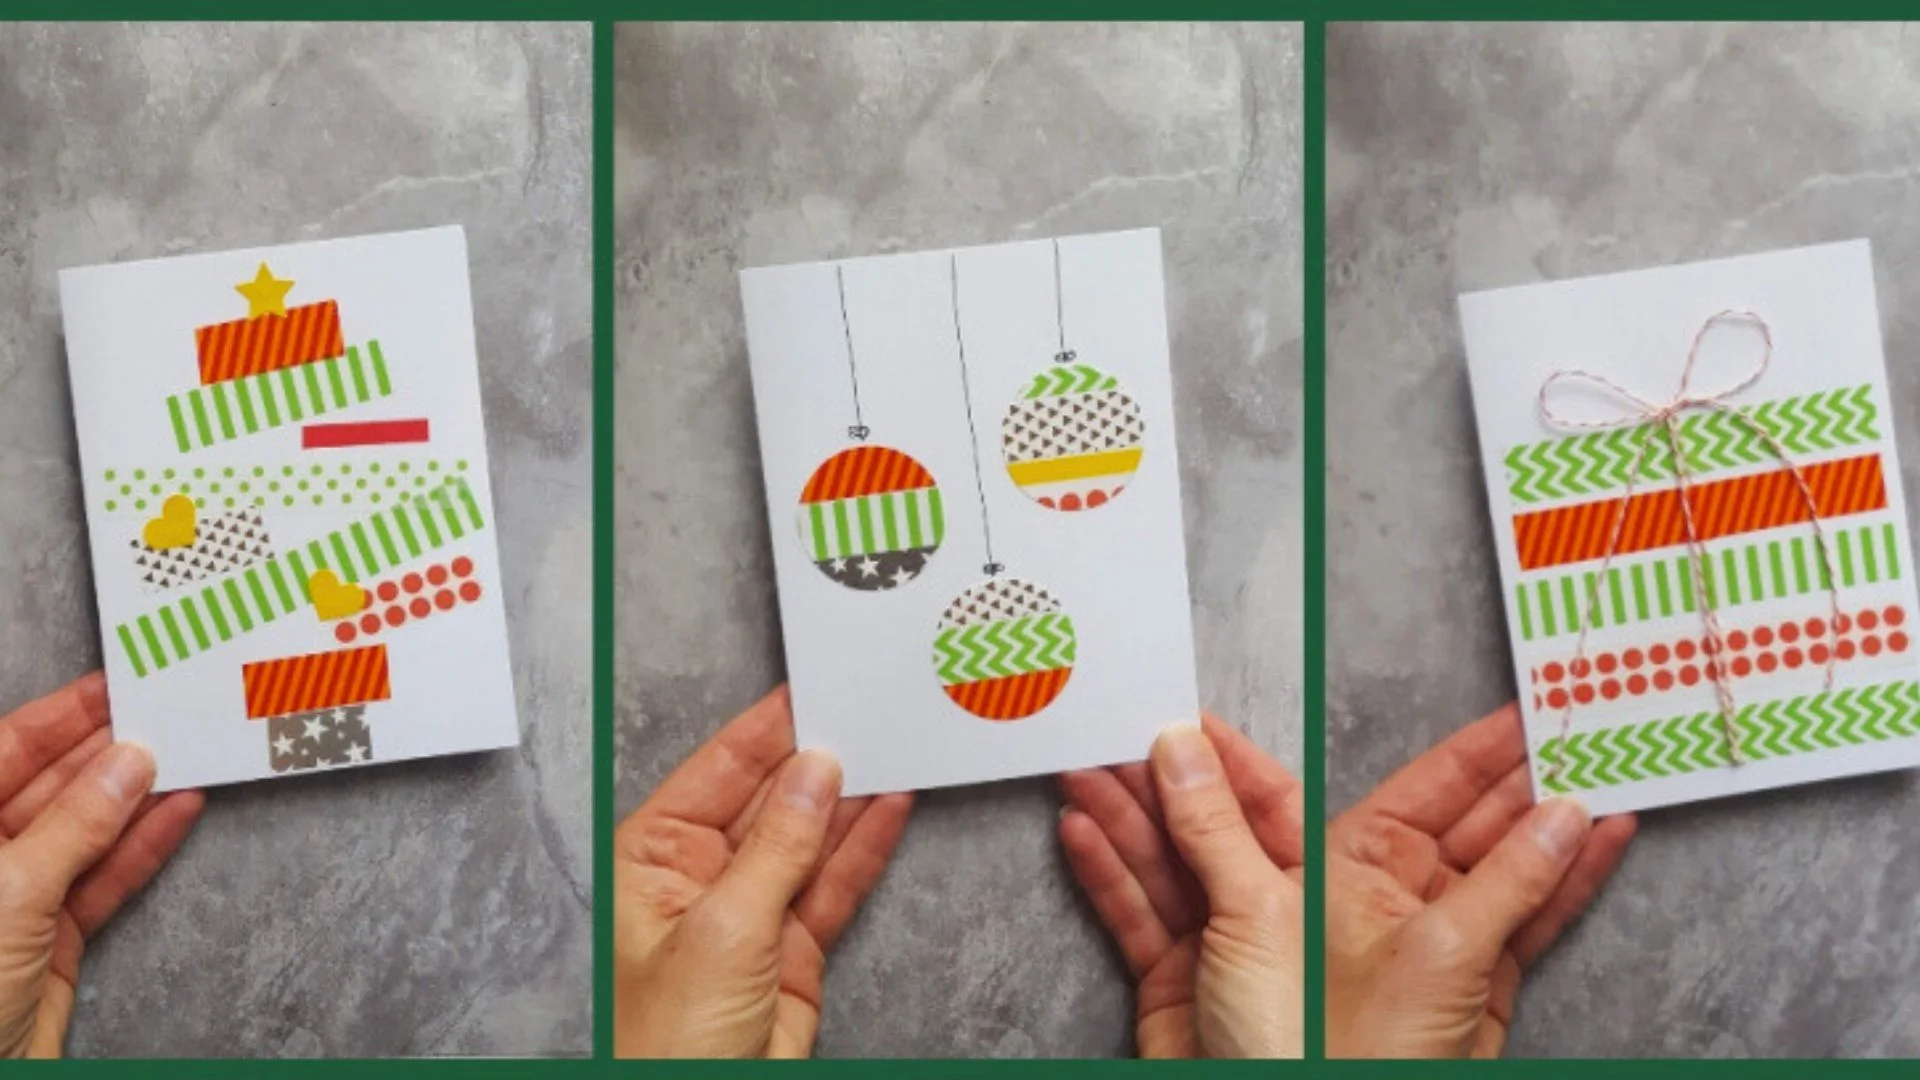
Outline blank cards with washi tape. Make patterns. Create Christmas trees. Add metallic accents.
Your cards will stand out in the pile of holiday mail.
Garland Card Holder Display
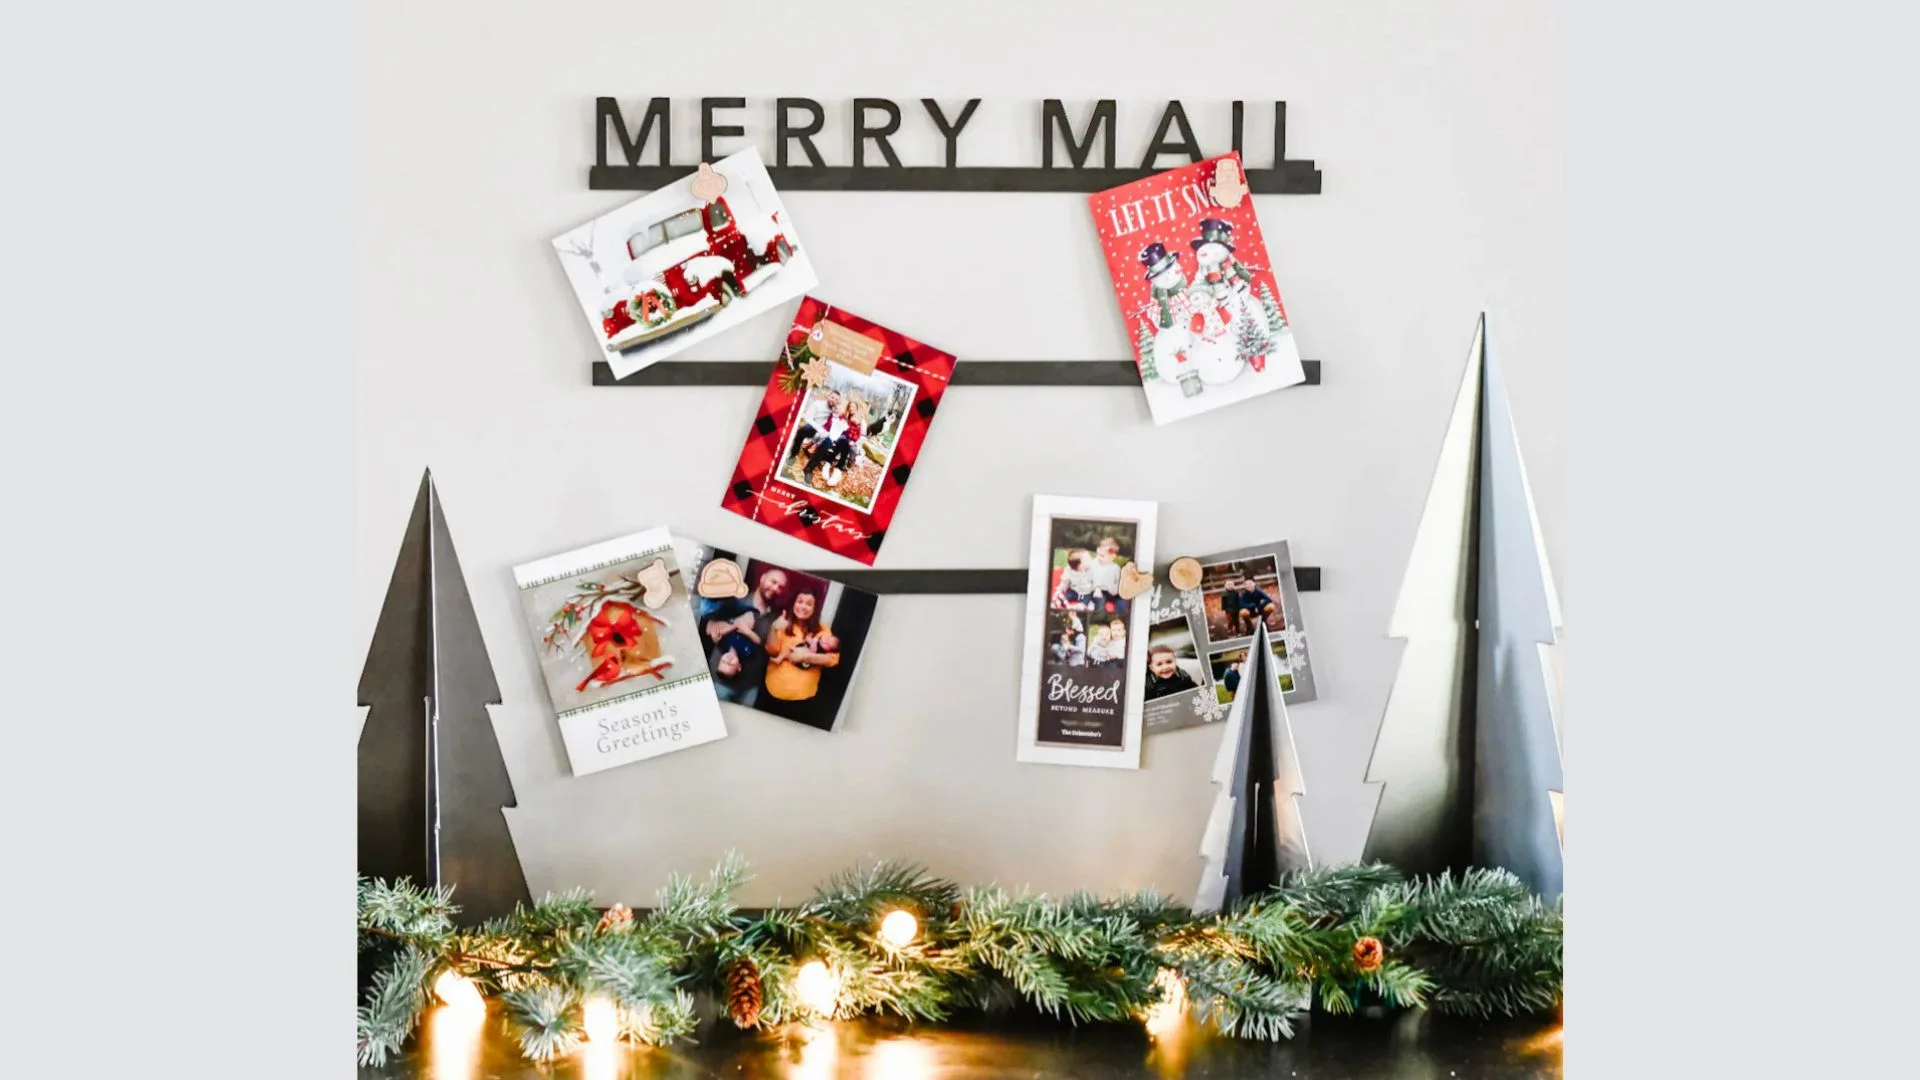
Attach three sprigs of garland to a wooden hanger. Hot glue some pinecones on.
Use small clothespins to clip holiday cards along the garland. Hang it on the wall.
Marbled Tree Ornaments with Nail Polish

Fill a cup with cold water. Drizzle in green nail polish in two shades. Dip wooden mini trees into the mixture.
Hold them upside down until they stop dripping. Let them dry. Add screw eyes and ribbon for hanging.
Each one comes out different.
Candy Cane Everything

Make a garland by tying candy canes together with ribbon. Wrap them around pillar candles. Add peppermints to tablescapes.
The peppermint theme is classic for good reason.
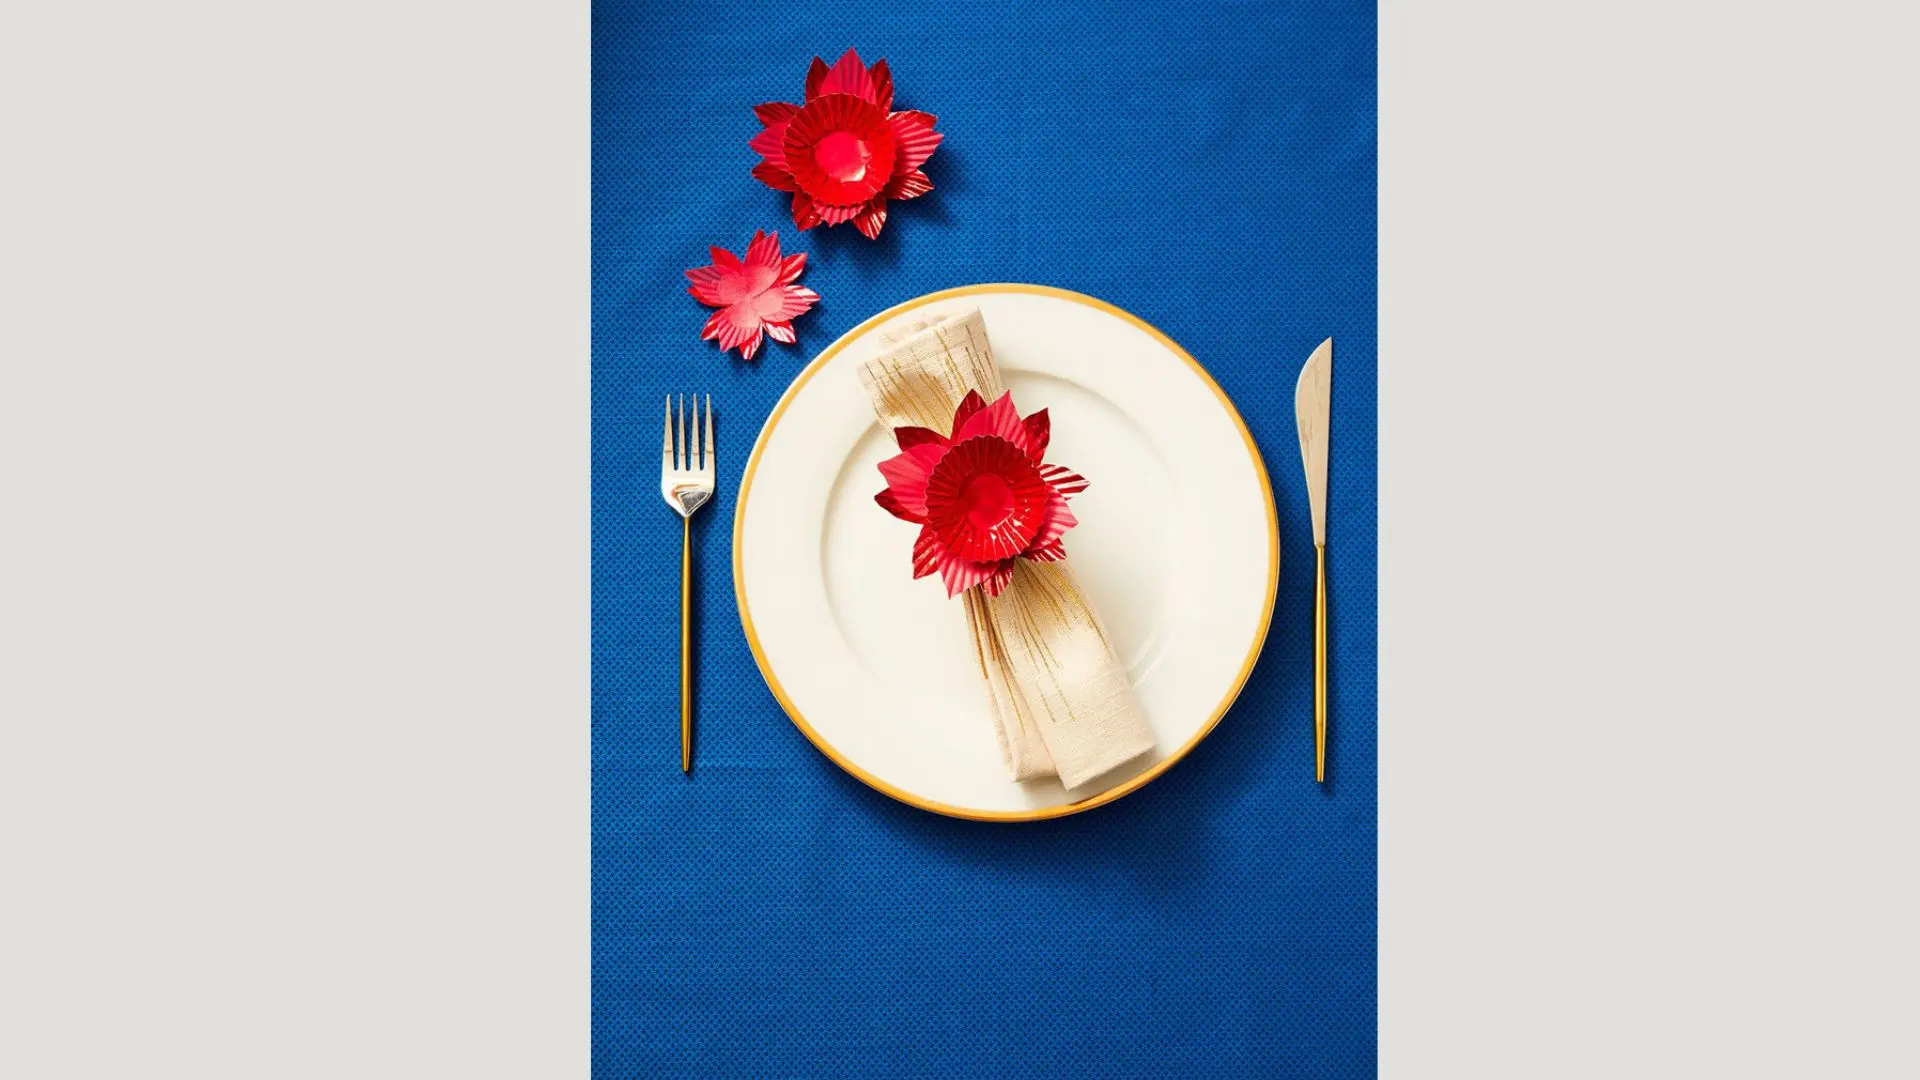
Japanese Wrapping for Place Settings
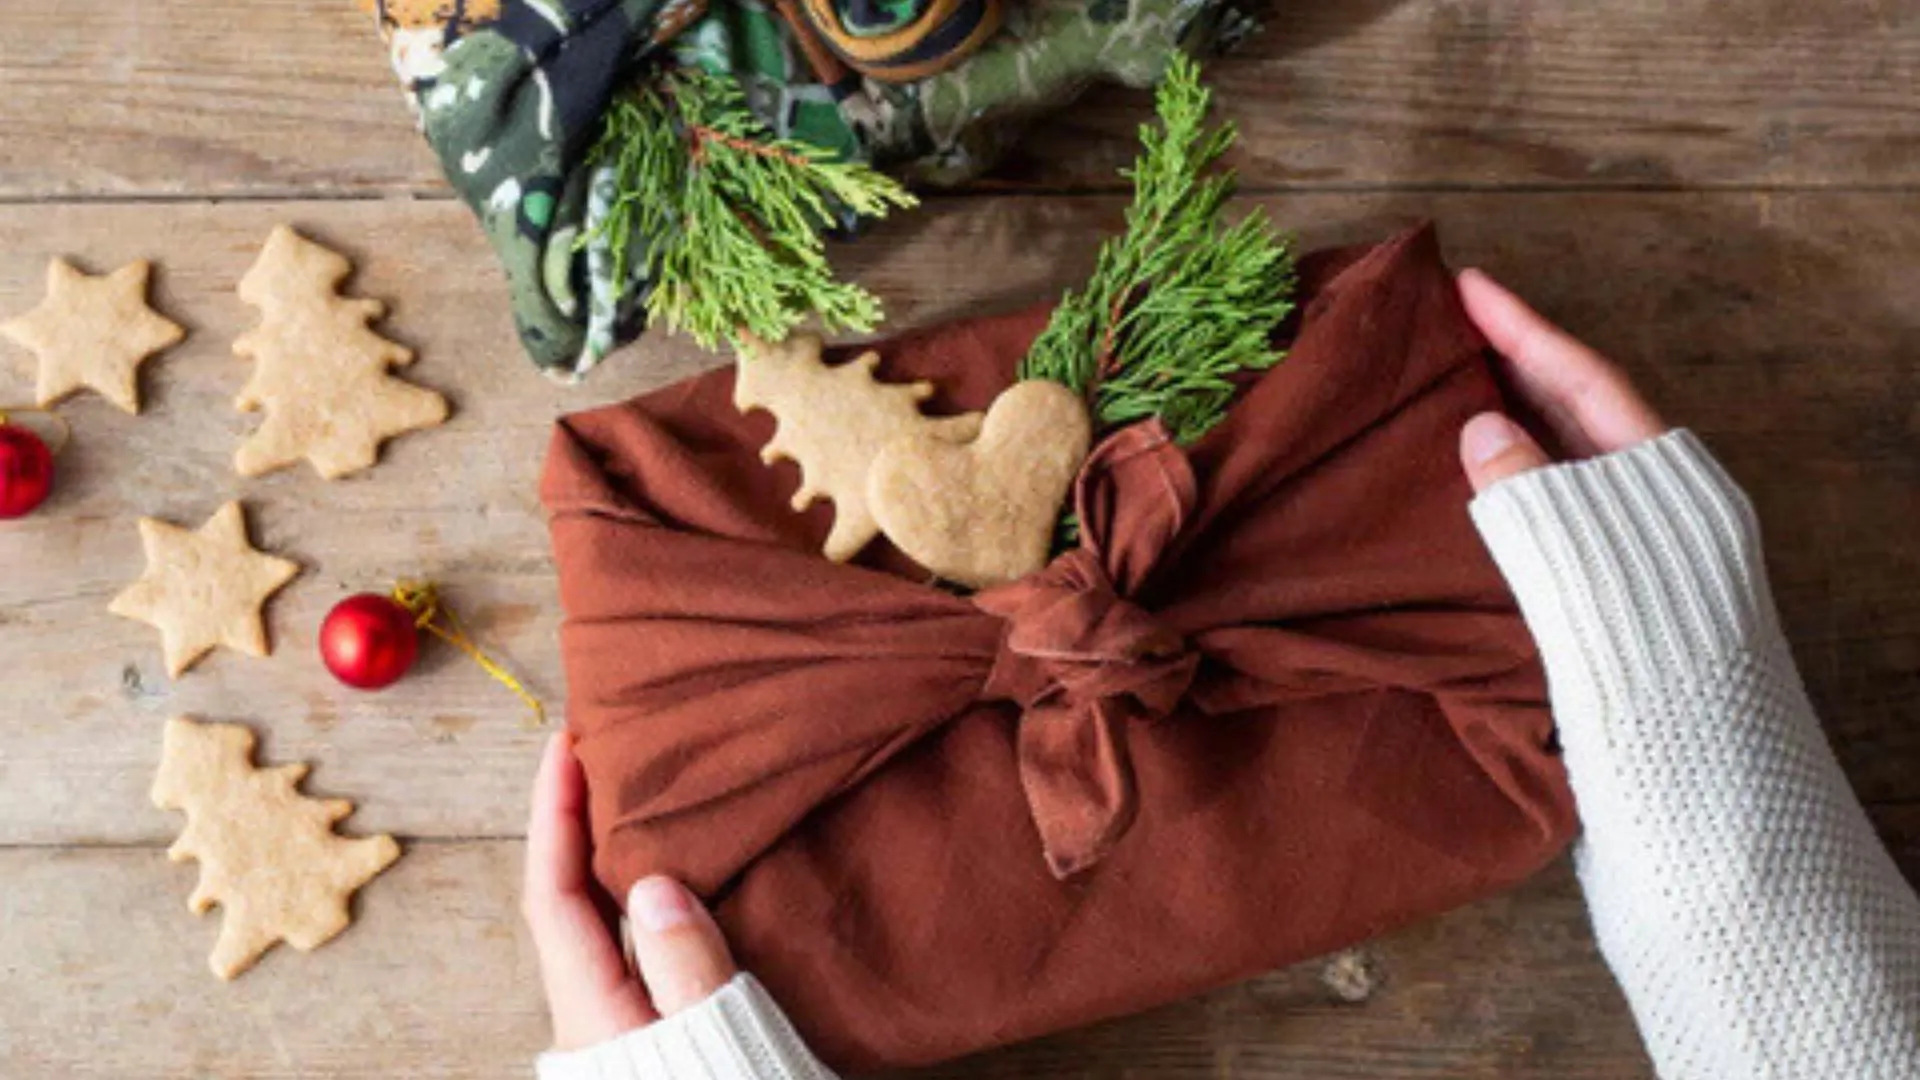
Learn the furoshiki technique. You can wrap a small box with a cloth napkin this way.
It elevates your holiday table. Guests can take the napkins home.
Wood Stockings for Your Mantel
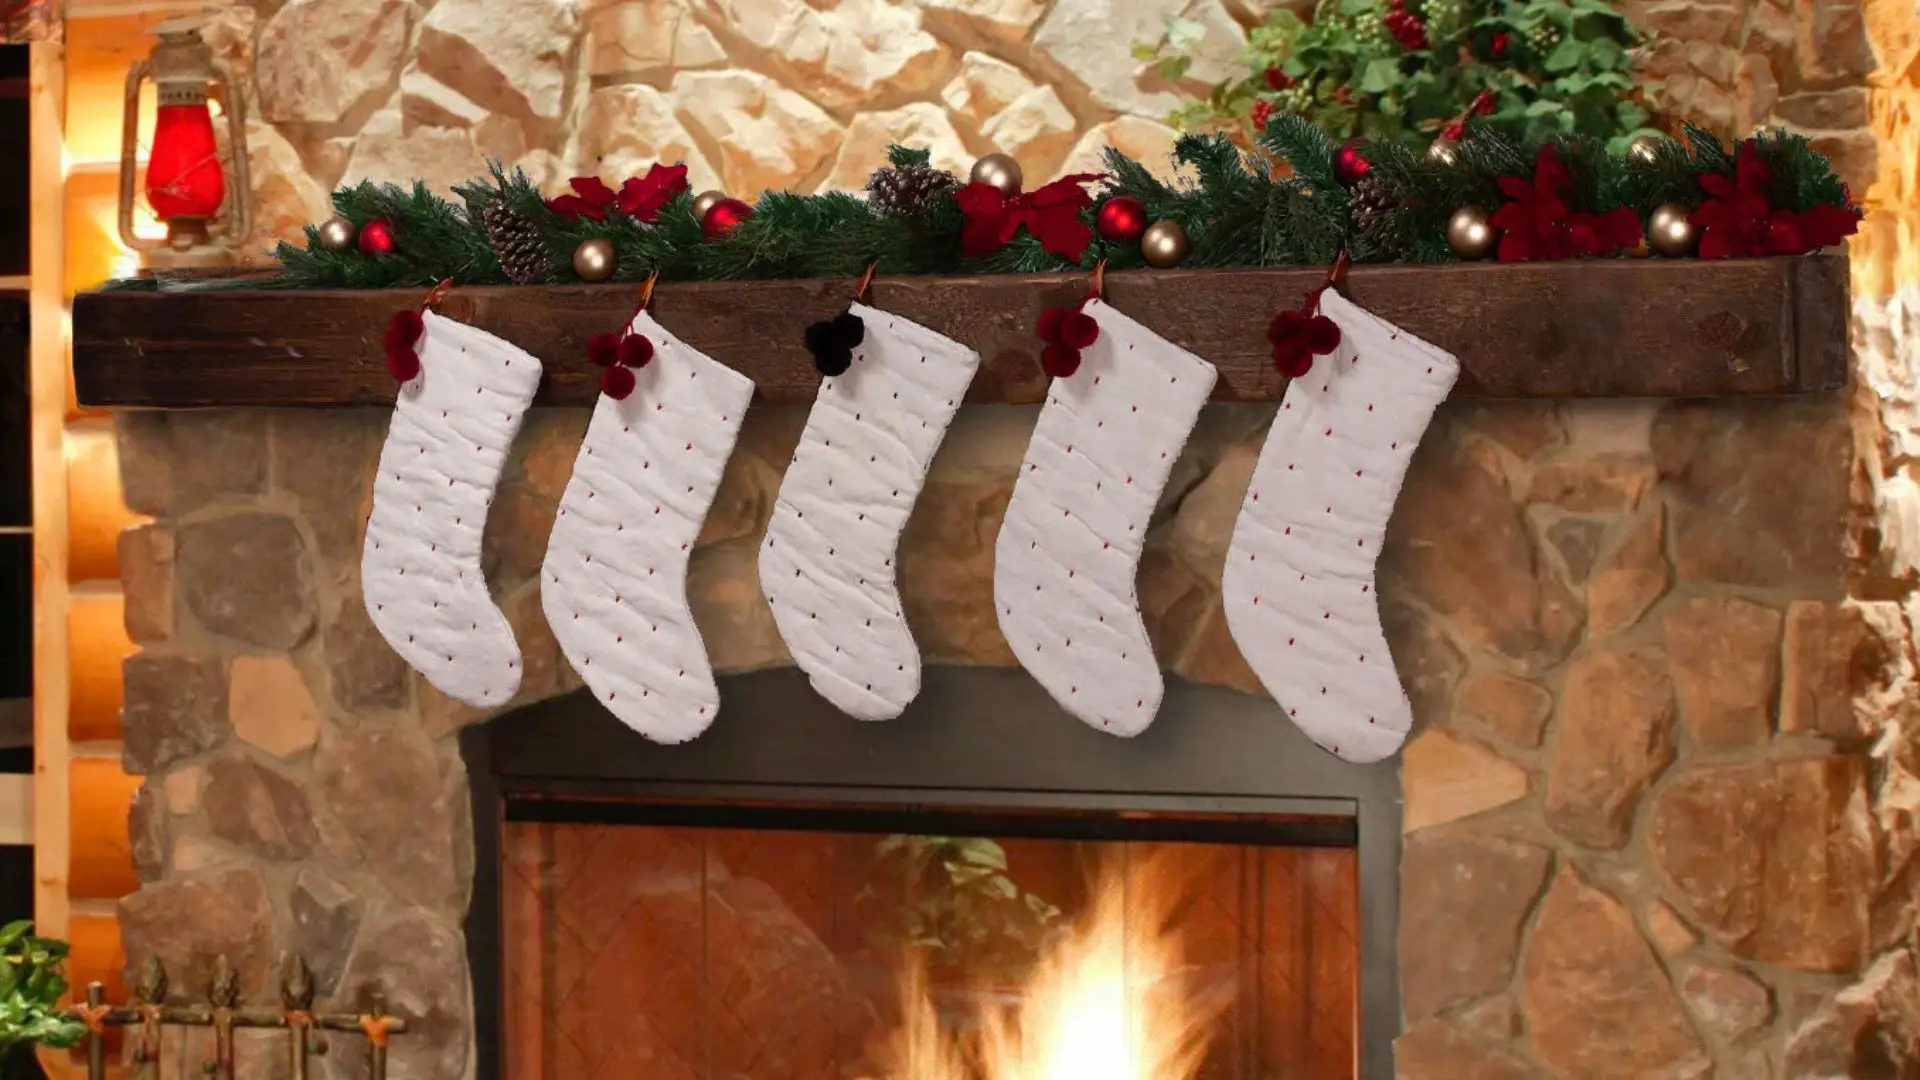
Trace stocking shapes on wood. Cut them out with a jigsaw. Sand the edges smooth. Stain them.
Hang them on your mantel with names painted on.
Holiday Scenes Under Glass Domes
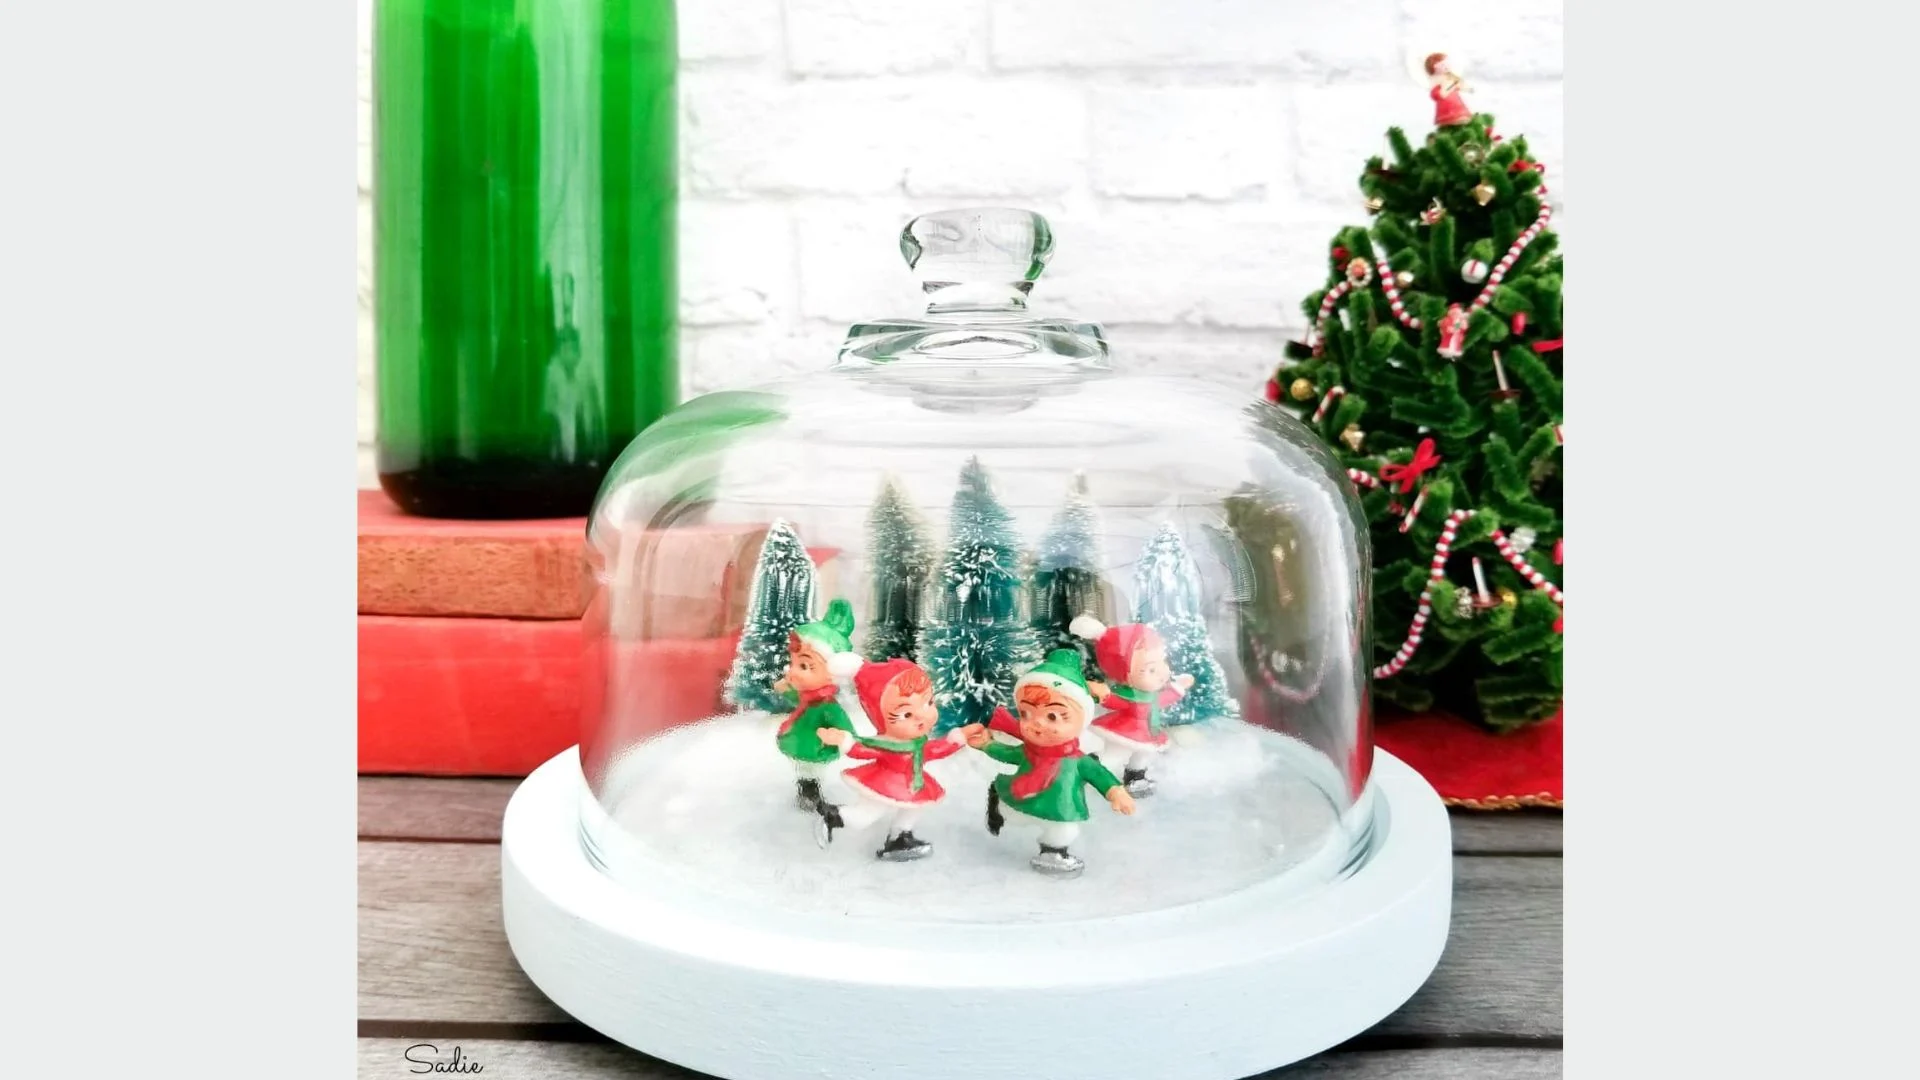
Arrange bottle brush trees, tiny houses, and fake snow under glass cloches or bell jars.
Make several in different sizes. Cluster them on a shelf or mantel.
Gold Leaf Candle Holders
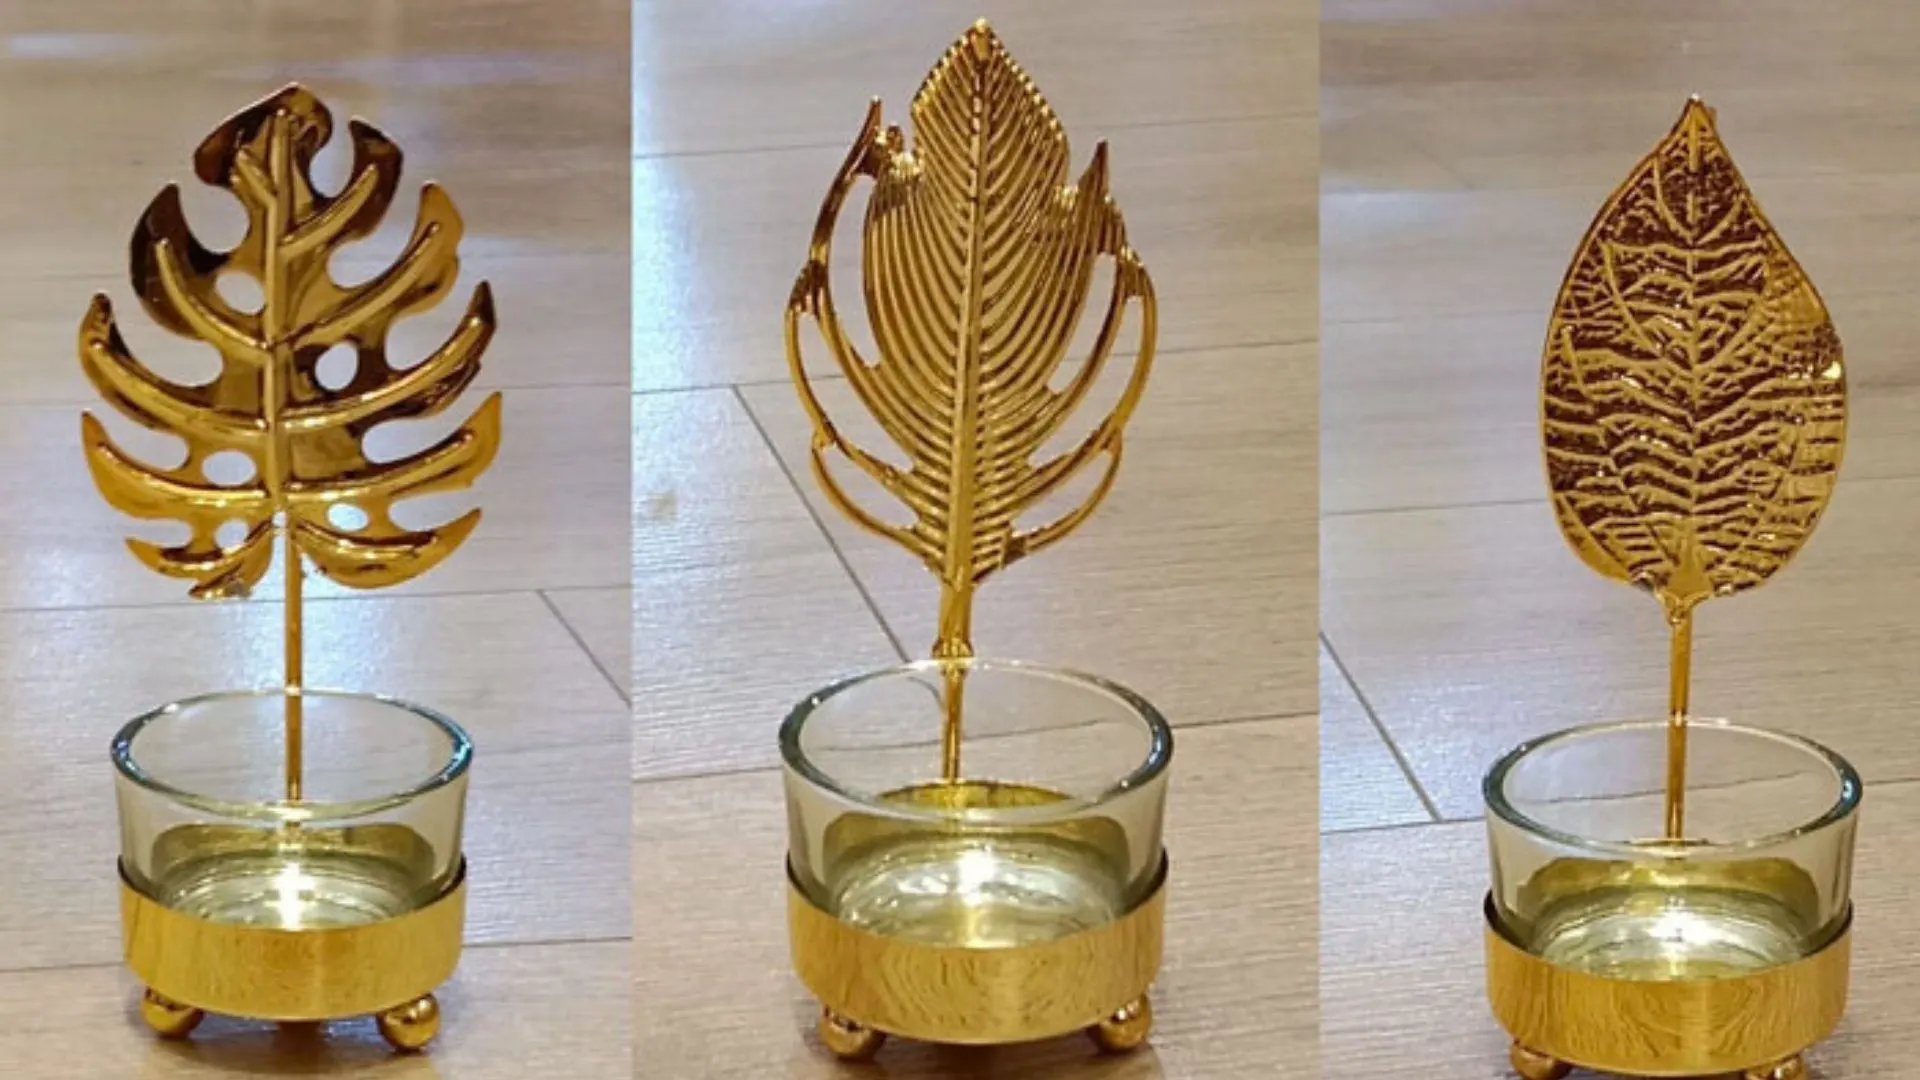
Paint glass candle holders with adhesive. Let it dry for 30 minutes. Press gold leaf sheets onto the adhesive.
Smooth with a soft brush. Let it set. Paint a thin layer of sealer on top.
These look expensive. They’re not.
Felt Advent Calendar in Bright Colors

Cut and sew felt pockets. Number them 1 through 25. Fill with small treats or notes.
Hang it on the wall with cotton rope. Kids check it every morning.
Learn this simple folding technique. It works with any cloth napkin. It takes 30 seconds once you know how.
Your holiday table suddenly looks fancy.
Mitten Christmas Tree on the Wall
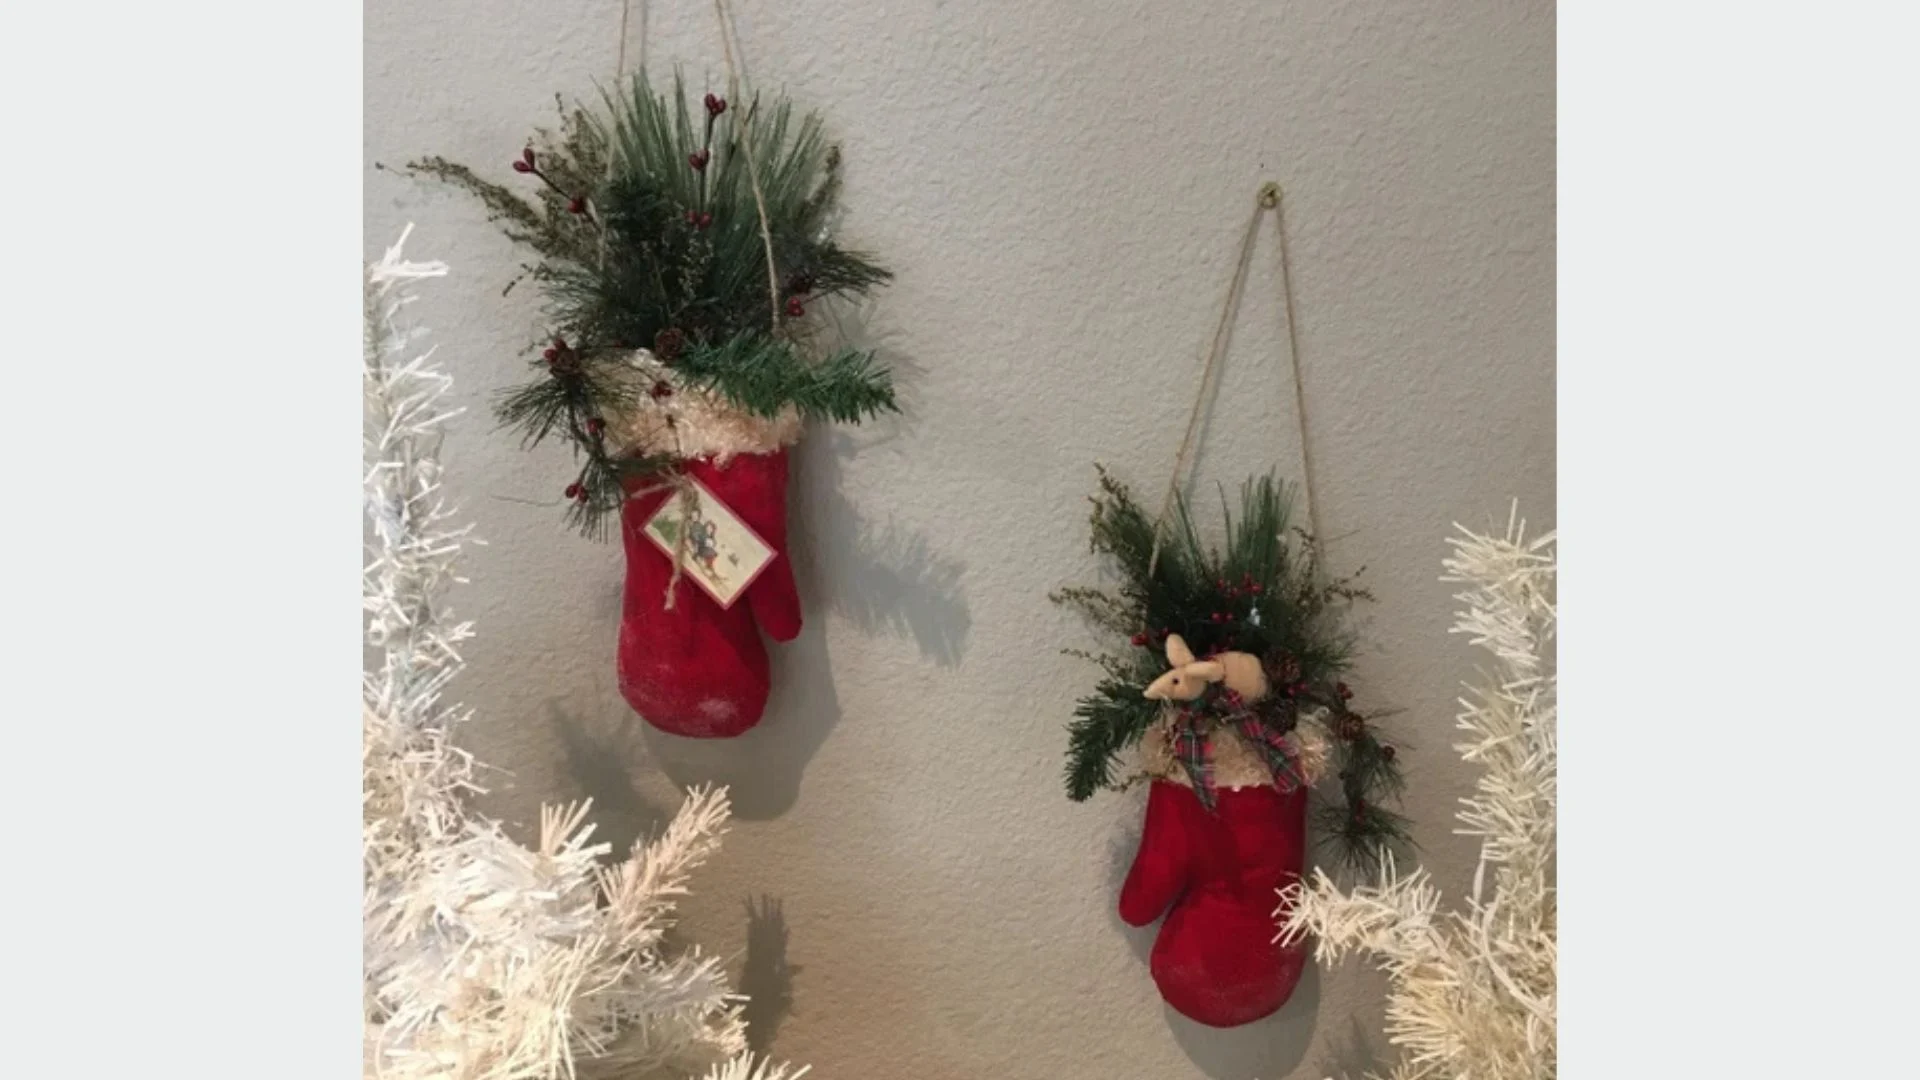
Gather all your family’s mittens. Arrange them on the wall in a tree shape. Use small nails or removable hooks.
Add pom-poms scattered throughout. It’s playful and personal.
Candy Cane Place Card Holders
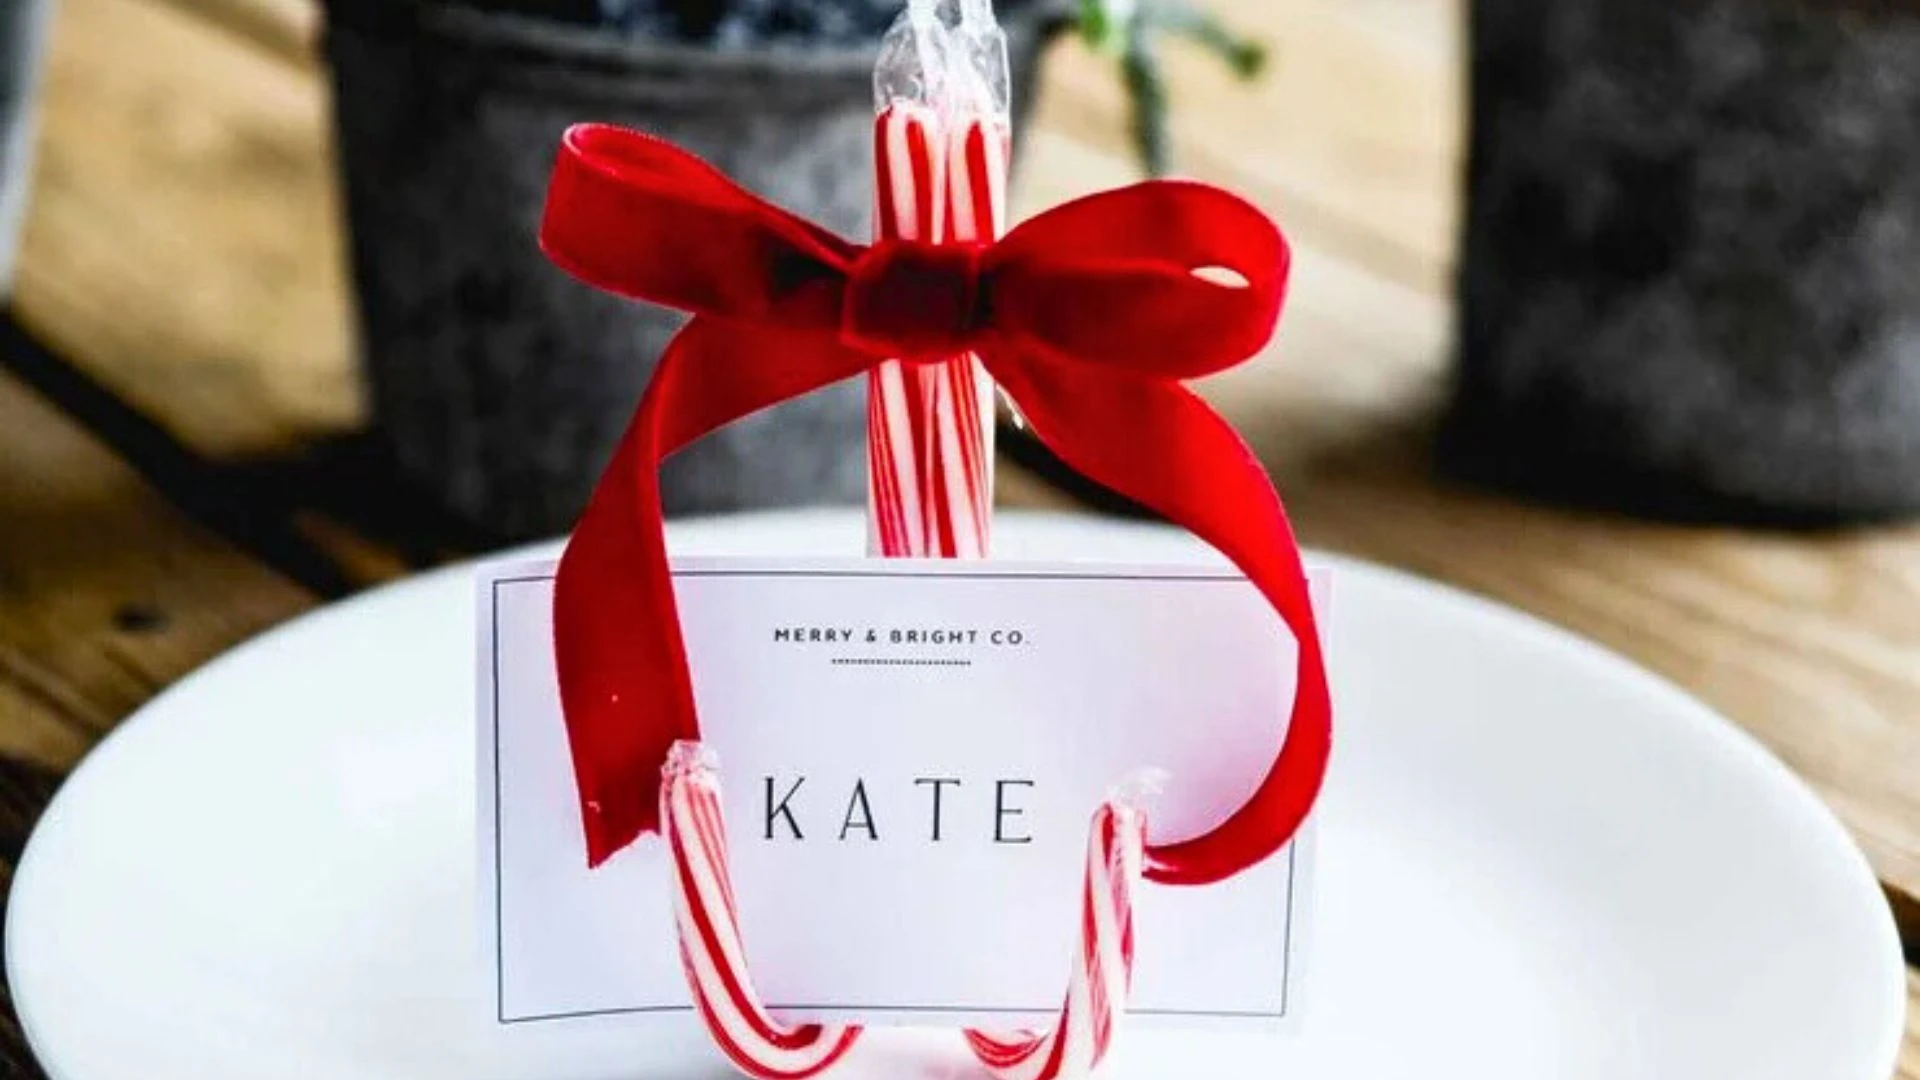
Write names in your best handwriting on small cards. Rest each card on a mini candy cane.
Guests can eat their place card holders after dinner.
Mini Wooden Trees Painted Gold
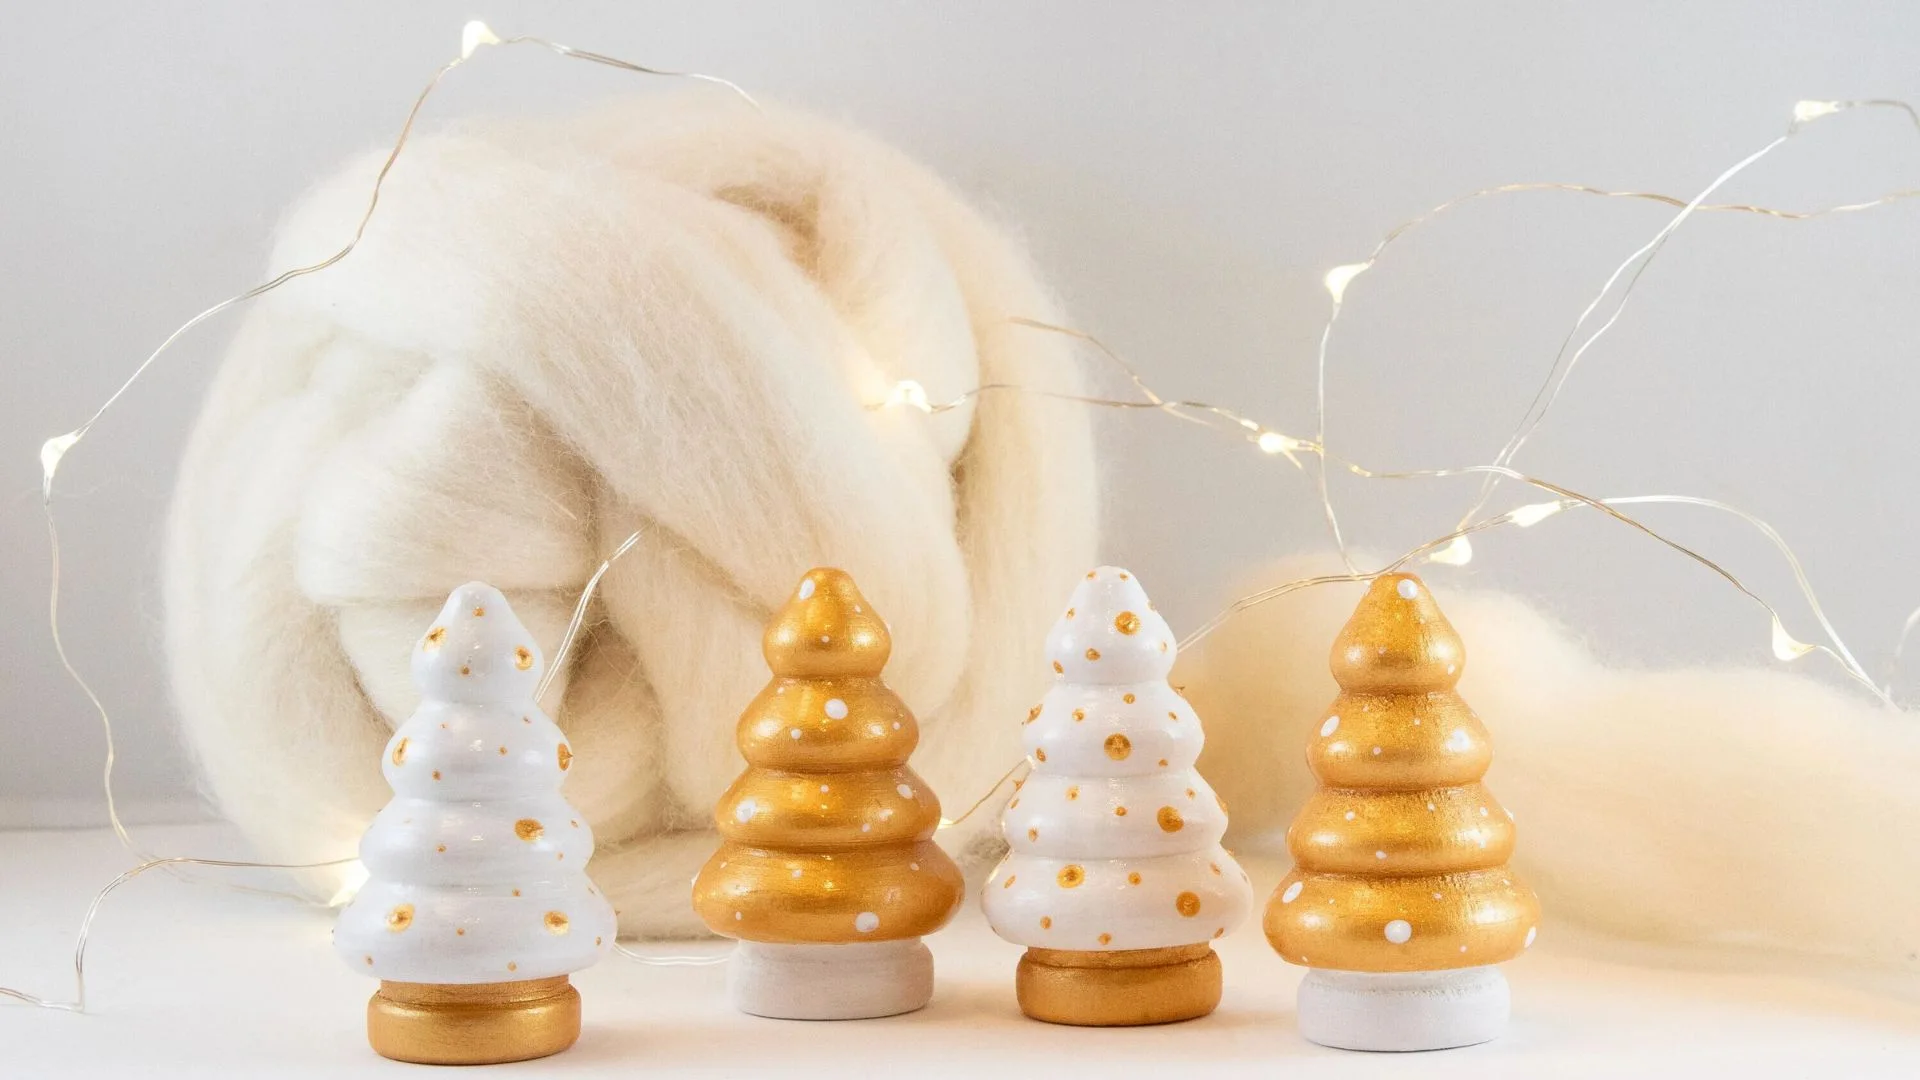
Buy laser-cut wooden tree shapes from the craft store. Paint them with decorative touches in gold.
Make several. Arrange them in a little forest on your buffet table.
Chalk Paint Ornaments You Can Write On
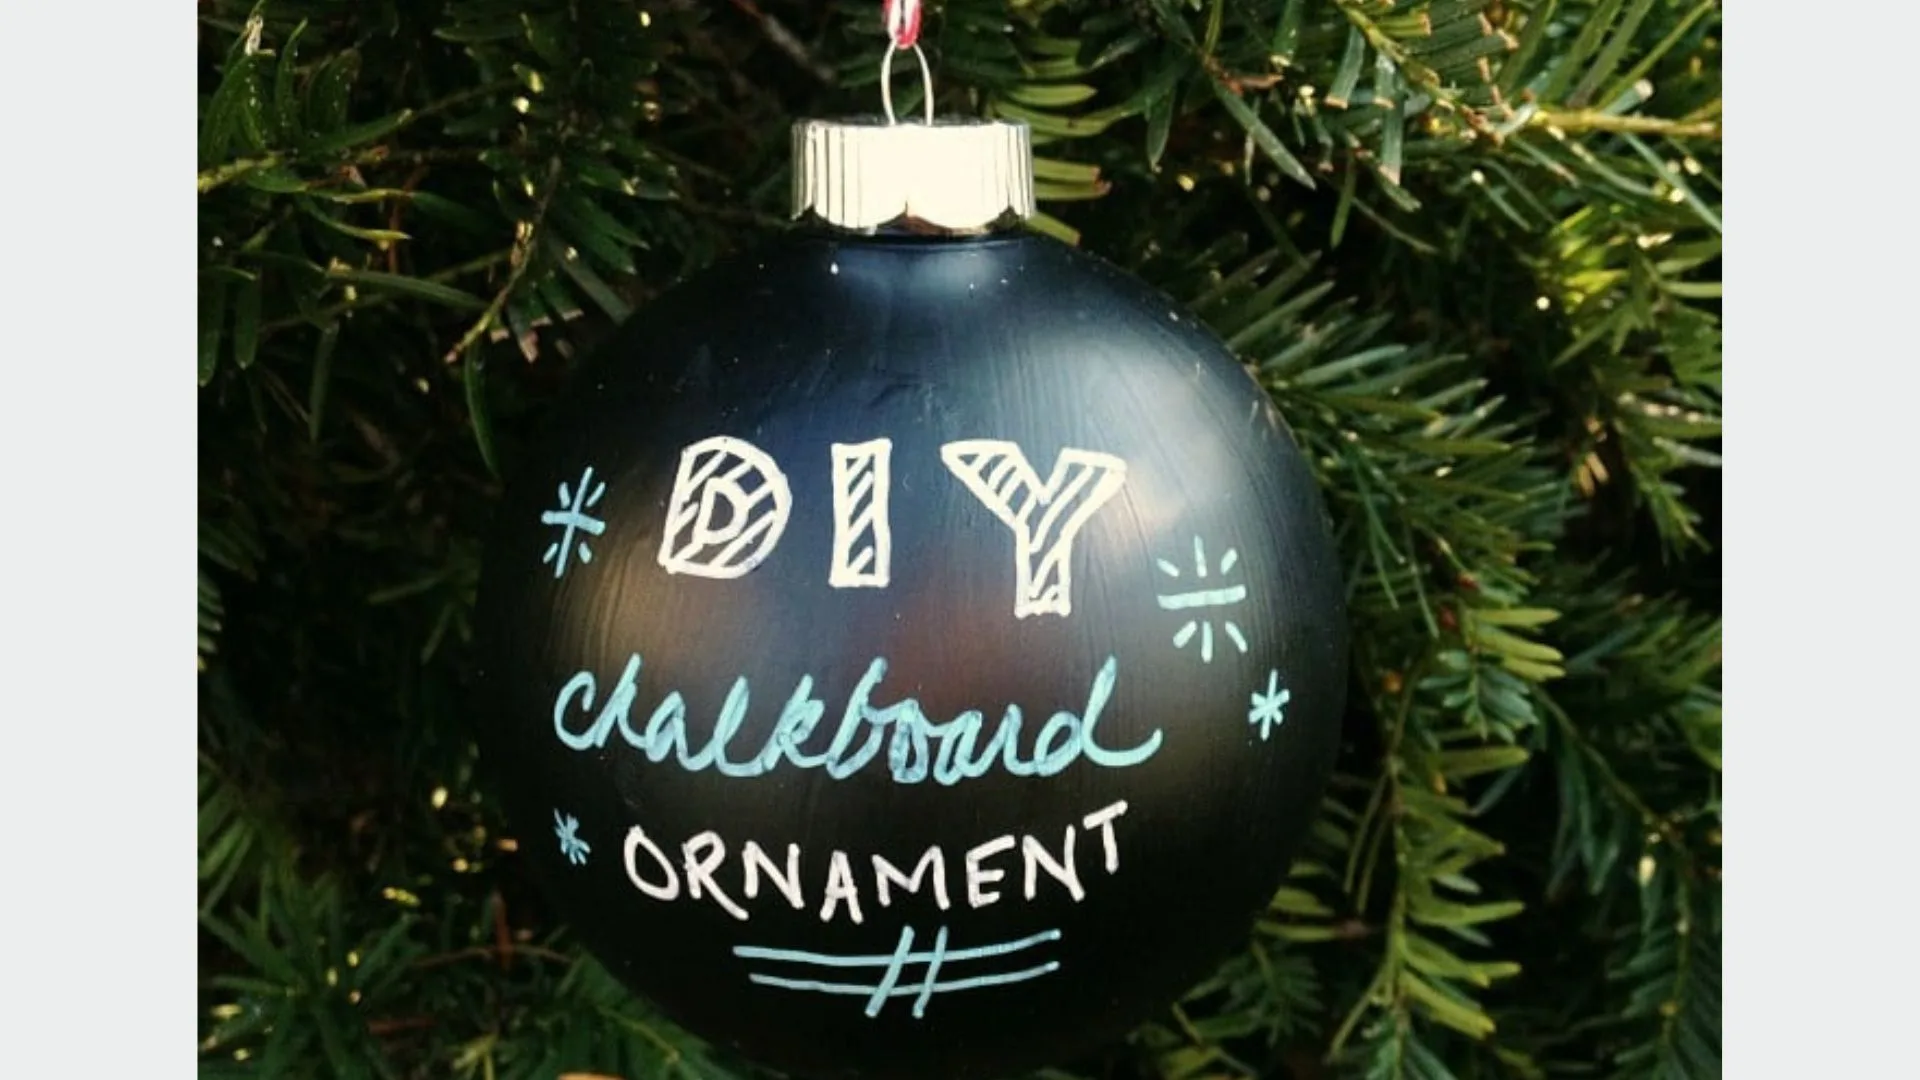
Paint glass ornaments with chalk paint. Let them dry. Write on them with white paint pens.
Add holiday designs or personalize them with names and dates.
Salt Dough Ornaments with Texture
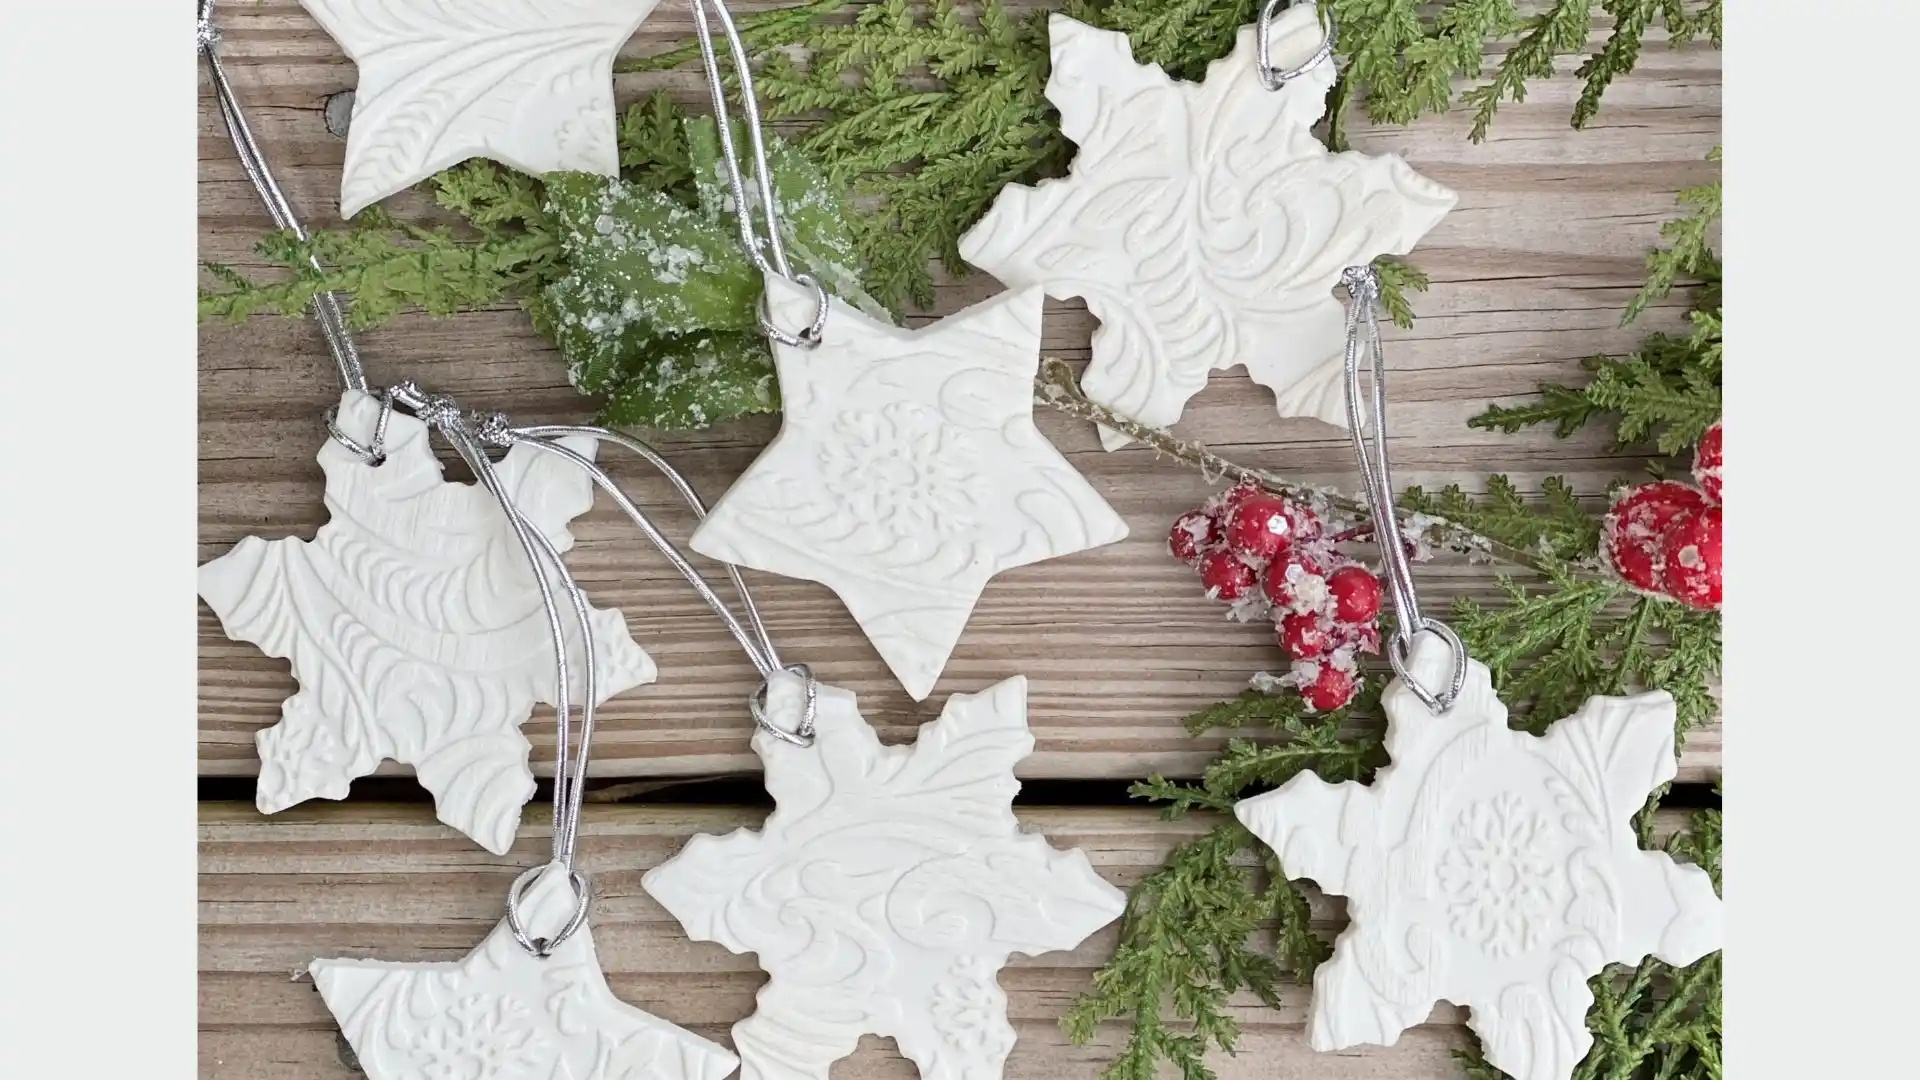
Make salt dough. Press vintage glassware, doilies, or leaves into it to create patterns. Cut shapes with cookie cutters.
Poke holes at the top for ribbon. Bake according to recipe. These have beautiful texture.
Citrus Garland with a Twist
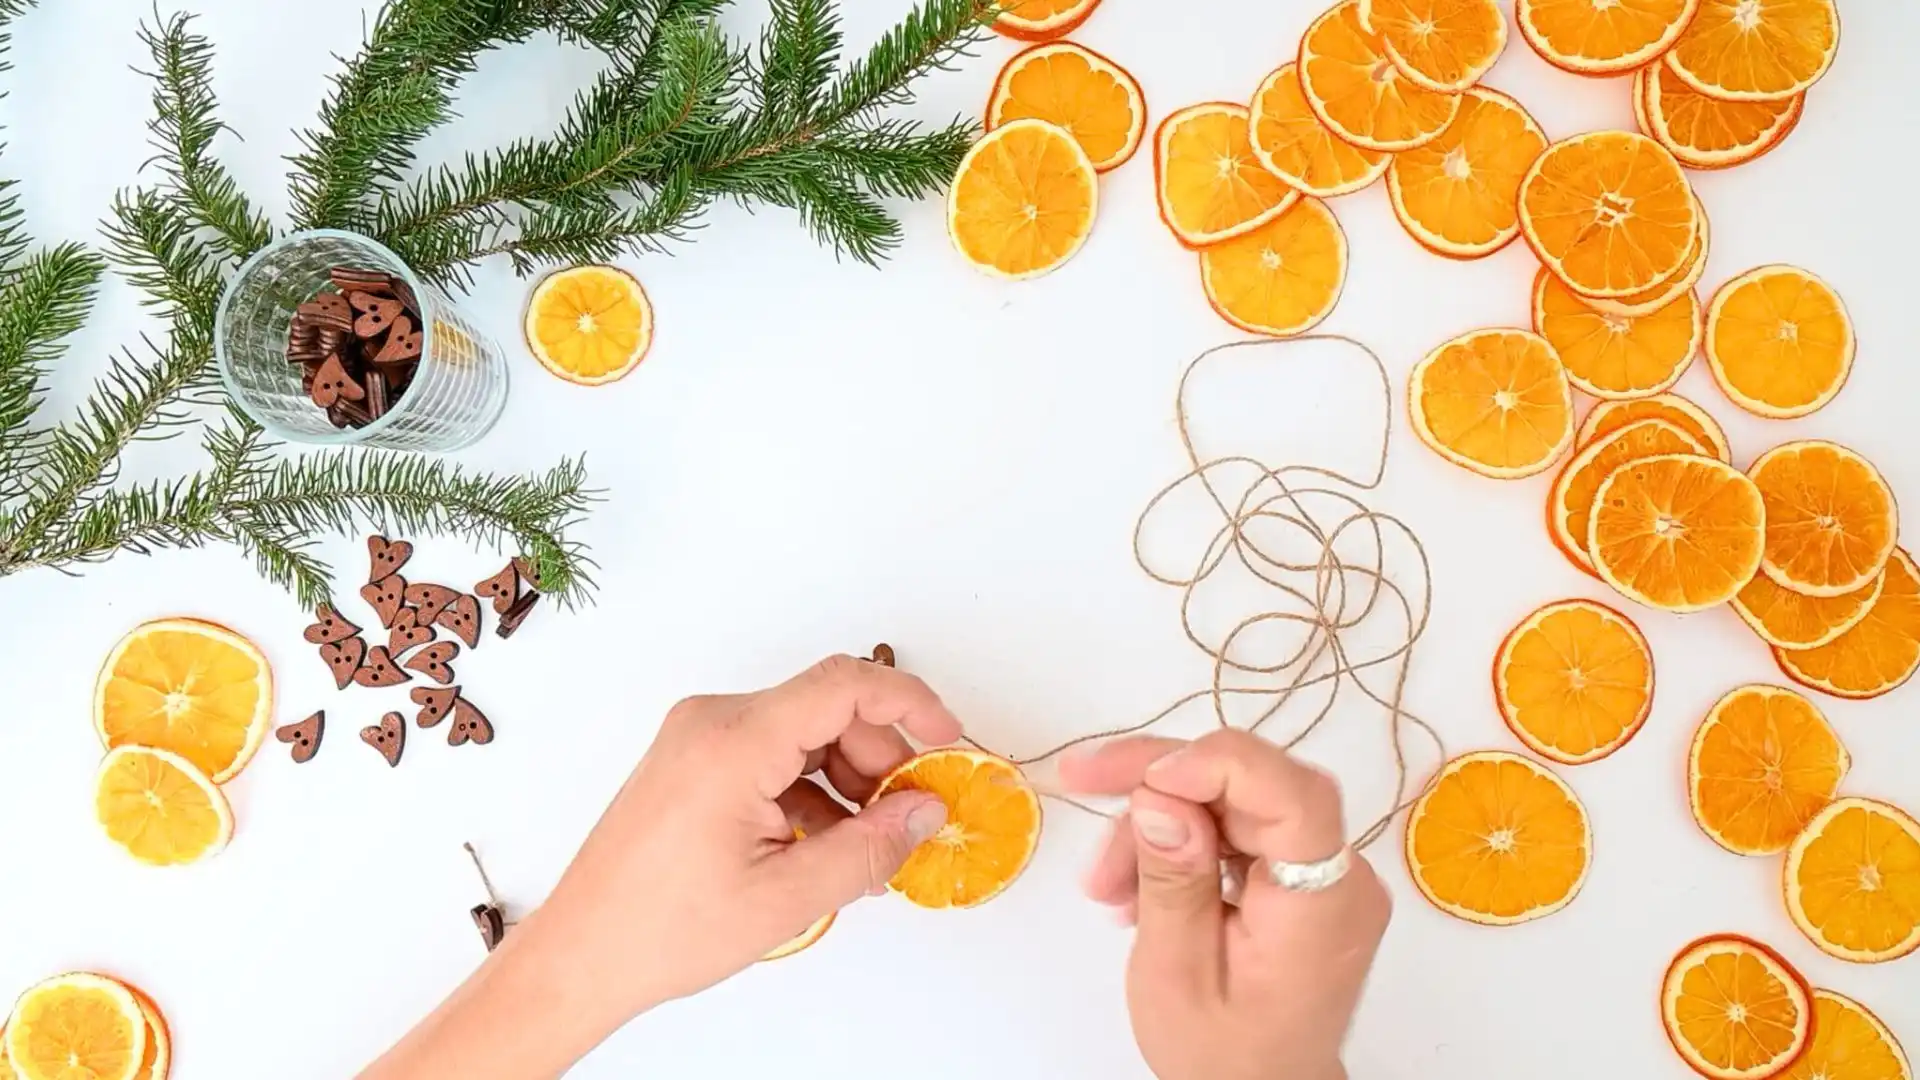
String dried orange slices onto your evergreen garland. The bright orange pops against the green.
Your garland smells citrusy instead of just piney.
Button Gift Toppers
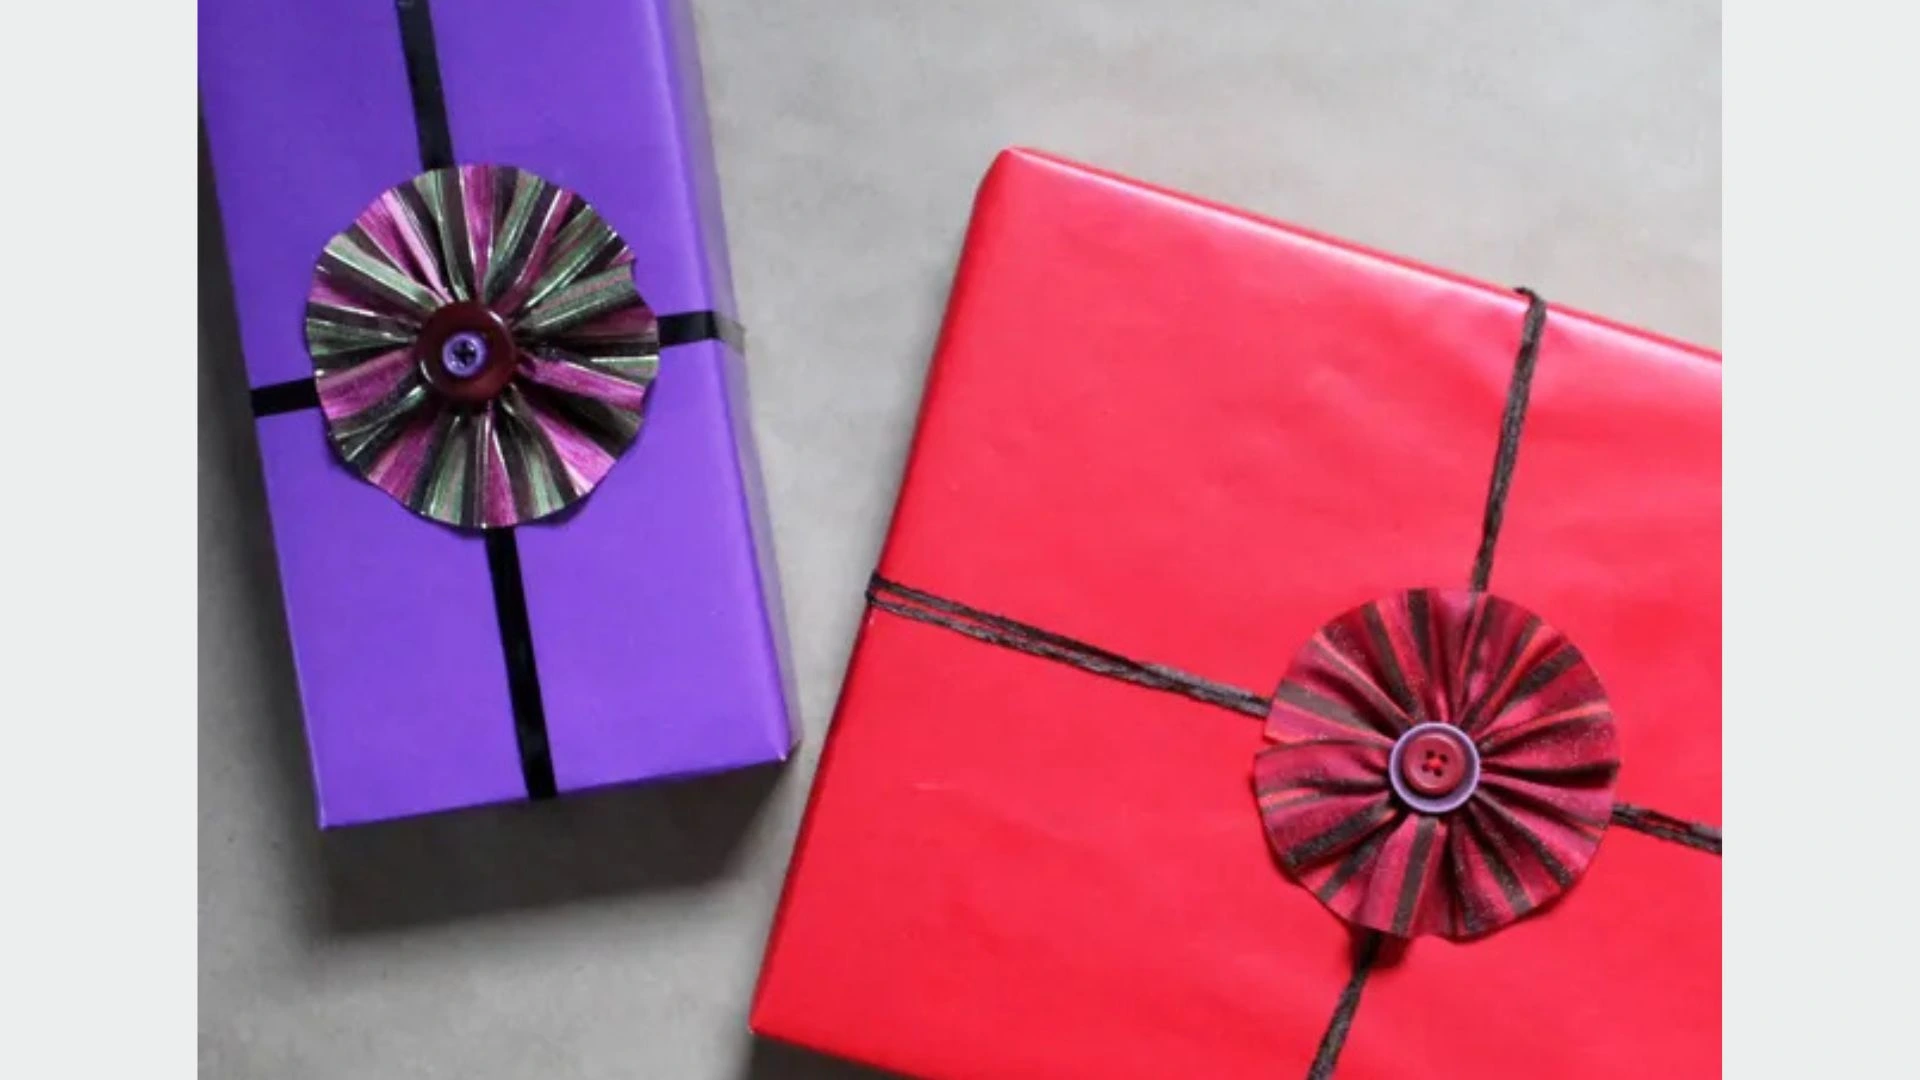
Hot glue buttons right onto wrapped gifts. Use different sizes and colors. Layer them.
The buttons become part of the gift. No more torn-off bows in the trash.
Holiday Card Tree on the Wall
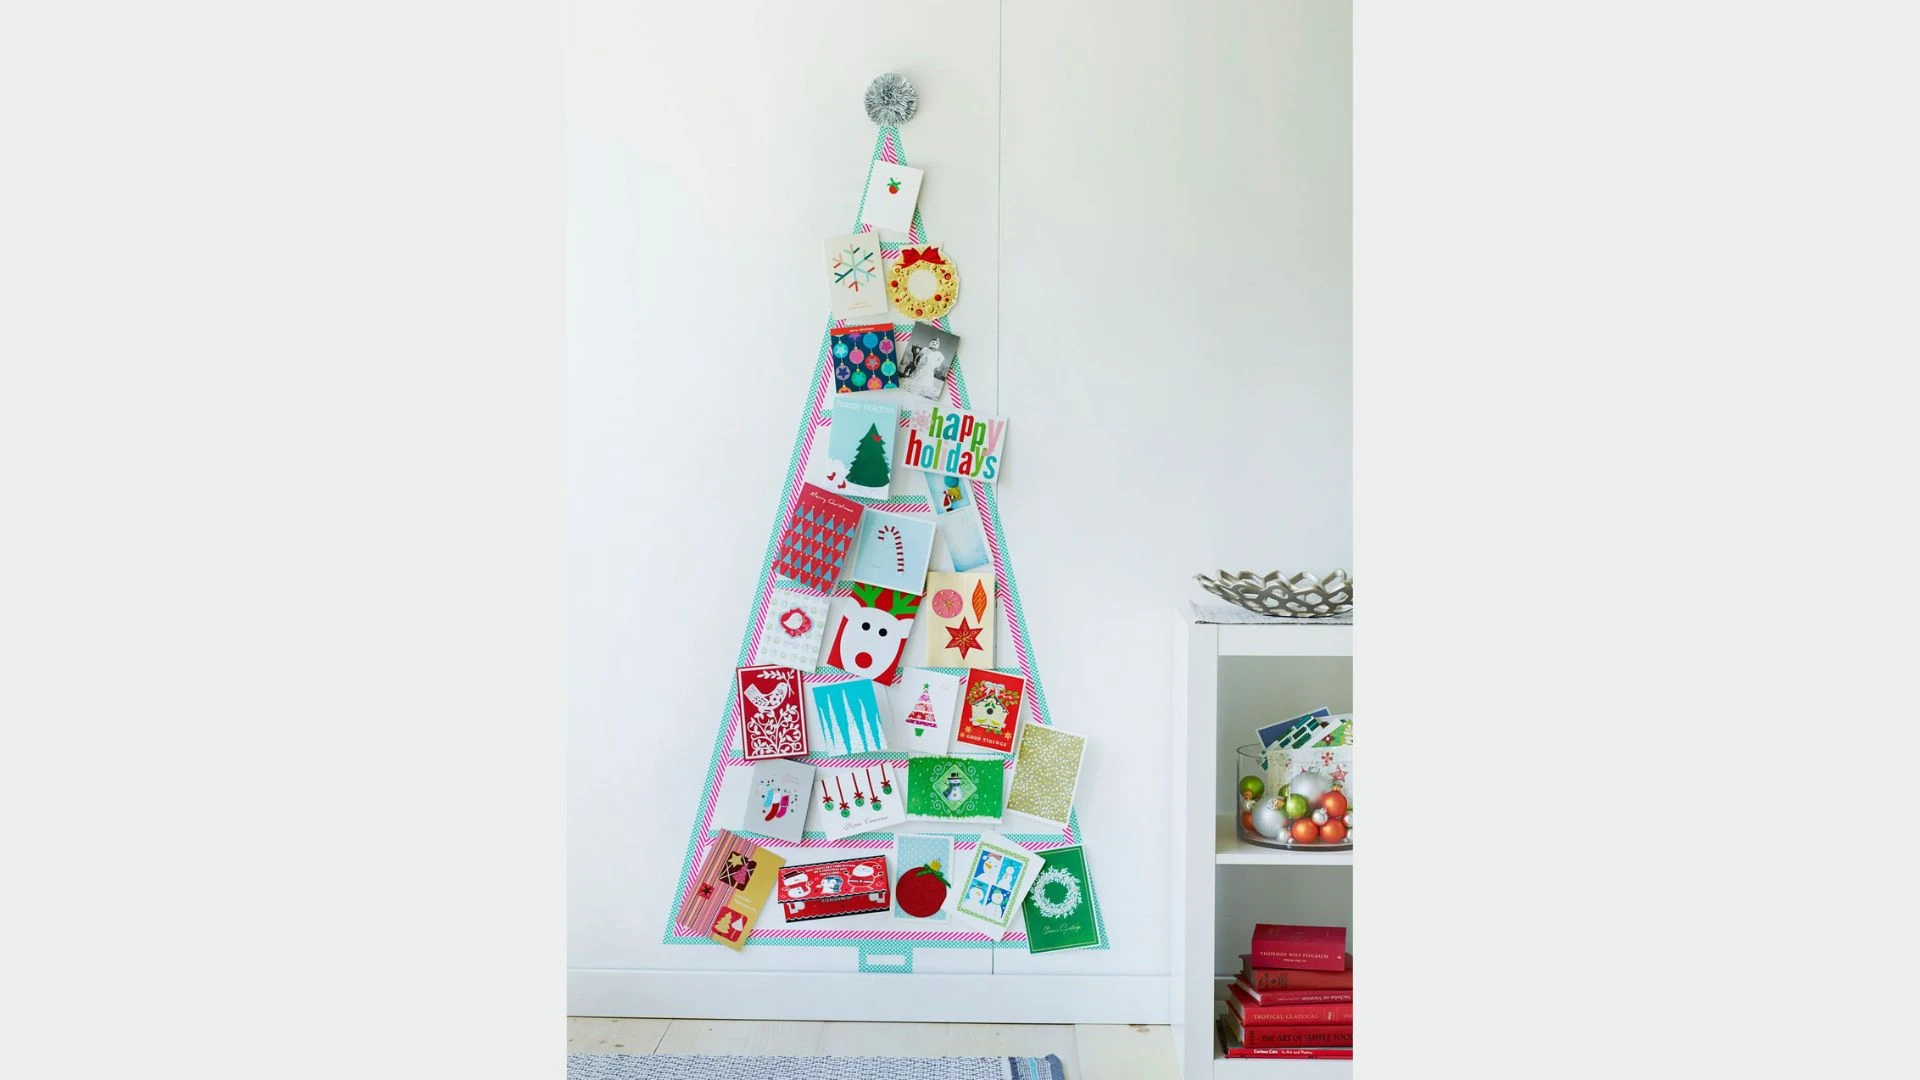
Arrange your holiday cards on the wall in a tree shape. Use removable adhesive.
It becomes a photo opportunity. Your tree grows as more cards arrive.
Clothespin Gift Toppers

Glue a mini deer and bottle brush tree to a clothespin. Attach it to your wrapped gift.
After opening, it becomes a tree ornament. Two decorations in one.
Christmas Light Napkin Rings

Save old Christmas bulbs. Loop red and white baker’s twine around the bottom. Glue it.
Tie them around rolled napkins. Your table looks festive without spending money.
Gift Bow Wreath

Hot glue gift bows all over a wreath form. Fill every space. Use different sizes and colors.
This is a fun project to do while watching Christmas movies. You can use it for years.
Embroidery Hoop Ornaments
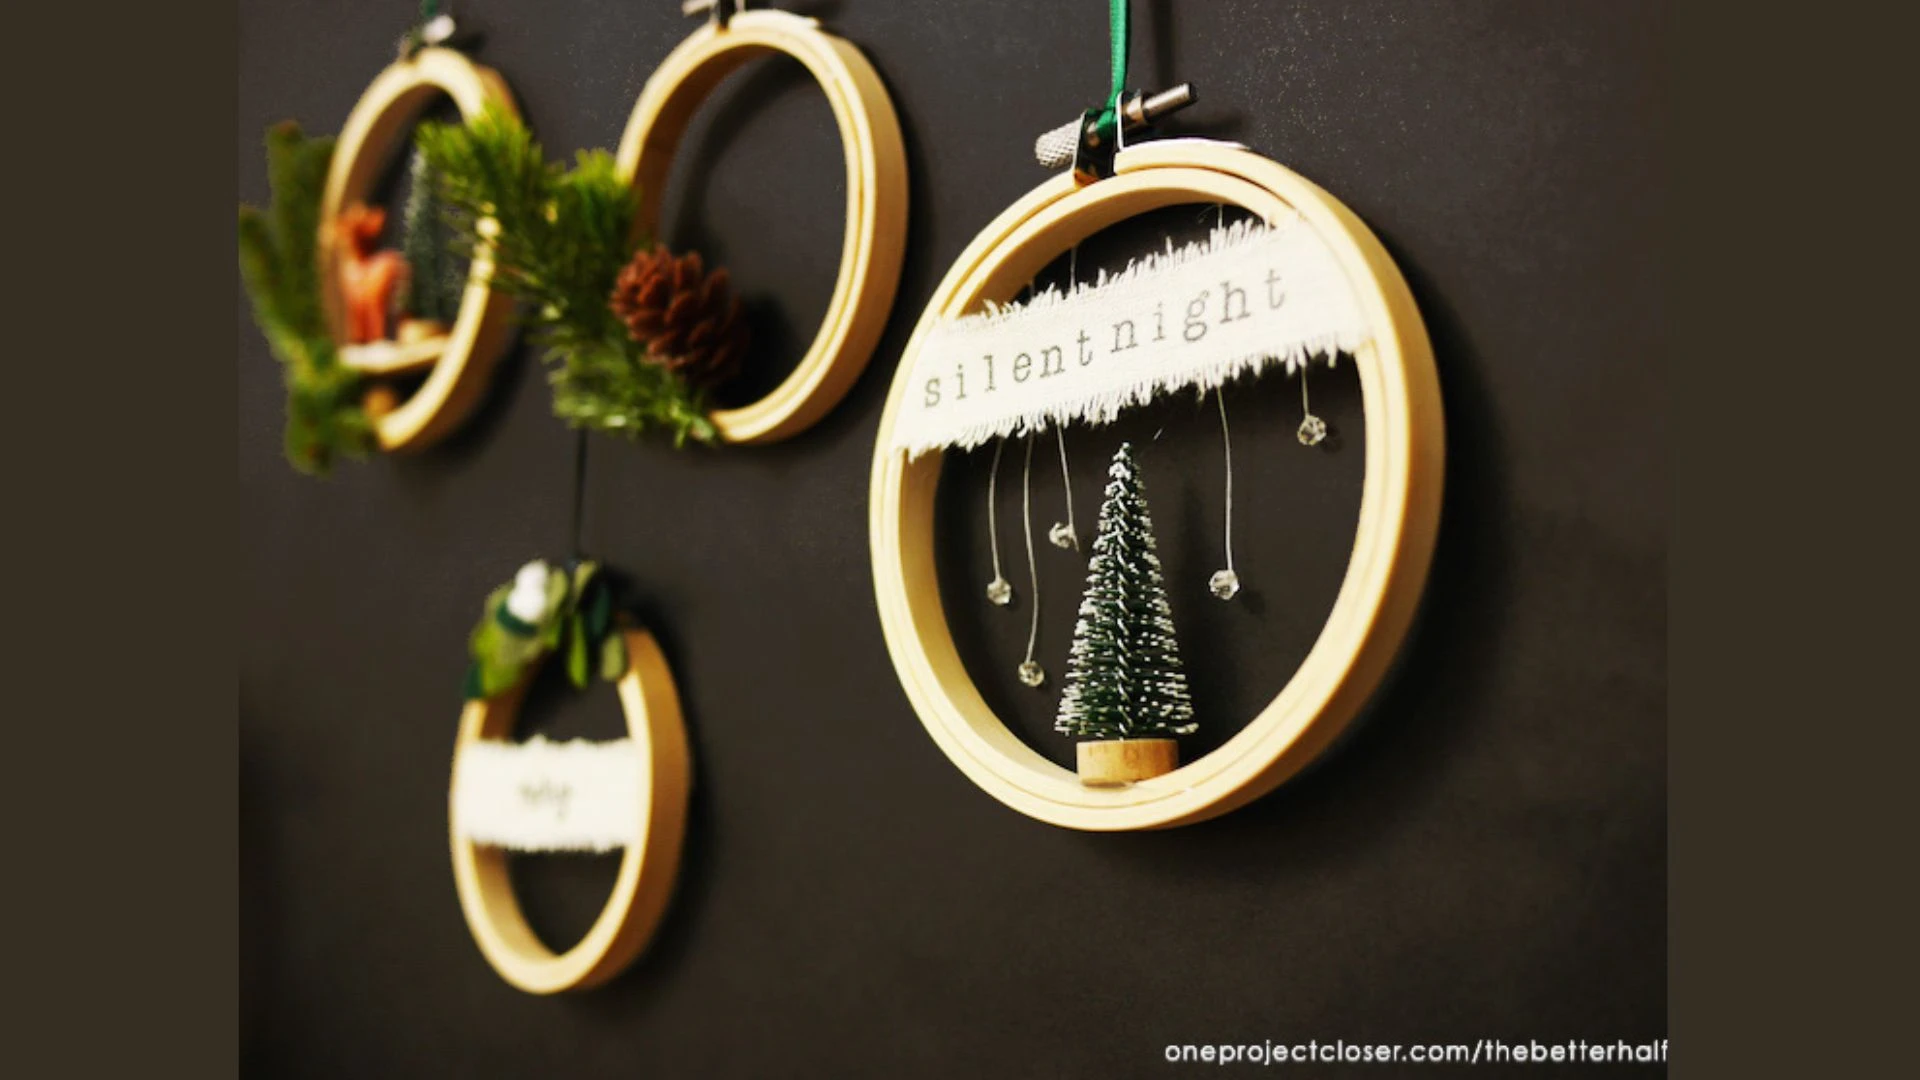
Cross-stitch or embroider a simple holiday pattern in a small embroidery hoop. Hang it from ribbon.
These look handmade in the best way.
Getting Started
Pick three crafts that sound fun. Not overwhelming. Not too ambitious. Just fun.
Gather your supplies. Put on music. Make cocoa. Invite a friend over if you want company.
The point isn’t perfection. The point is making something with your hands. Creating warmth in your home. Building traditions.
Some of these crafts will become your favorites. You’ll make them every year. Others you’ll try once and move on from.
That’s okay. That’s part of the fun.
Your home will smell like cinnamon and pine and hot glue. Your fingers will have glitter under the nails. Your mantel will be crowded with things you made.
And when people visit, they’ll feel the difference. Not because everything matches or looks professional. But because your home feels loved. Lived in. Warm.
That’s what Christmas decorating is really about.
Now go make something beautiful.