Let’s be honest. Most of us love the magic of Christmas decorations. The twinkling lights, the festive wreaths, the cozy holiday atmosphere. But here’s the thing: all that glitter and plastic comes at a cost to our planet.
The good news? You don’t have to choose between a beautiful home and being kind to the Earth. This year, you can create stunning Christmas decorations that are both eco-friendly and elegant. No flimsy-looking crafts. No obvious “I made this from trash” vibes. Just gorgeous, sustainable pieces that your guests will actually admire.
I’ve put together six DIY projects that prove sustainable Christmas decor can look expensive, thoughtful, and totally Instagram-worthy. Whether you live in a small apartment or a spacious house, these ideas work for any space and budget. Let’s make this holiday season both merry and green.

Why Choose Sustainable Christmas Decorations?
Before we jump into the projects, let’s talk about why this matters.
Traditional Christmas decorations often come wrapped in plastic,

shipped from far away, and designed to last just one season. Americans throw away about 25% more trash during the holiday season. That’s an extra million tons of waste each week.
Sustainable decorations change this story. They use natural materials, repurpose items you already own, and create less waste. Plus, they often look more authentic and charming than mass-produced plastic ornaments.
The best part? These projects save you money while helping the planet. It’s a win-win situation.
1. Dried Citrus Garland: Natural Elegance That Smells Amazing

What You’ll Need
- Oranges, lemons, or grapefruits
- Sharp knife
- Baking sheets
- Parchment paper
- Twine or natural jute string
- Needle (optional)
How to Make It
Start by slicing your citrus fruits into rounds about a quarter-inch thick. The thinner your slices, the faster they’ll dry and the more translucent they’ll become.
Pat the slices dry with a paper towel or clean cloth. This speeds up the drying process.
Arrange them on parchment-lined baking sheets. Make sure they don’t overlap.
Pop them in your oven at 200°F (95°C) for about three to four hours. Flip them every hour so they dry evenly. You’ll know they’re done when they feel dry and slightly firm to the touch.
Once cooled, thread them onto your twine. You can poke a small hole near the edge with a needle, or simply tie the string around each slice. Space them out or cluster them together based on your style.
Hang your garland on your mantel, staircase, or Christmas tree. The natural colors look stunning against greenery, and the subtle citrus scent adds a fresh holiday fragrance to your home.
Budget Tip: Use citrus fruits that are starting to look a bit sad in your fruit bowl. They’re perfect for this project and would otherwise go to waste.
2. Pinecone Winter Centerpiece: Rustic Charm in Minutes

What You’ll Need
- Pinecones (collected from outside)
- A wooden tray, bowl, or basket
- Battery-operated fairy lights
- Natural elements like sprigs of evergreen, cinnamon sticks, or dried berries
- Optional: white paint or beeswax for a frosted look
How to Make It
First, clean your pinecones. Give them a gentle shake to remove dirt and debris. If you want to be extra cautious about bugs, bake them at 200°F (95°C) for 30 minutes.
For a snowy effect, lightly brush the tips with white paint or dip them in melted beeswax. Let them dry completely.
Arrange the pinecones in your chosen container. Mix in some evergreen sprigs for color and texture. Tuck in a few cinnamon sticks for that cozy holiday scent.
Weave battery-operated fairy lights throughout the arrangement. The warm glow makes everything look magical in the evening.
Place your centerpiece on your dining table, coffee table, or entryway console. It instantly adds a festive, natural touch to any space.
Small Space Tip: Create a mini version using a small wooden bowl on your desk or bedside table. Even a tiny pinecone arrangement brings holiday cheer to compact spaces.
3. Fabric Scrap Ornaments: Zero-Waste Tree Decorations
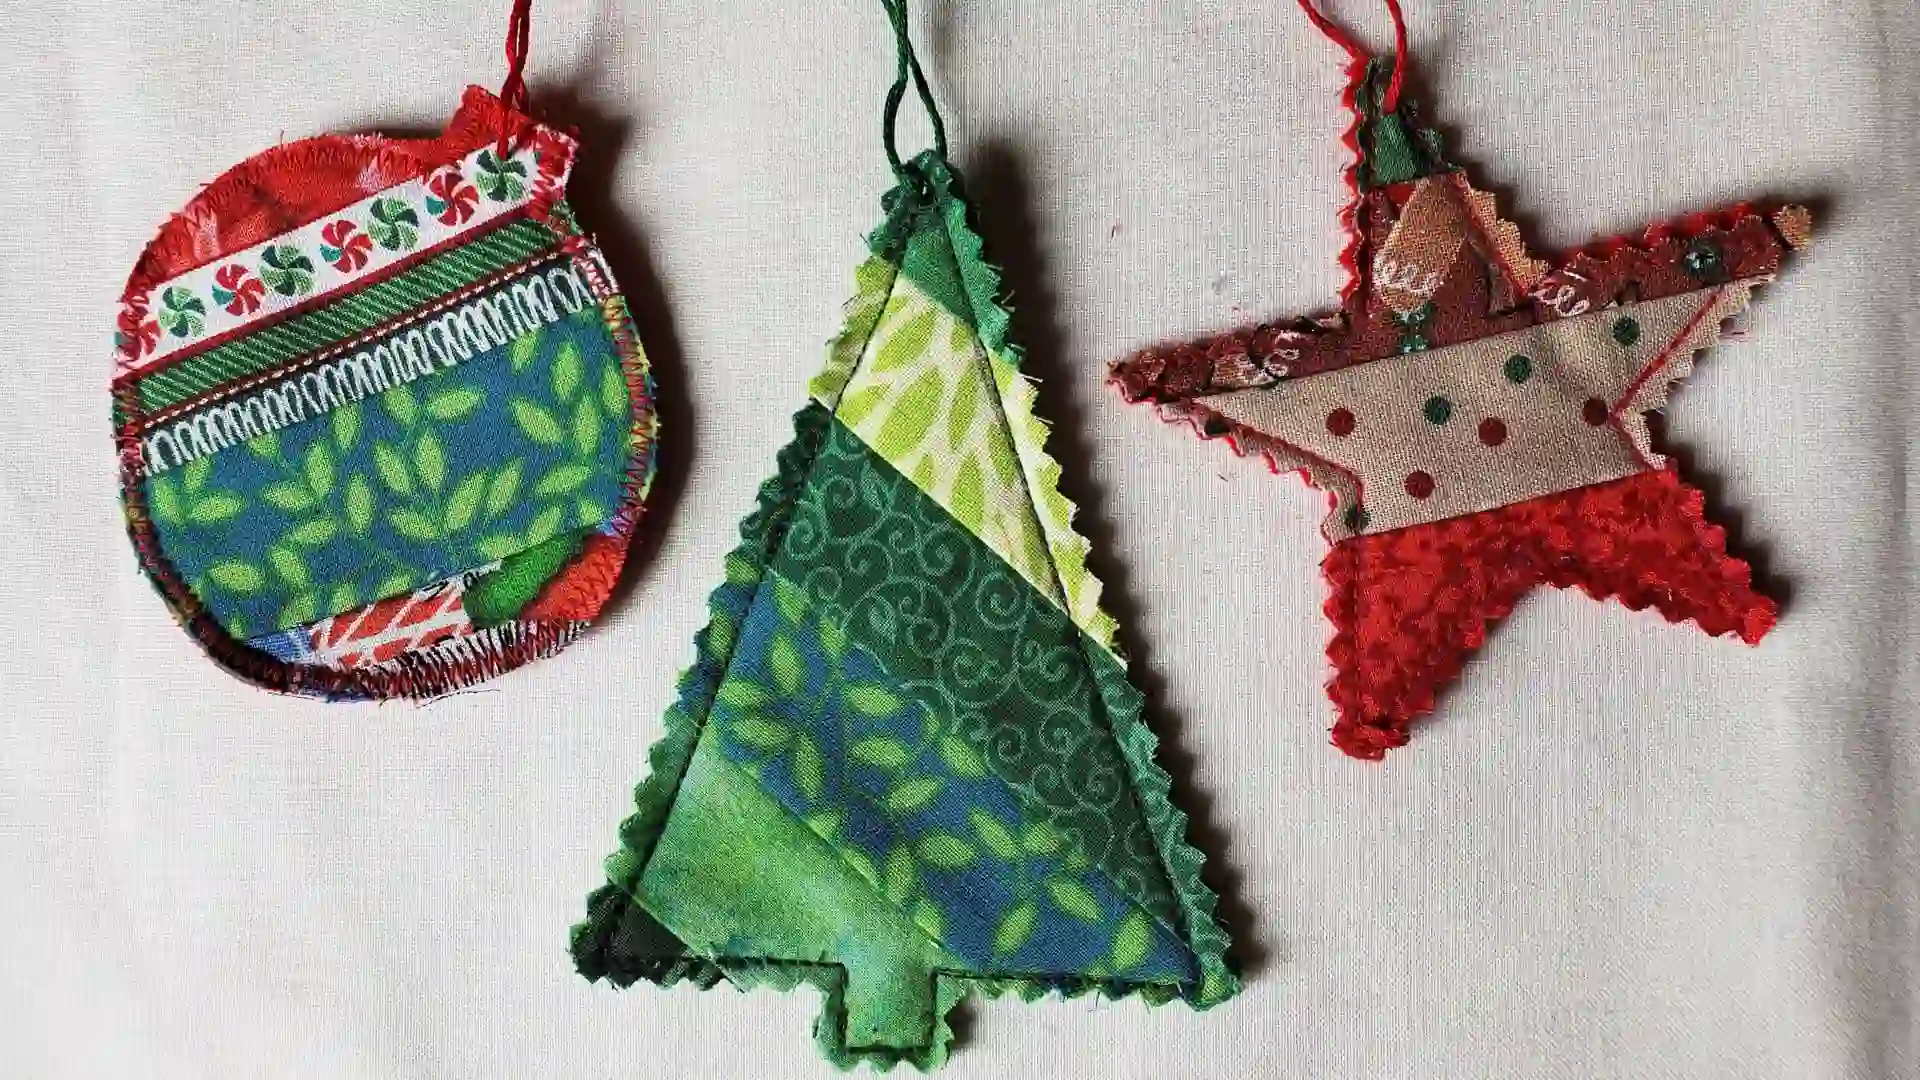
What You’ll Need
- Fabric scraps from old clothes, bedding, or craft projects
- Embroidery hoop (small, 3-4 inches)
- Scissors
- Ribbon or twine for hanging
- Optional: stuffing from old pillows, dried lavender

How to Make It
Cut your fabric into circles slightly larger than your embroidery hoop. Choose festive patterns or colors, or mix and match for an eclectic look.
Separate the two rings of your embroidery hoop. Place the fabric over the smaller ring, then press the larger ring over it. Pull the fabric tight so it creates a smooth surface.
Trim any excess fabric from the back. You can leave it as is, or add a fabric backing for a cleaner finish.
If you want to make padded ornaments, place a bit of stuffing or dried lavender between two fabric layers before securing them in the hoop. This creates a soft, dimensional look.
Tie ribbon or twine through the hoop hardware for hanging.
These ornaments look surprisingly sophisticated. They add texture and color to your tree while giving new life to fabric that would otherwise end up in a landfill.
DIY Tip: This is a perfect project for using fabric from sentimental clothing that’s too worn to wear but too special to throw away. Your grandmother’s old scarf or your baby’s first onesie can become a cherished ornament.
4. Mason Jar Snow Globes: Upcycled Magic
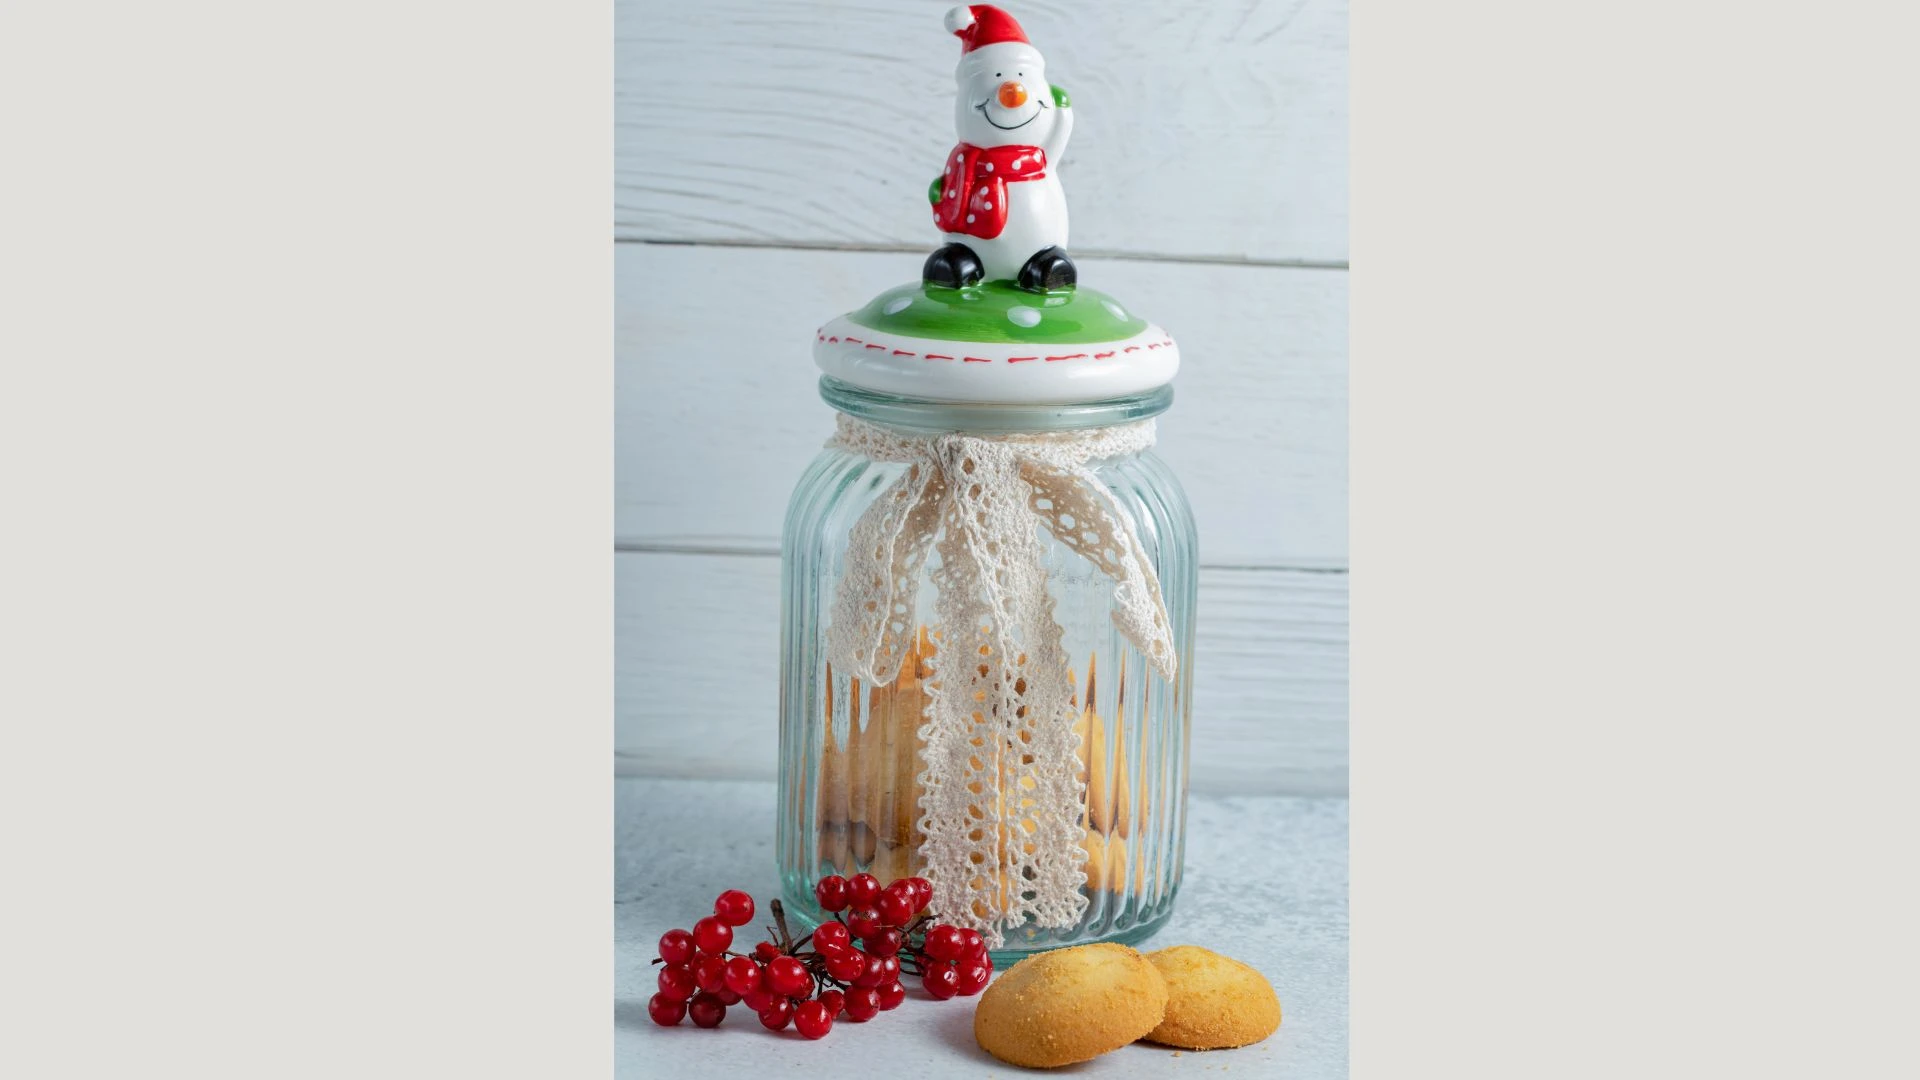
What You’ll Need
- Clean mason jars (any size)
- Small figurines, pinecones, or branches
- Epsom salt or coarse sea salt
- Waterproof glue or hot glue gun
- Ribbon or twine
How to Make It
Glue your chosen figurine or natural element to the inside of the jar lid. Let it dry completely. This is important because you want everything secure.
Fill the jar about halfway with Epsom salt or sea salt. This creates your “snow.”
You can add small sprigs of evergreen or tiny pinecones around your main figurine.
Screw the lid back on tightly. Turn the jar upside down so the lid becomes the base.
Wrap ribbon or twine around the jar rim for a finished look.
These snow globes look beautiful on windowsills where natural light makes them glow. They’re also perfect for giving as gifts because they feel personal and thoughtful.
Budget Tip: Use jars from pasta sauce, pickles, or jam instead of buying new mason jars. Just remove the labels with warm soapy water and a bit of scrubbing.
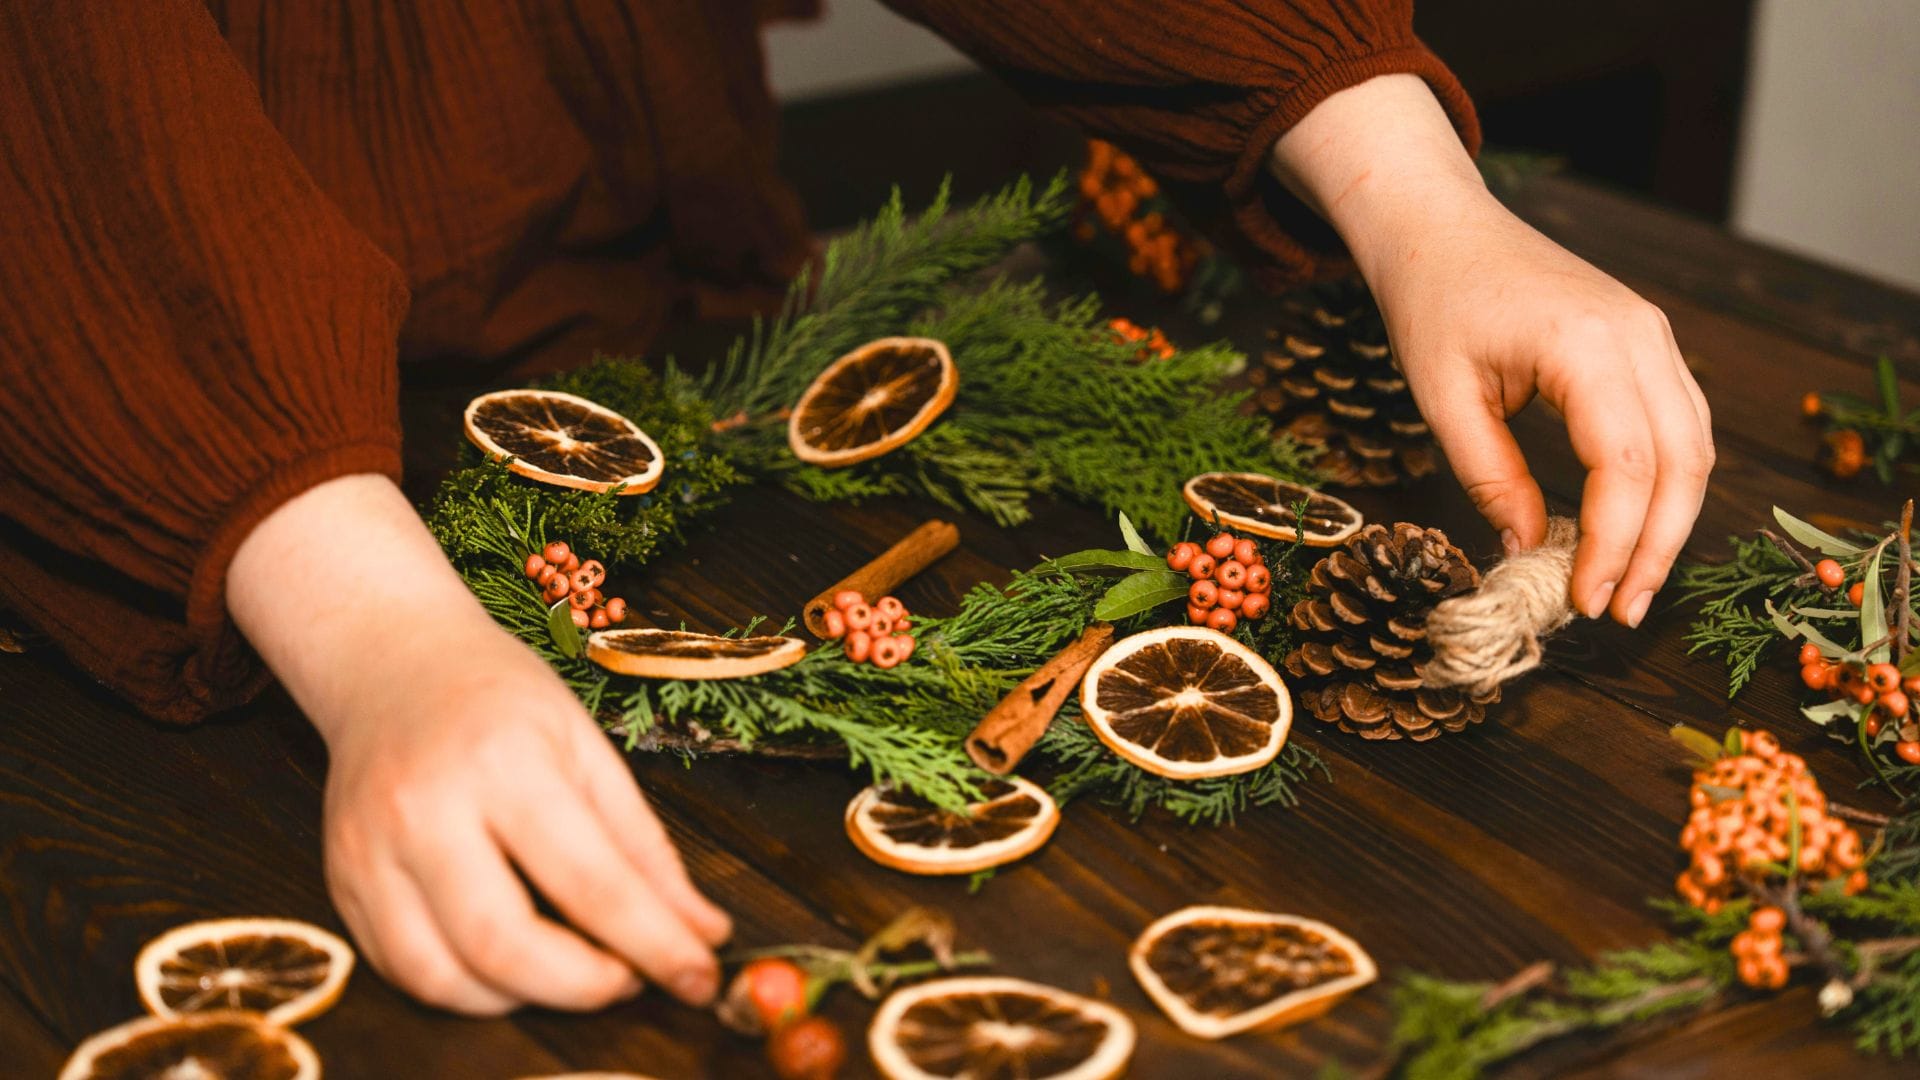
5. Natural Evergreen Wreath: Classic Beauty From Your Backyard
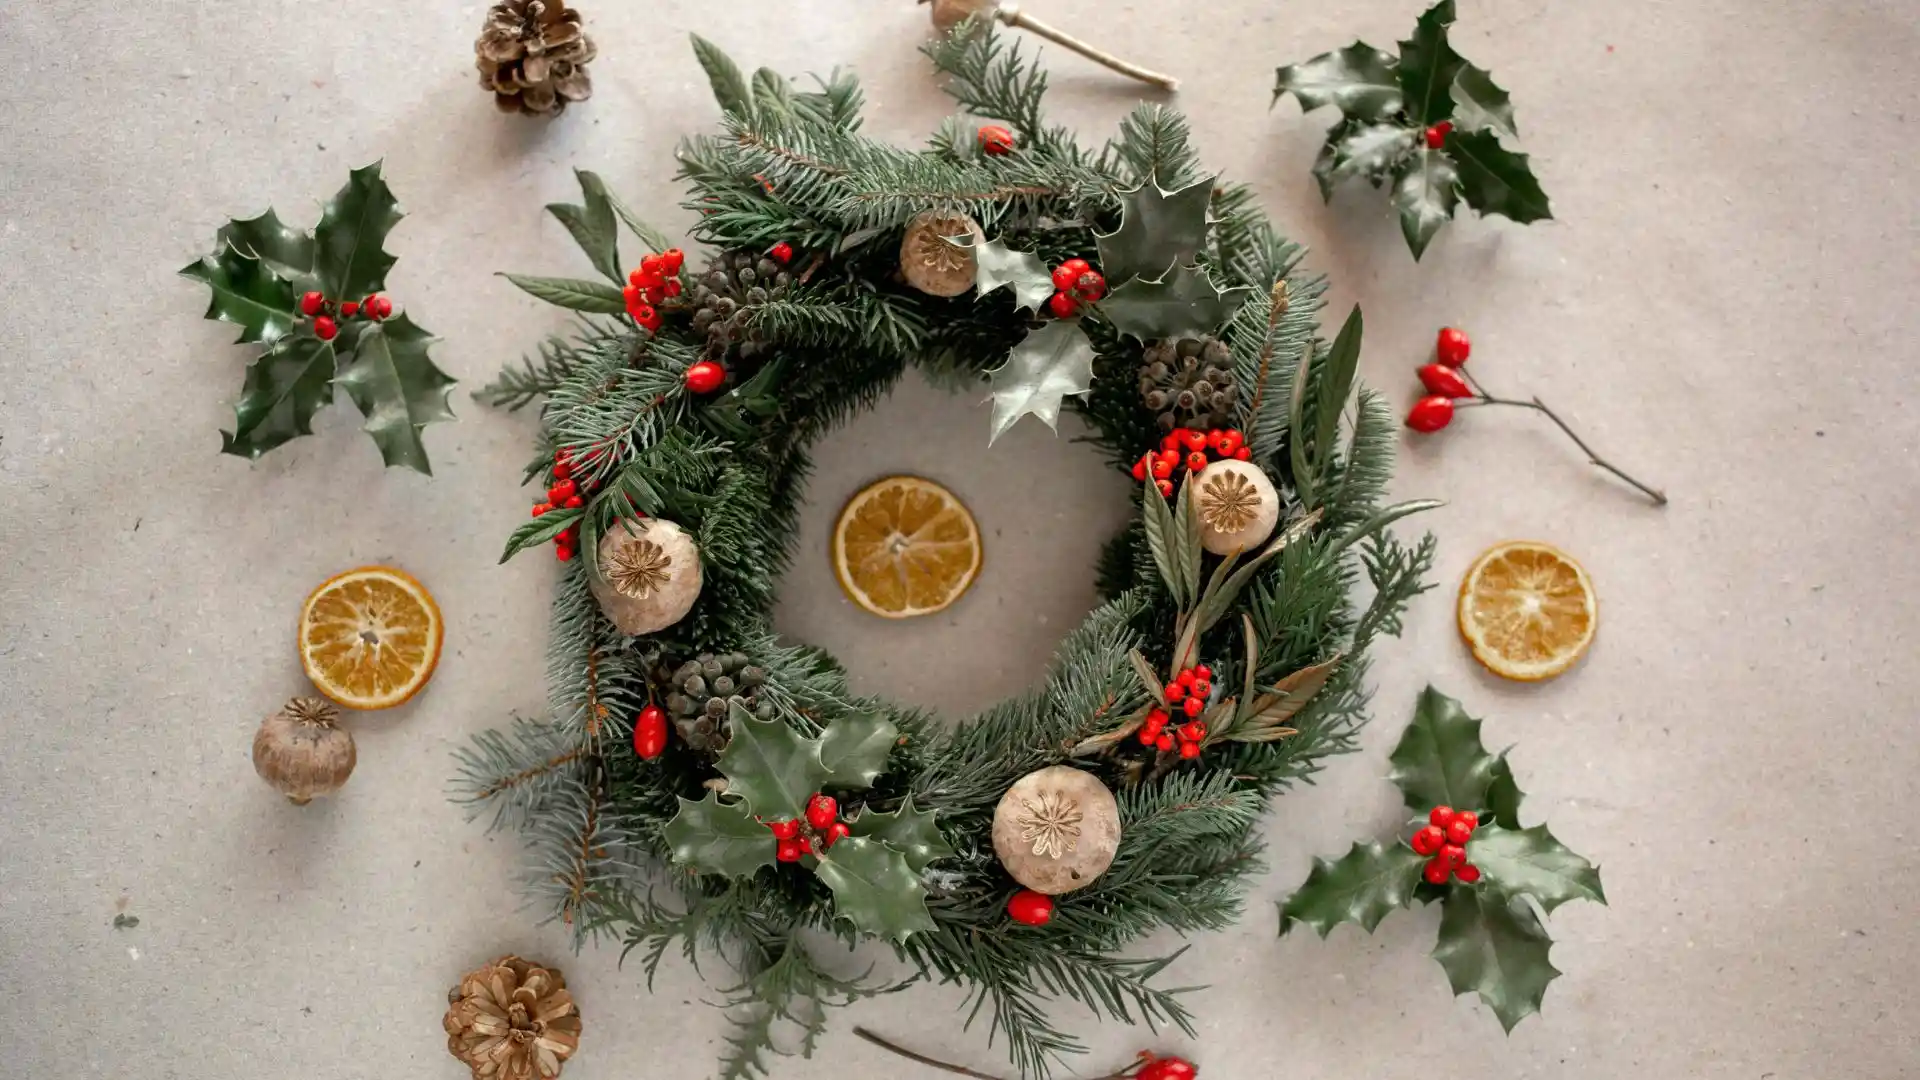
What You’ll Need
- Wire wreath frame (or make one from a wire coat hanger)
- Fresh evergreen branches (pine, cedar, fir, or eucalyptus)
- Floral wire or thin gauge wire
- Pruning shears
- Natural decorations like pinecones, dried orange slices, or cinnamon sticks
How to Make It
Cut your evergreen branches into six to eight-inch pieces. You’ll need quite a few, so gather plenty.
Take small bundles of three to four branches. Attach them to your wire frame using floral wire. Wrap the wire around several times to secure them.
Continue adding bundles, overlapping each new bunch over the stems of the previous one. Work your way around the entire wreath.
Once you’ve covered the frame, add your natural decorations. Wire on some pinecones, tuck in dried citrus slices, or tie on cinnamon sticks with twine.
Hang your wreath on your front door, over your mantel, or on a wall. The fresh evergreen scent welcomes everyone who enters your home.
Small Space Tip: Make a mini wreath for your apartment door or use it as a table centerpiece with a candle in the middle.
6. Beeswax Candles With Dried Flowers: Sustainable Ambiance

What You’ll Need
- Beeswax pellets or blocks
- Cotton candle wicks
- Glass jars or vessels (upcycled)
- Double boiler or makeshift one (metal bowl over a pot)
- Dried flowers or herbs
- Wooden skewers or clothespins
How to Make It
First, prepare your containers. Place a wick in the center of each jar. You can secure it by tying it to a wooden skewer laid across the jar opening, or use a clothespin.
Melt your beeswax in a double boiler. Keep the temperature low and steady. Beeswax melts at around 145°F (63°C).
While the wax melts, arrange a few dried flowers on the inside walls of your jar. You’ll press them there with the first layer of wax.
Pour a thin layer of melted beeswax into your jar. Quickly press your dried flowers against the glass before it sets. This creates a beautiful pressed flower effect.
Once that layer hardens slightly, fill the jar with the remaining wax. Leave about half an inch at the top.
Let your candles cool and harden completely. This takes several hours. Trim the wick to about a quarter inch.
These candles burn clean, smell naturally sweet, and look absolutely stunning when lit. The flowers create gorgeous silhouettes through the glowing wax.
Budget Tip: Buy beeswax in bulk from local beekeepers or farmers markets. It’s often cheaper than craft stores and supports local businesses.
Tips for Making Your Sustainable Decor Look Expensive
Here’s the secret to making DIY projects look professional:
Keep your color palette simple. Choose two to three colors and stick with them throughout your decorations. Natural tones like cream, brown, and forest green always look elegant.
Pay attention to placement. Even beautiful decorations can look cluttered if you use too many. Edit your displays. Less is often more.
Use quality natural materials. Real evergreen branches will always look better than fake ones. Natural wood, cotton ribbon, and beeswax have a richness that plastic can’t match.
Finish your projects properly. Trim loose threads, wipe away glue residue, and take time with the final details. These small touches make a big difference.
Frequently Asked Questions
How long do natural decorations last?
Fresh evergreen wreaths and garlands typically last three to four weeks indoors. Dried citrus, pinecones, and fabric decorations can be stored and reused for many years if kept dry.
Where can I find free natural materials for these projects?
Take walks in local parks or wooded areas to collect pinecones, branches, and interesting twigs. Just make sure collecting is allowed in your area. You can also check with local tree farms, as they often have trimmings available.
Are these projects kid-friendly?
Most of these projects work great for kids with supervision. The citrus garland, pinecone centerpiece, and mason jar snow globes are especially fun for children. Just be careful with hot glue guns and sharp tools.
Can I make these projects if I’m not crafty?
Absolutely. These projects are designed to be simple and forgiving. Start with the easiest one, like the pinecone centerpiece, and build your confidence from there.
How much money will I save making sustainable decorations?
You can save 50-75% compared to buying new decorations each year. Many materials are free or very low cost, and you can reuse items you already own.
What if my decorations don’t turn out perfect?
Embrace the imperfections. Handmade items have character and charm precisely because they’re not factory-perfect. Your guests will appreciate the thought and effort you put into creating something unique.
Make This Your Greenest Holiday Yet
Sustainable Christmas decorating isn’t about sacrifice. It’s about creativity, intention, and making choices that feel good for both your home and the planet.
These six projects prove that eco-friendly decor can be absolutely beautiful. They bring natural textures, wonderful scents, and a handmade warmth that plastic decorations simply can’t match. Plus, you’ll feel proud every time someone compliments your decorations and you can say, “Thanks, I made it myself.”
This holiday season, challenge yourself to try at least one of these projects. Start small if you need to. Make one citrus garland or one mason jar snow globe. See how it feels. I think you’ll be surprised at how much you enjoy the process and the results.
Your home will look stunning, you’ll save money, and you’ll be part of the solution to holiday waste. That’s the kind of Christmas spirit that truly lasts.
Now it’s your turn. Which project will you try first? Gather your materials this weekend and get started. Your sustainable, beautiful holiday home is waiting to be created. Share your creations with friends and family, and maybe inspire them to go green this holiday season too.
Happy crafting, and here’s to a gorgeous, guilt-free Christmas!